DIY Gilded Easter Eggs

As many of you know, the LMP team loves incorporating metallics into our party decor. Time and time again, I turn to using gold leaf for our DIY projects because it adds the perfect amount of shine.
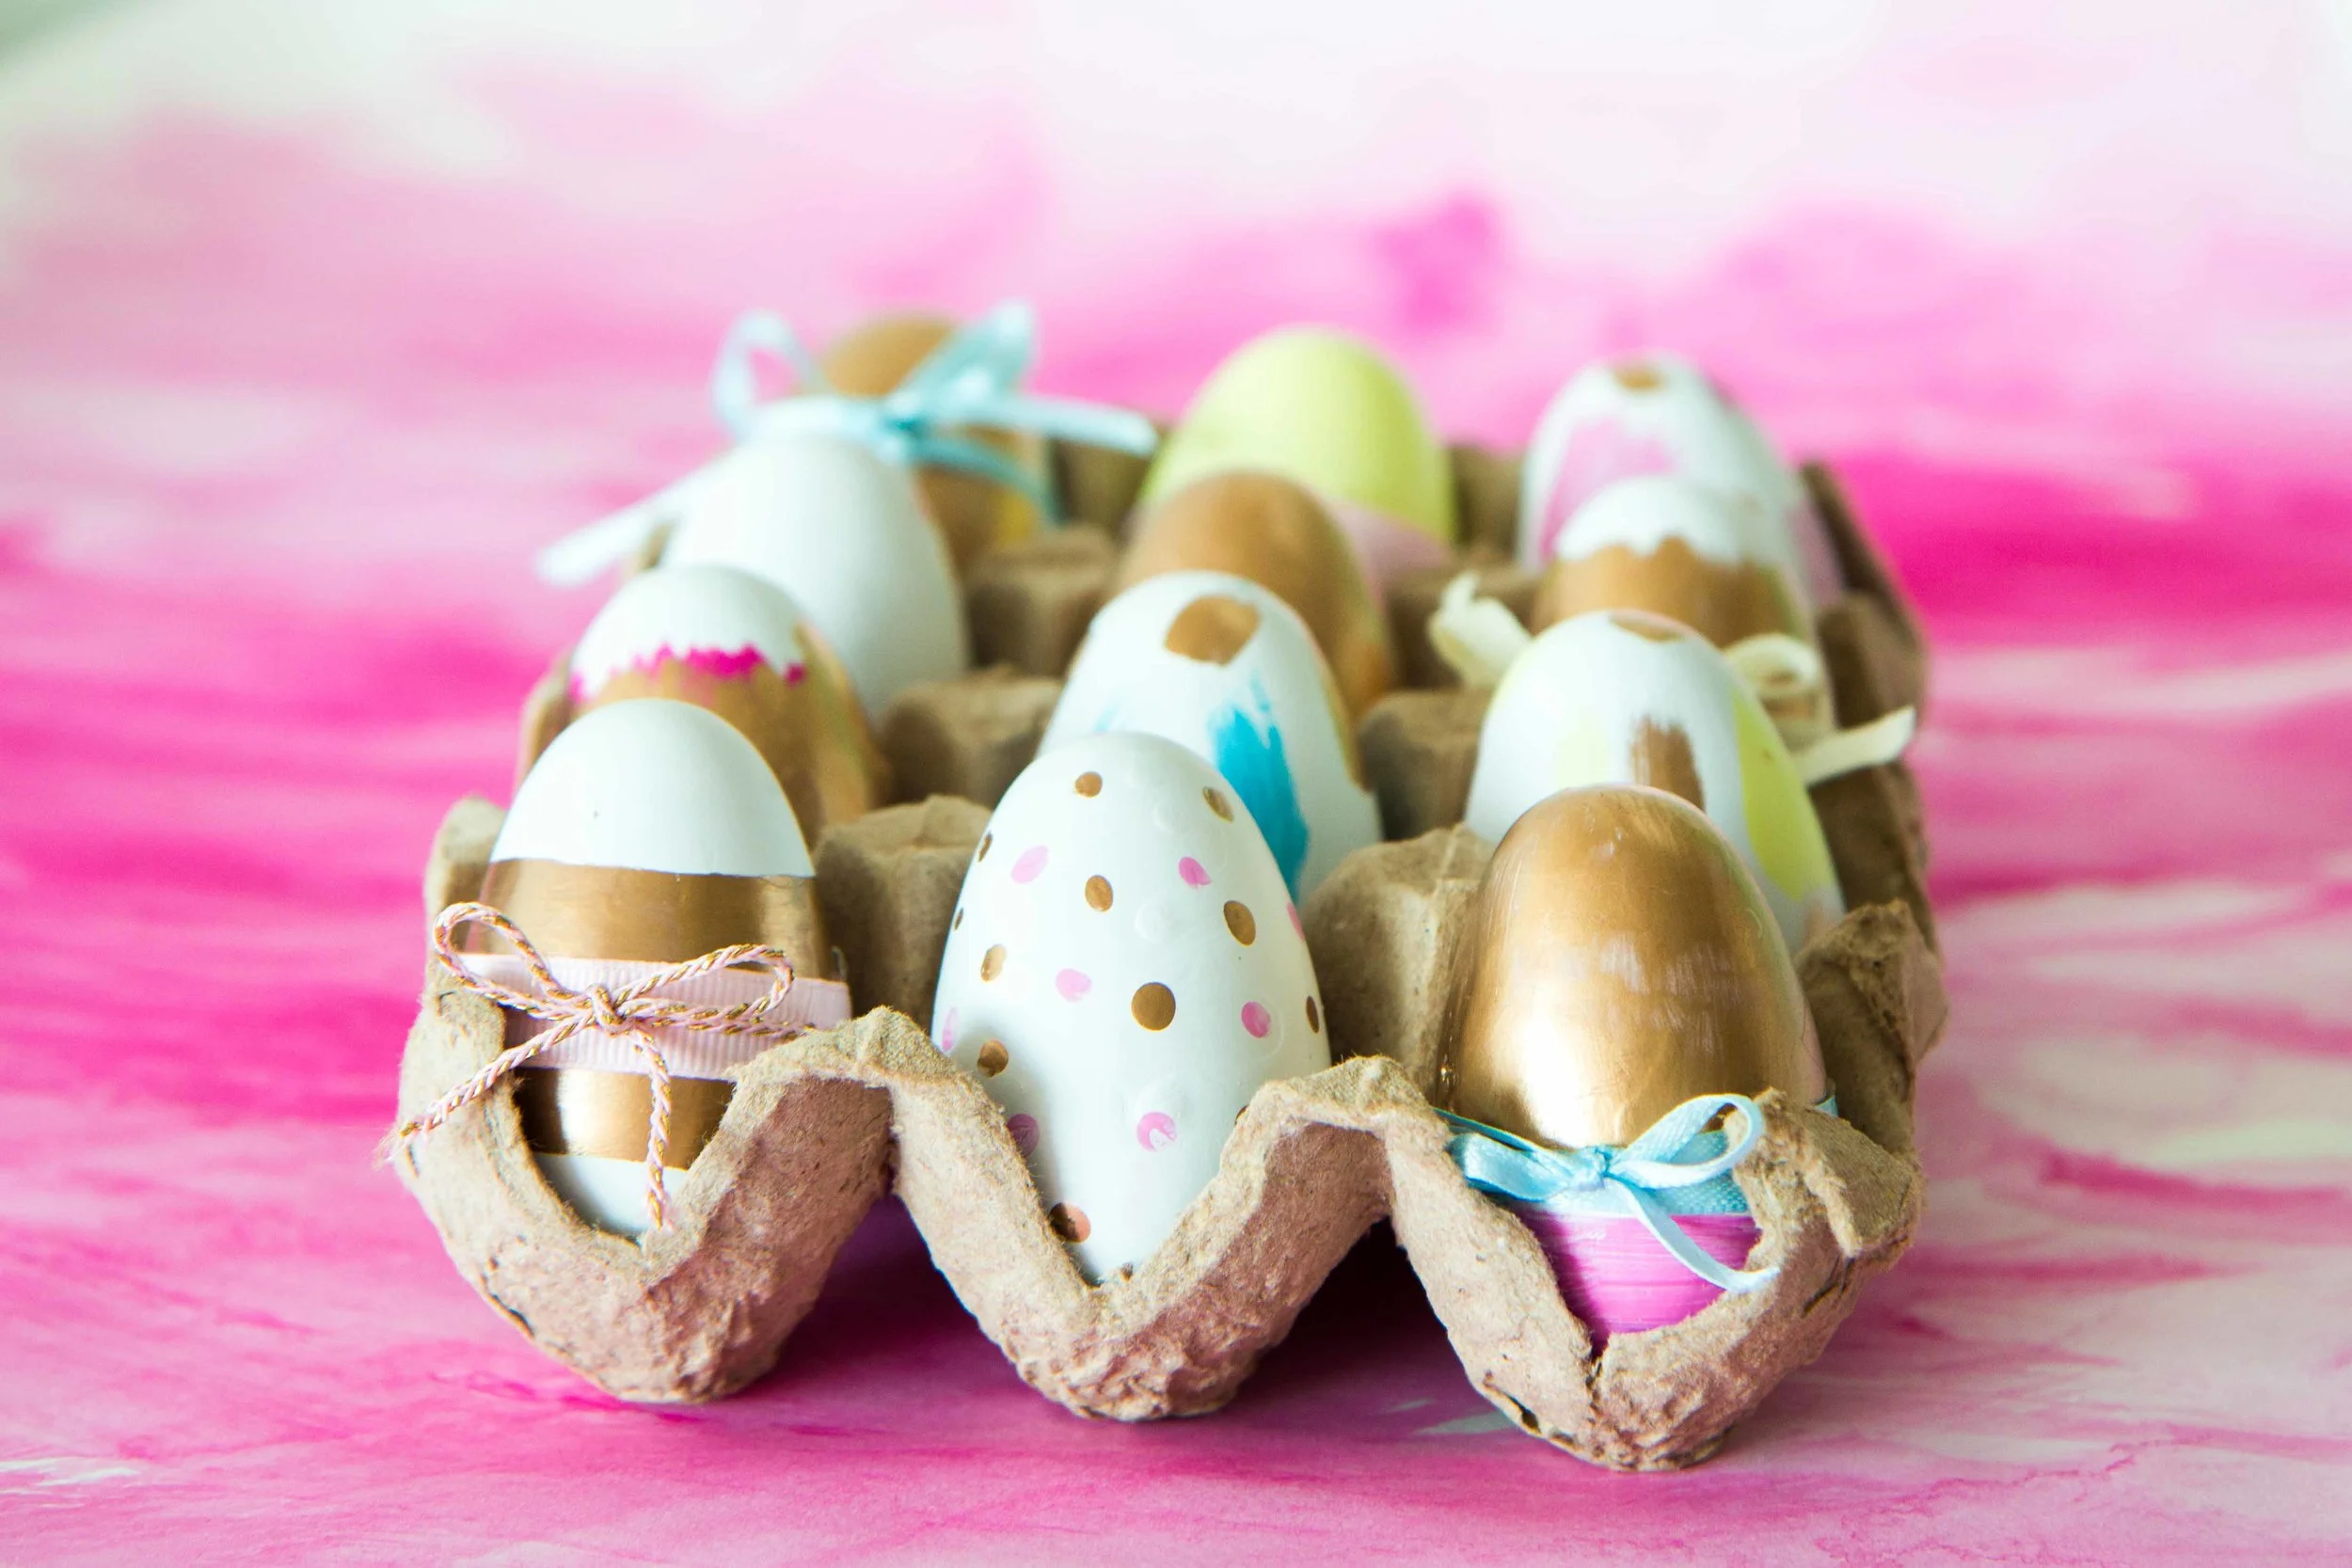
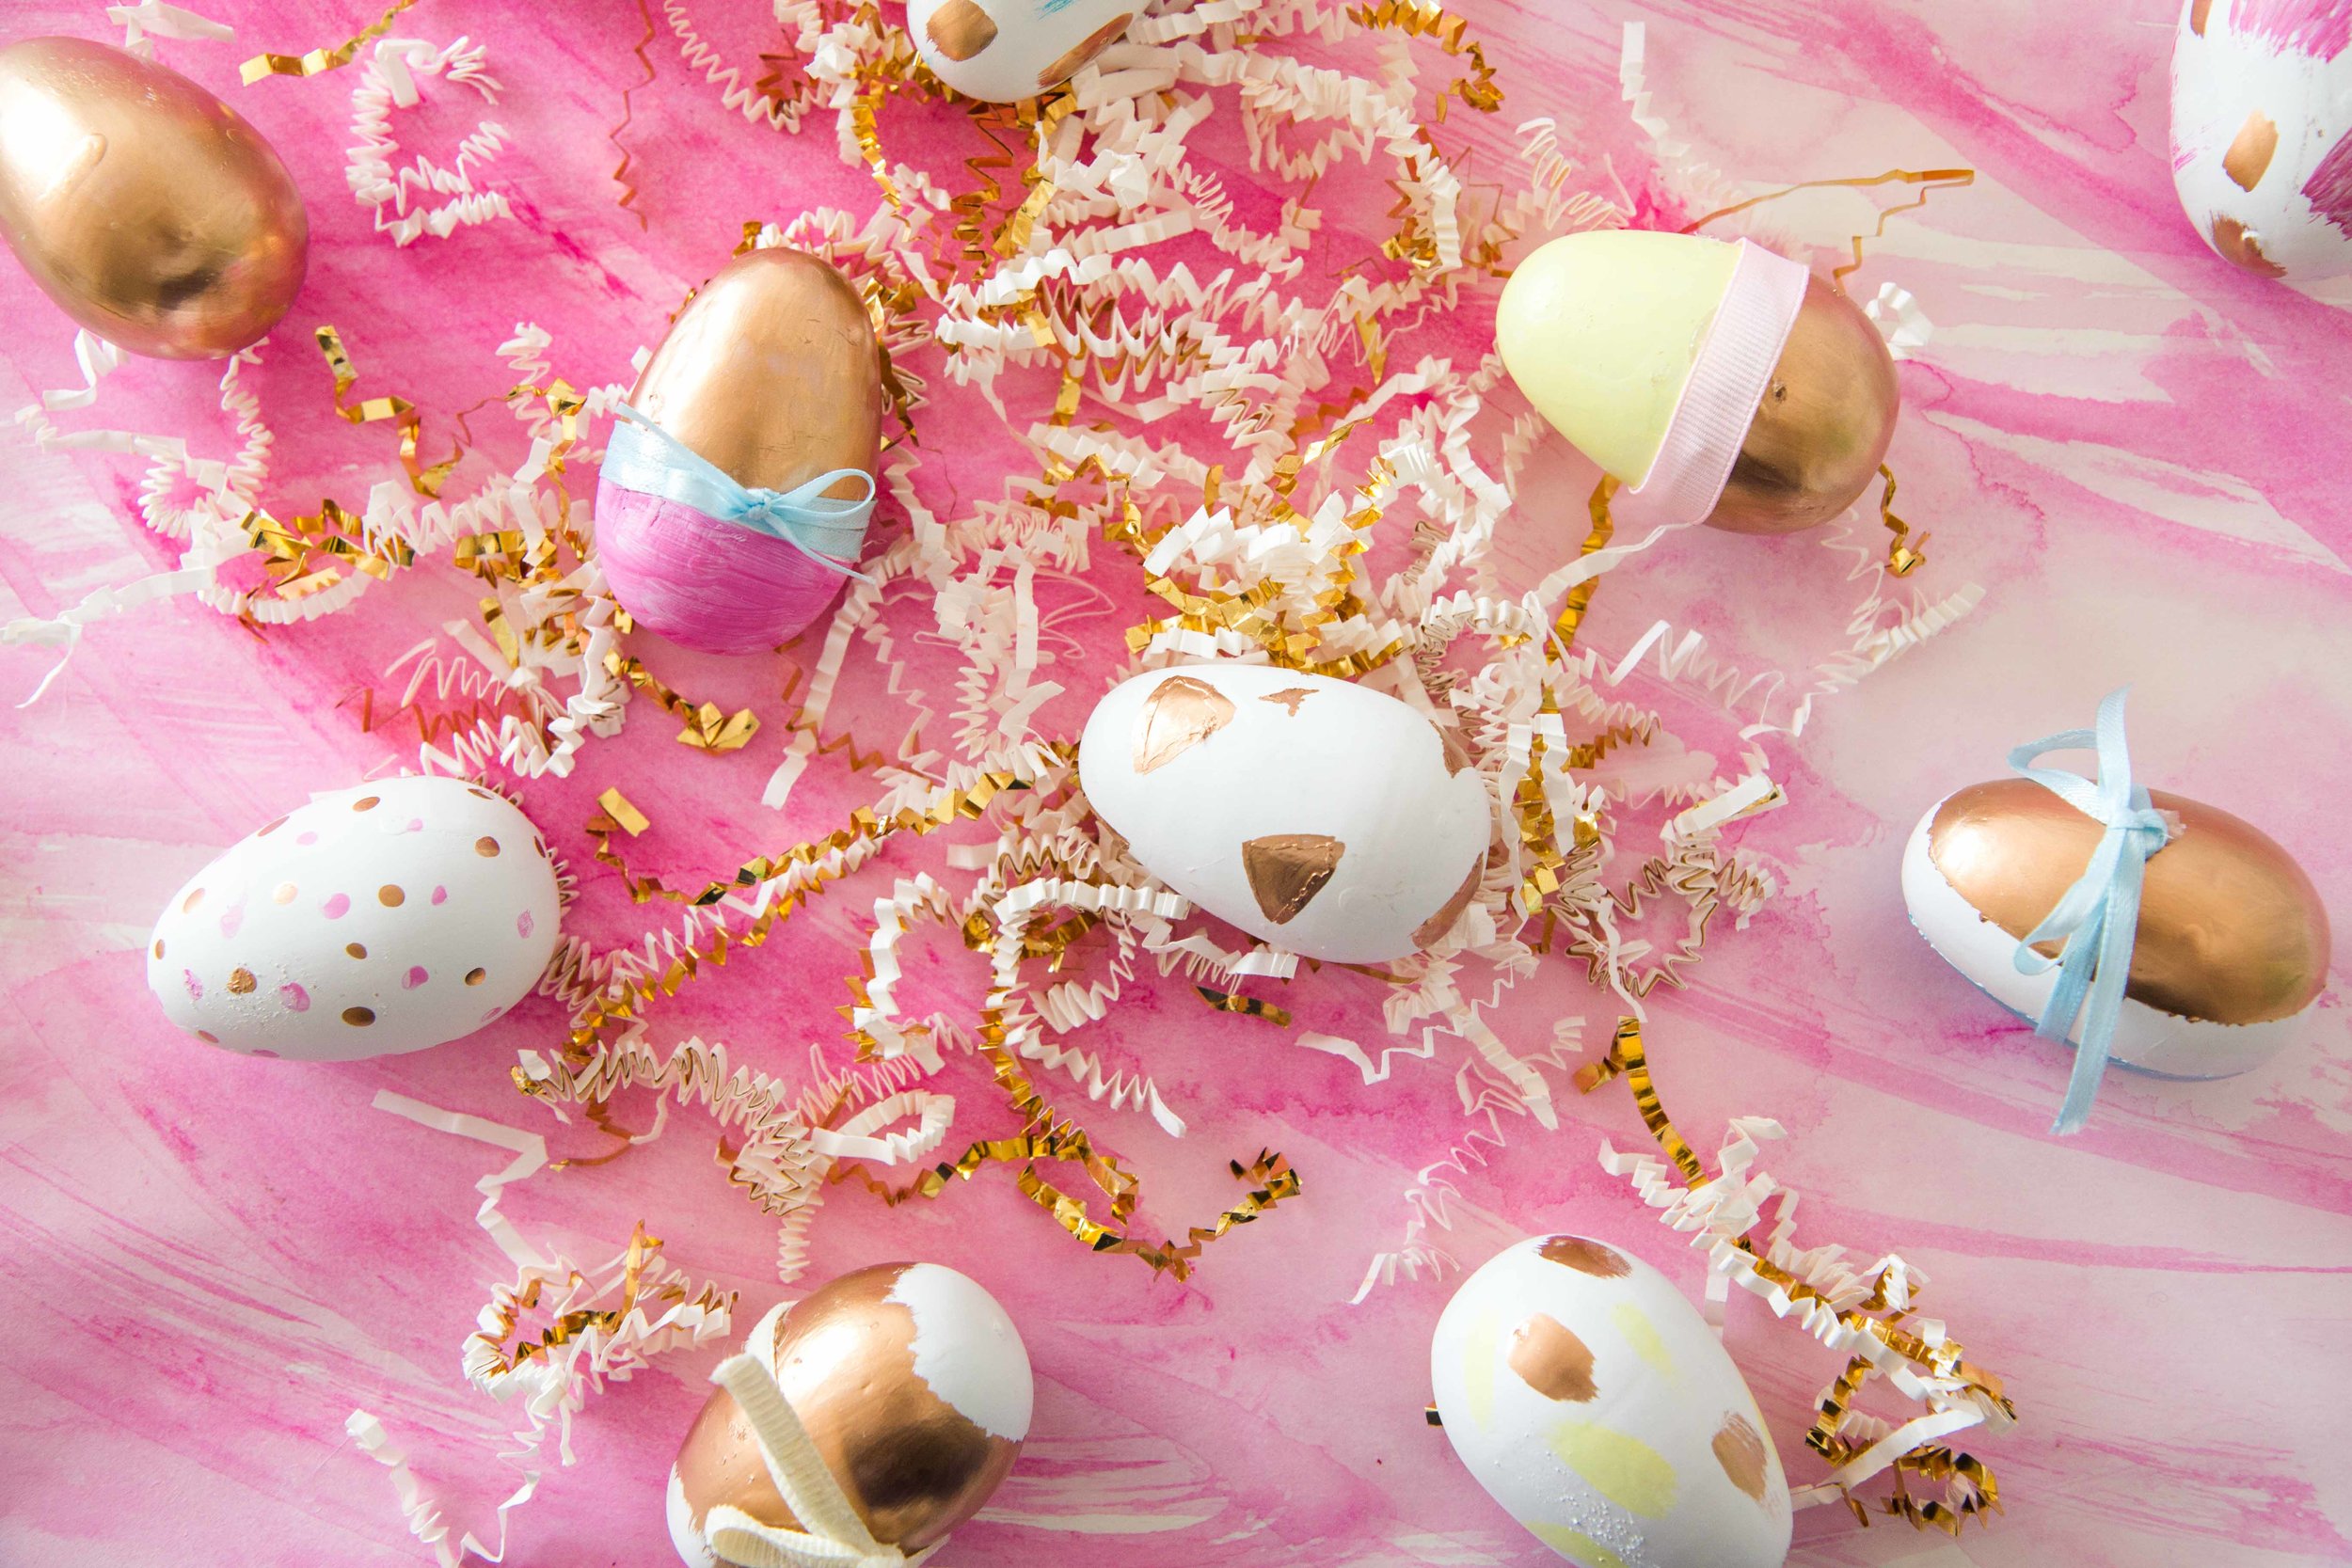
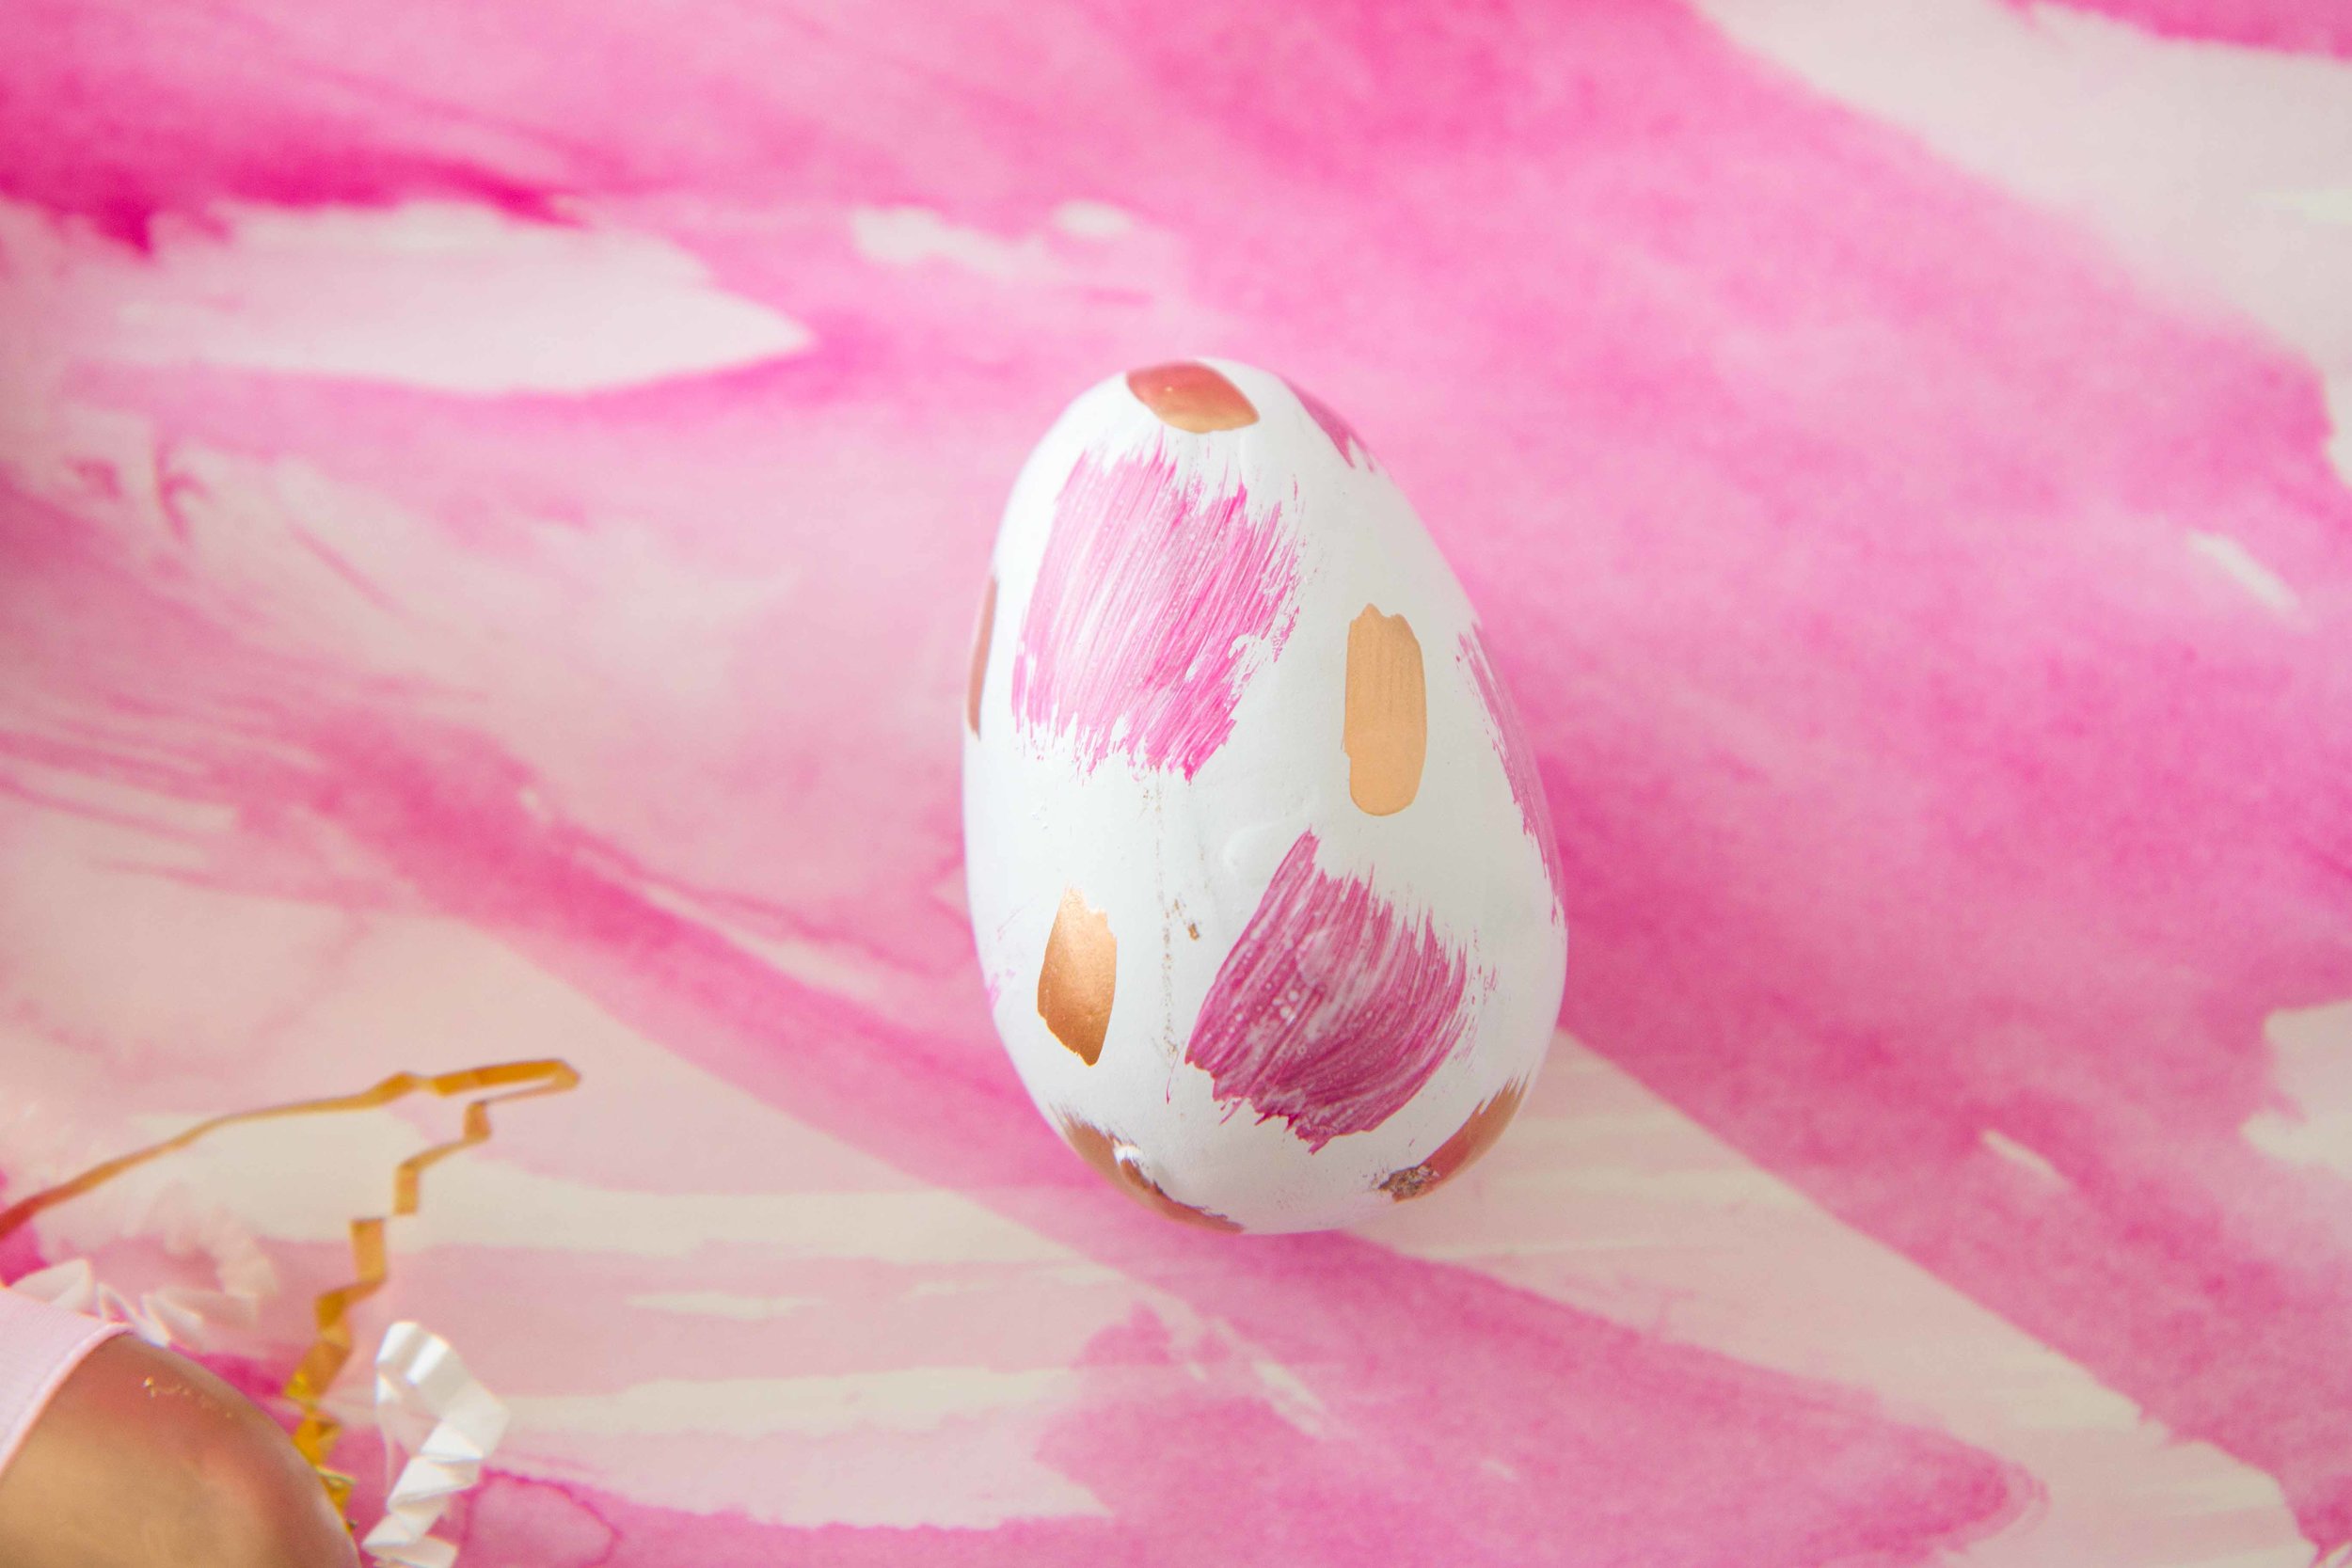
For Easter this year, we planned a brunch with some of Seri's friends and thought it would be perfect to add gilded eggs to our table decor. The fun thing about these eggs is that they don't need to all match. There's really no limit to the number of fun patterns colors, or materials you can use to decorate them. We suggest sticking with the same general color scheme so they look good together, but overall, they can all be completely unique and still look beautiful as a set!
You will need:
- wooden eggs
- white spray paint
- acrylic paints
- ribbon
- hot glue
- paint brushes
- painter's tape
- liquid gold leaf

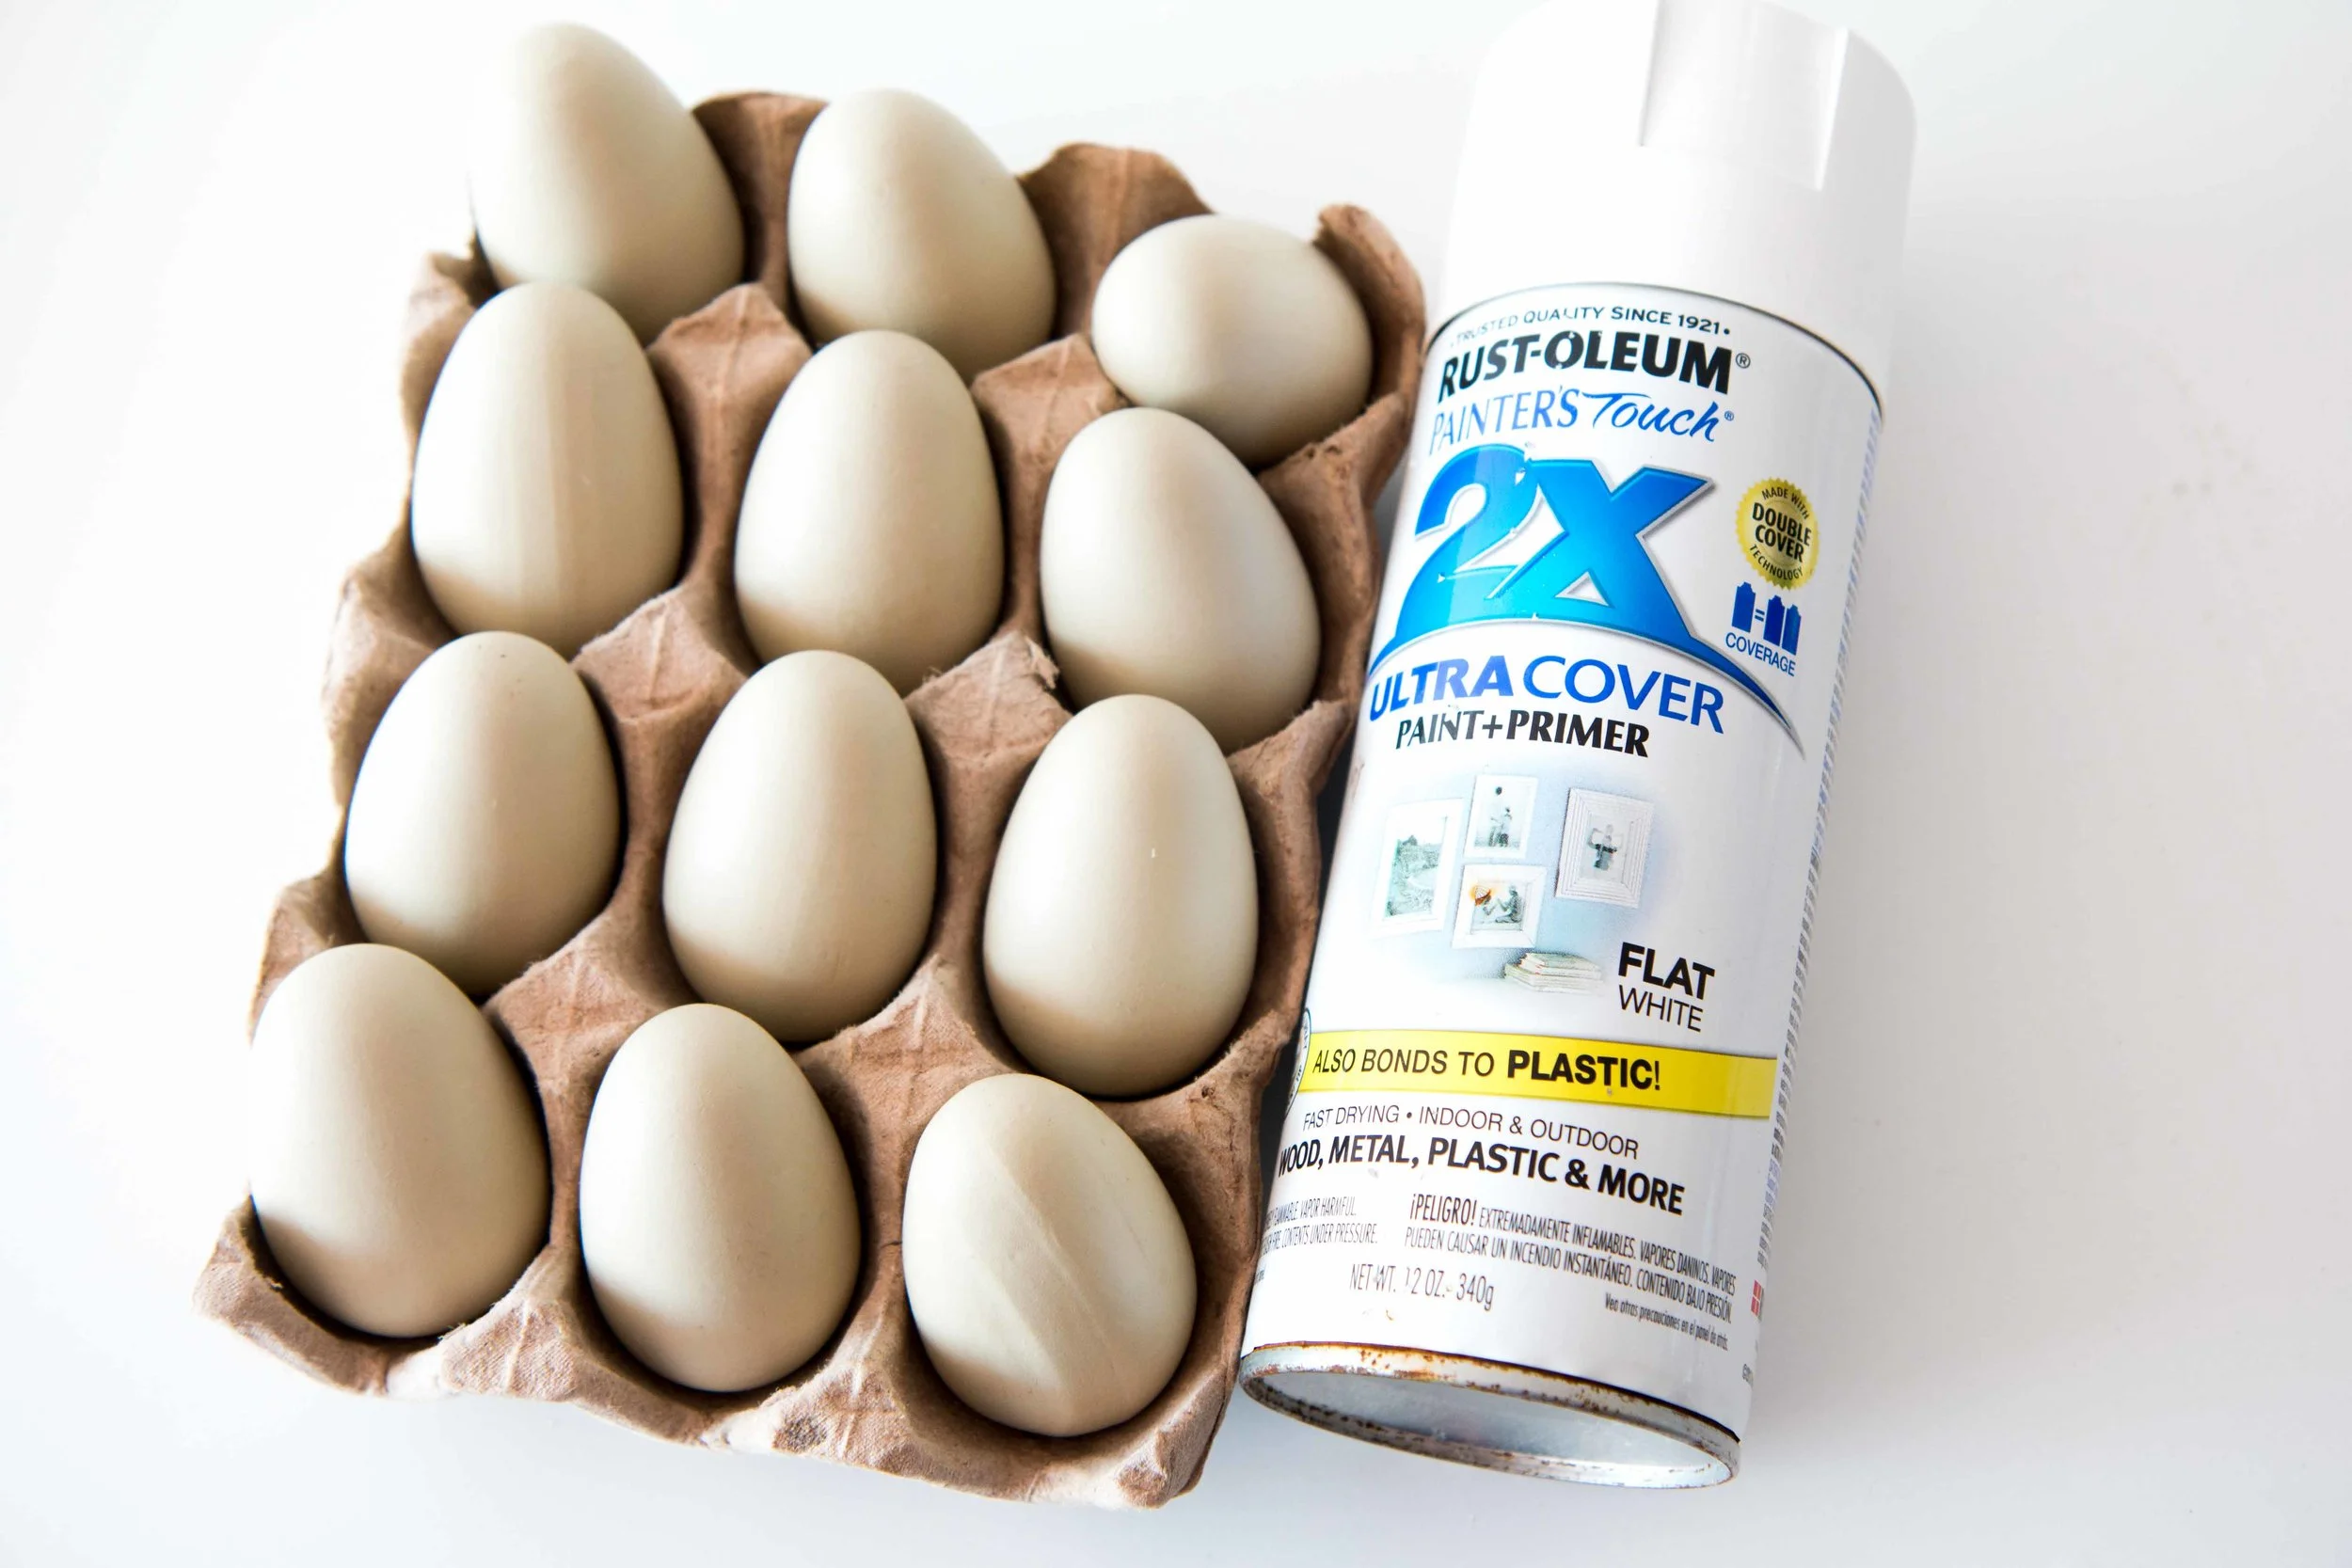
Step 1: Spray your eggs white to create an even base coat.

Step 2: Use painters tape to create stripes or shapes.
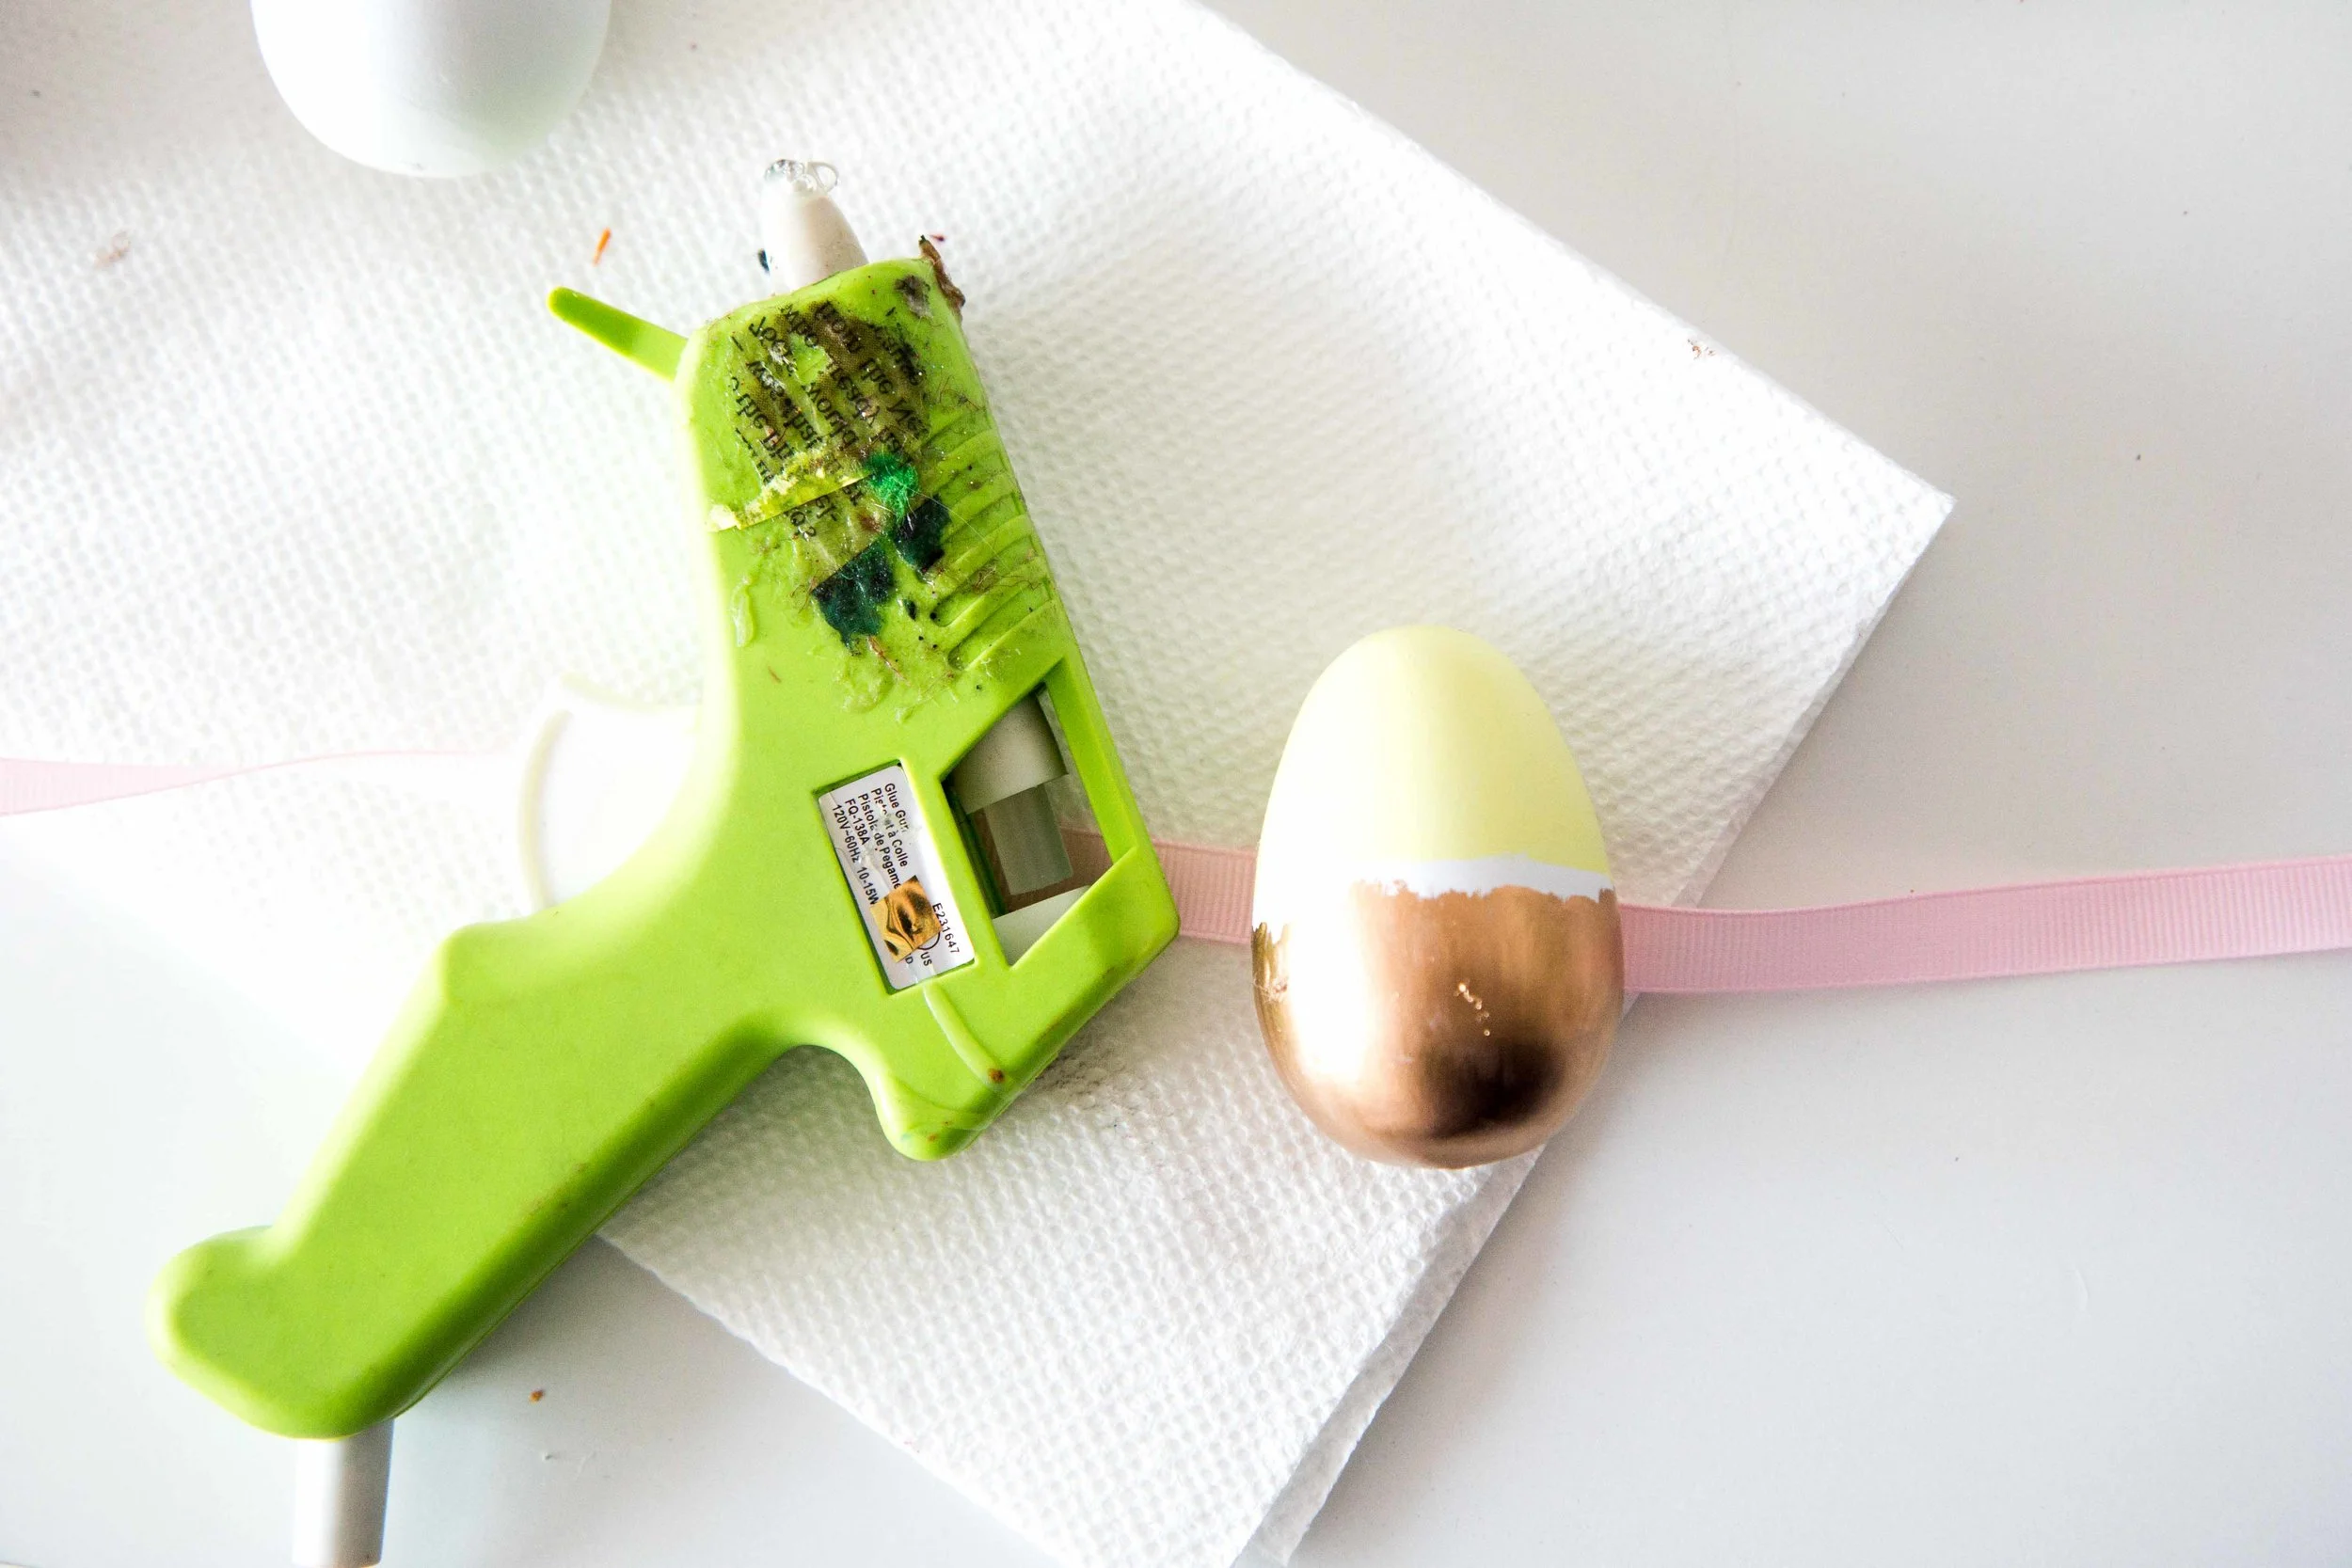
Step 3: Use hot glue to add any fun elements, like ribbon!
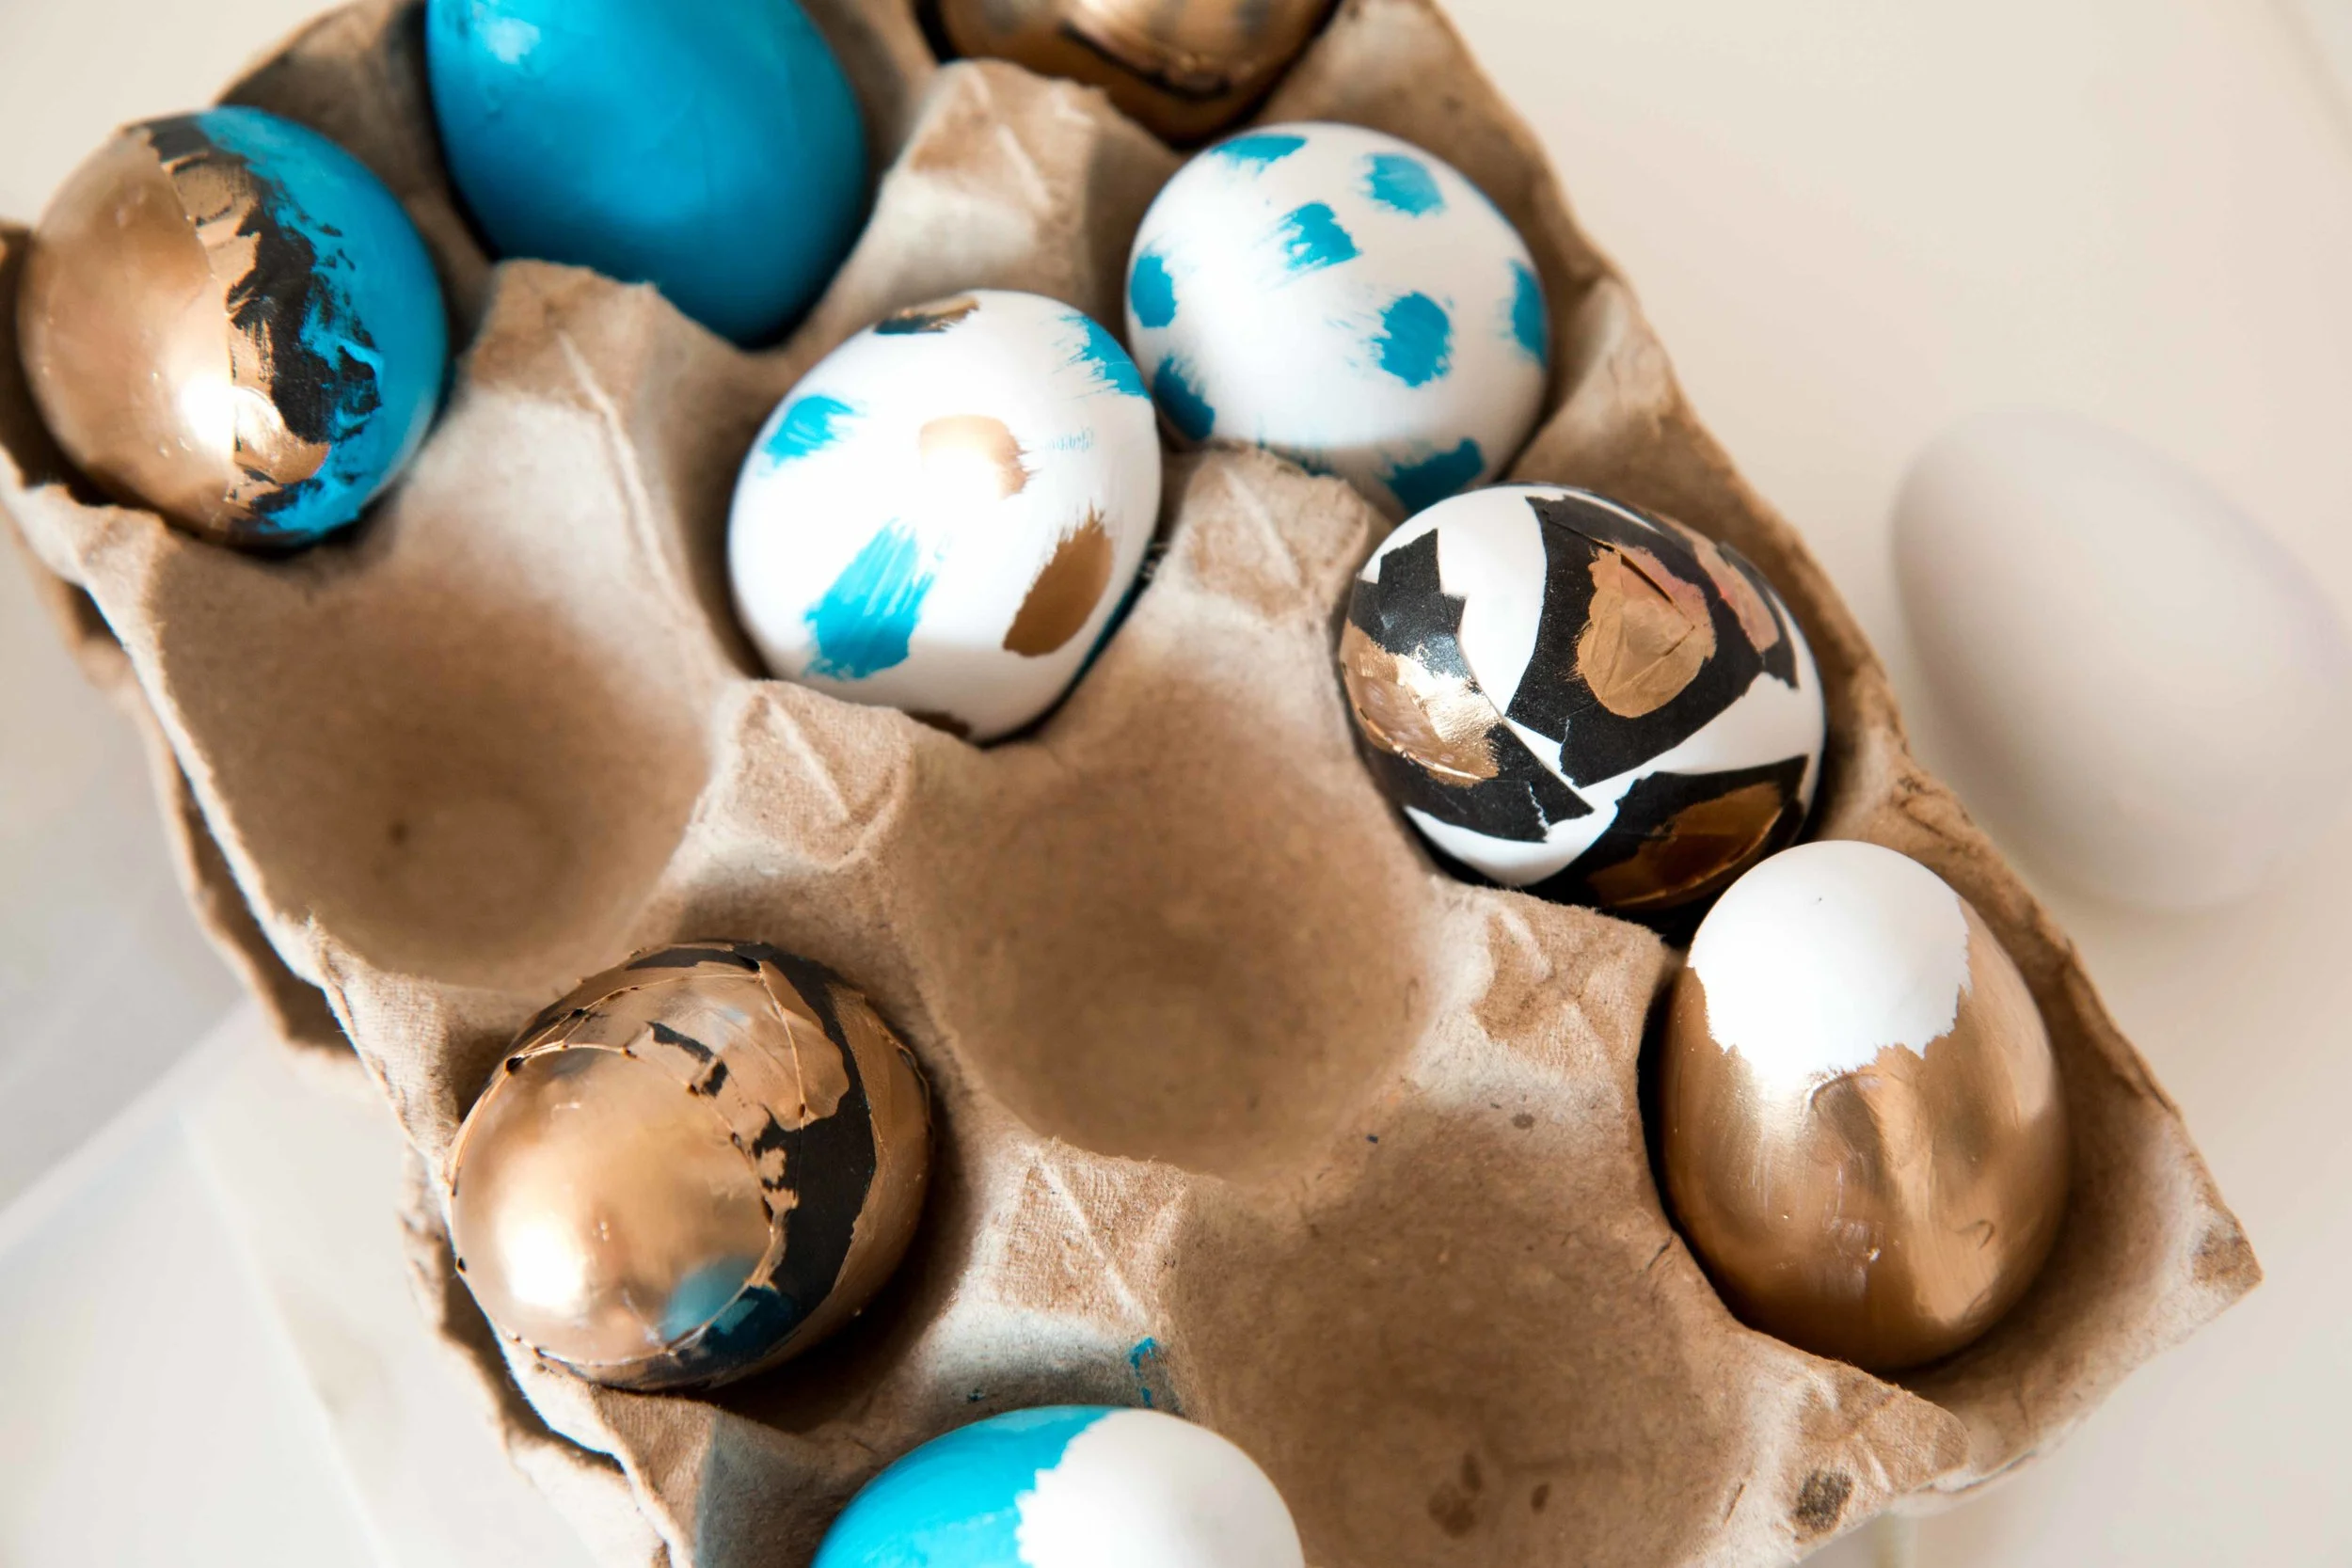
Step 4: Use your paint brushes to add gold leaf and acrylic paint to the eggs in any way you would like- covering the egg, small strokes, or large blocks of color.
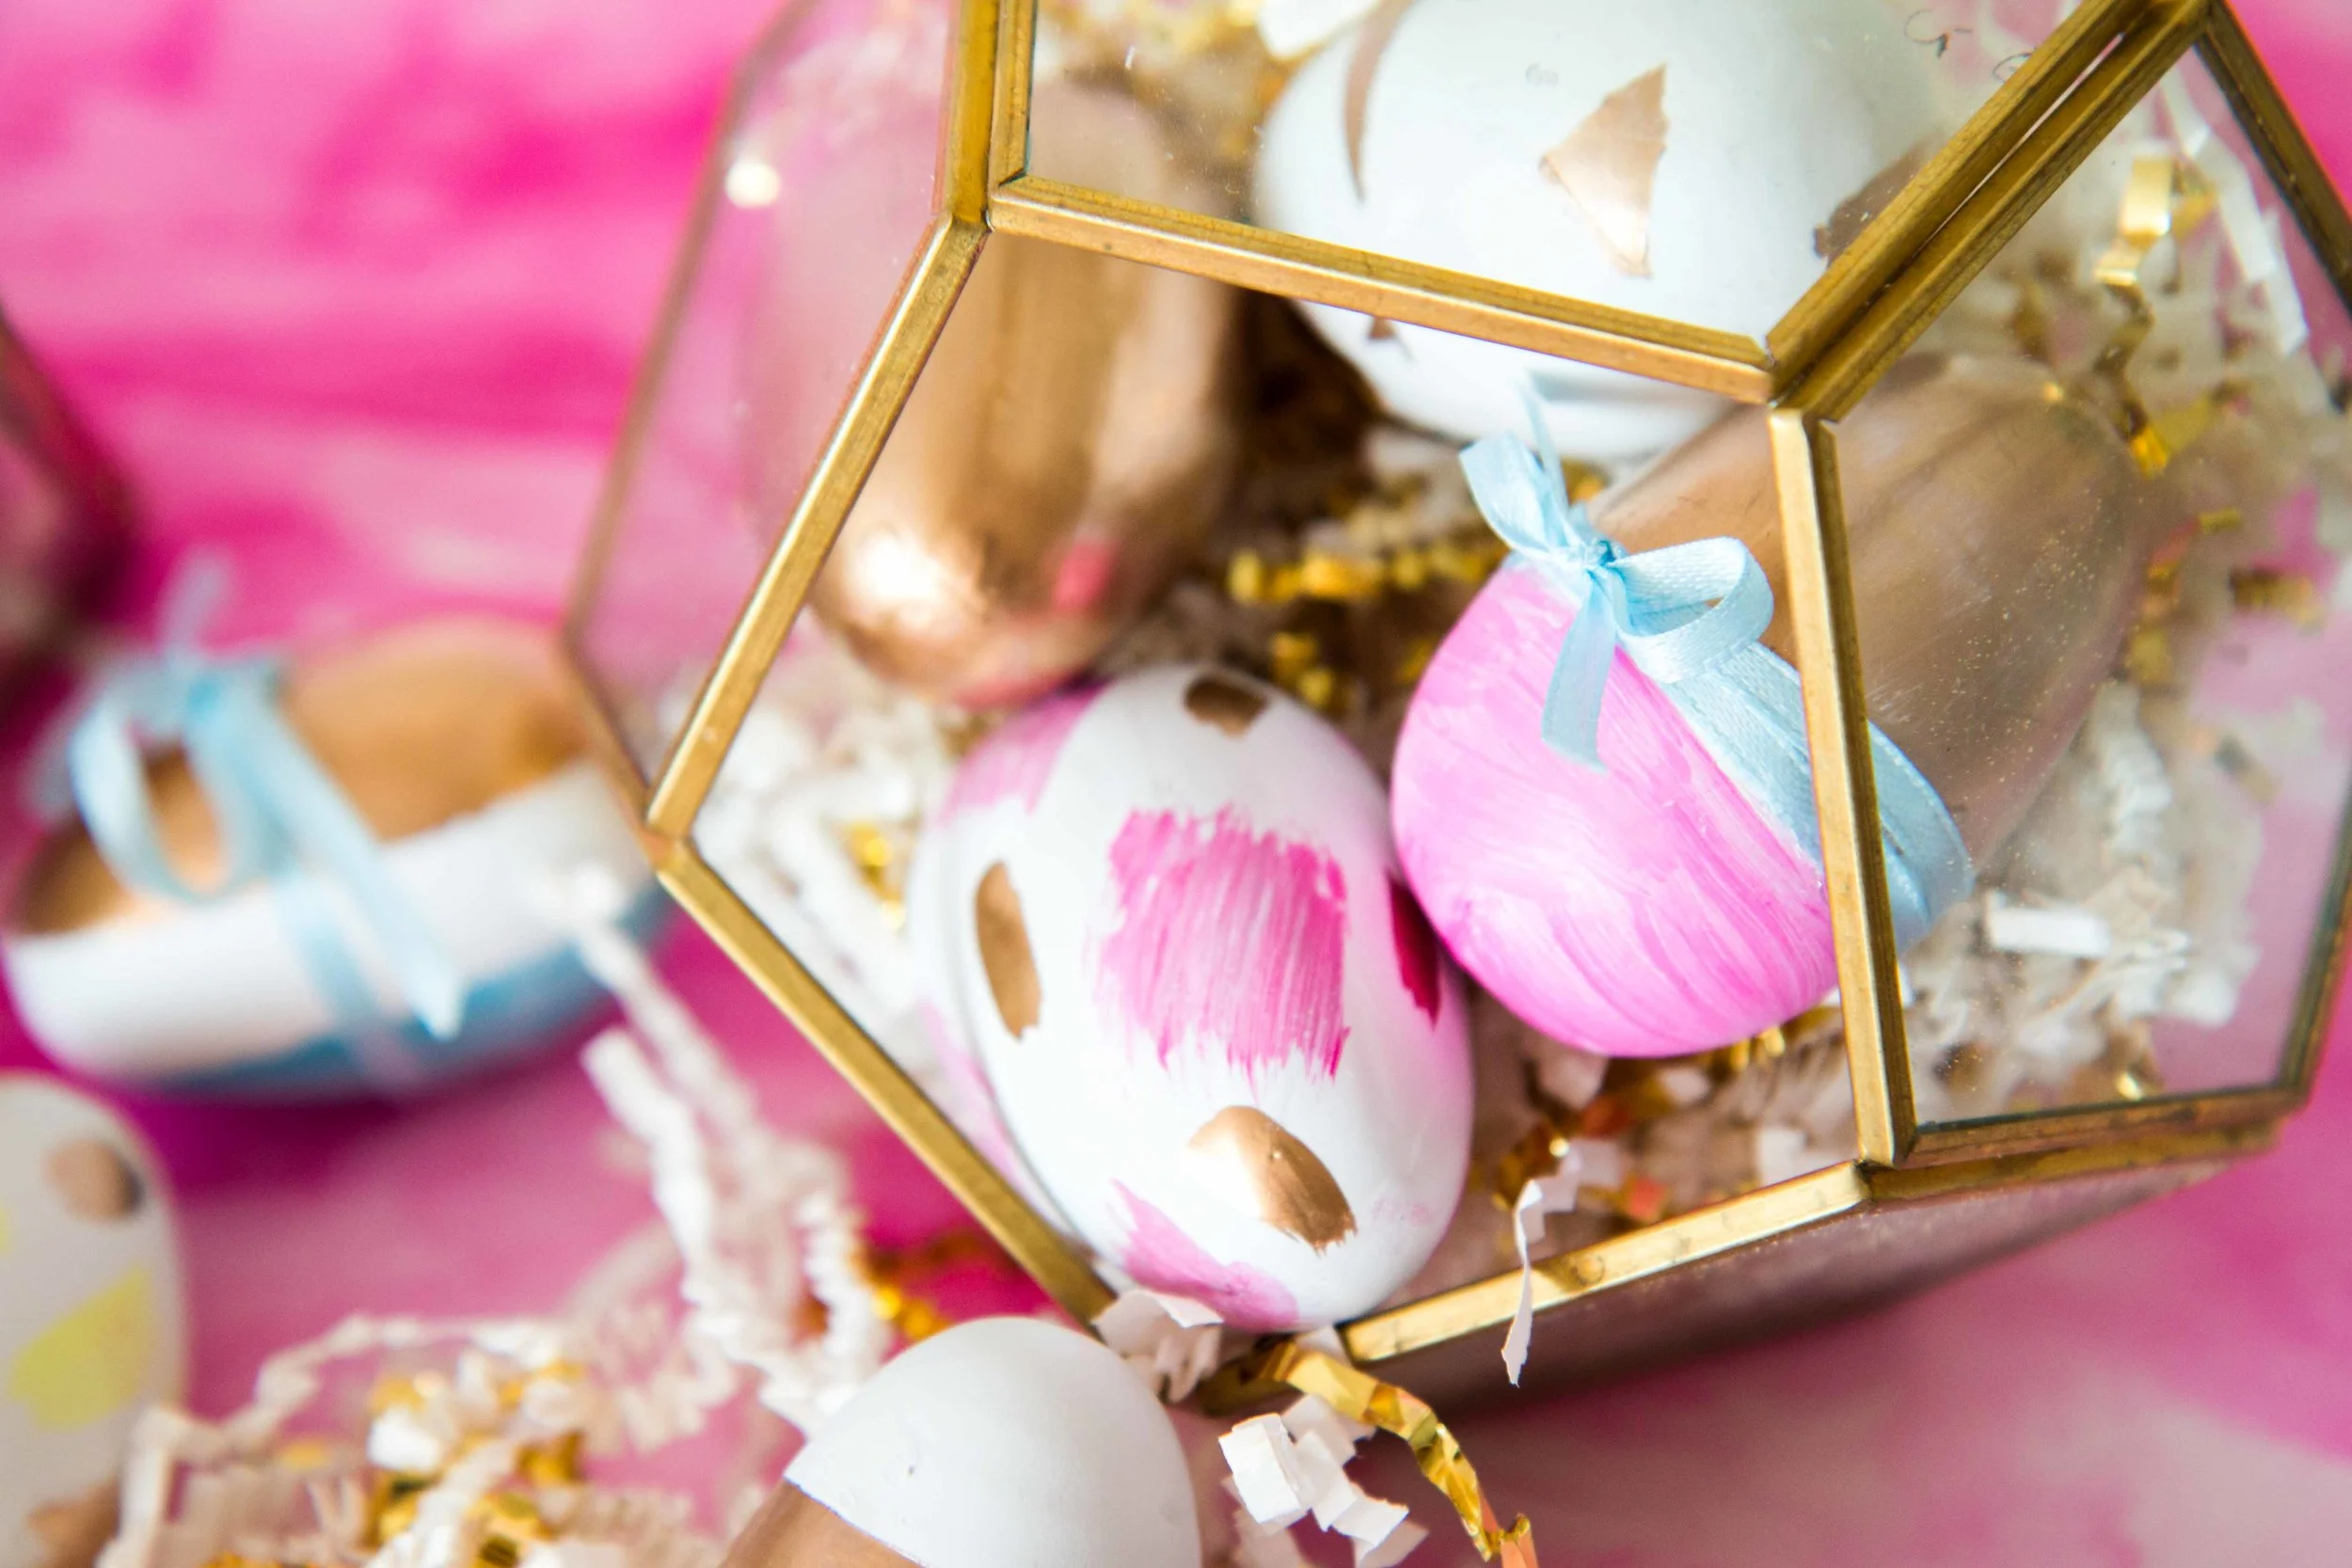
Step 5: Style them with your favorite bowl and add them to your table!

Happy Easter!
xo
Maggie