
The rosh hashana Hope tree
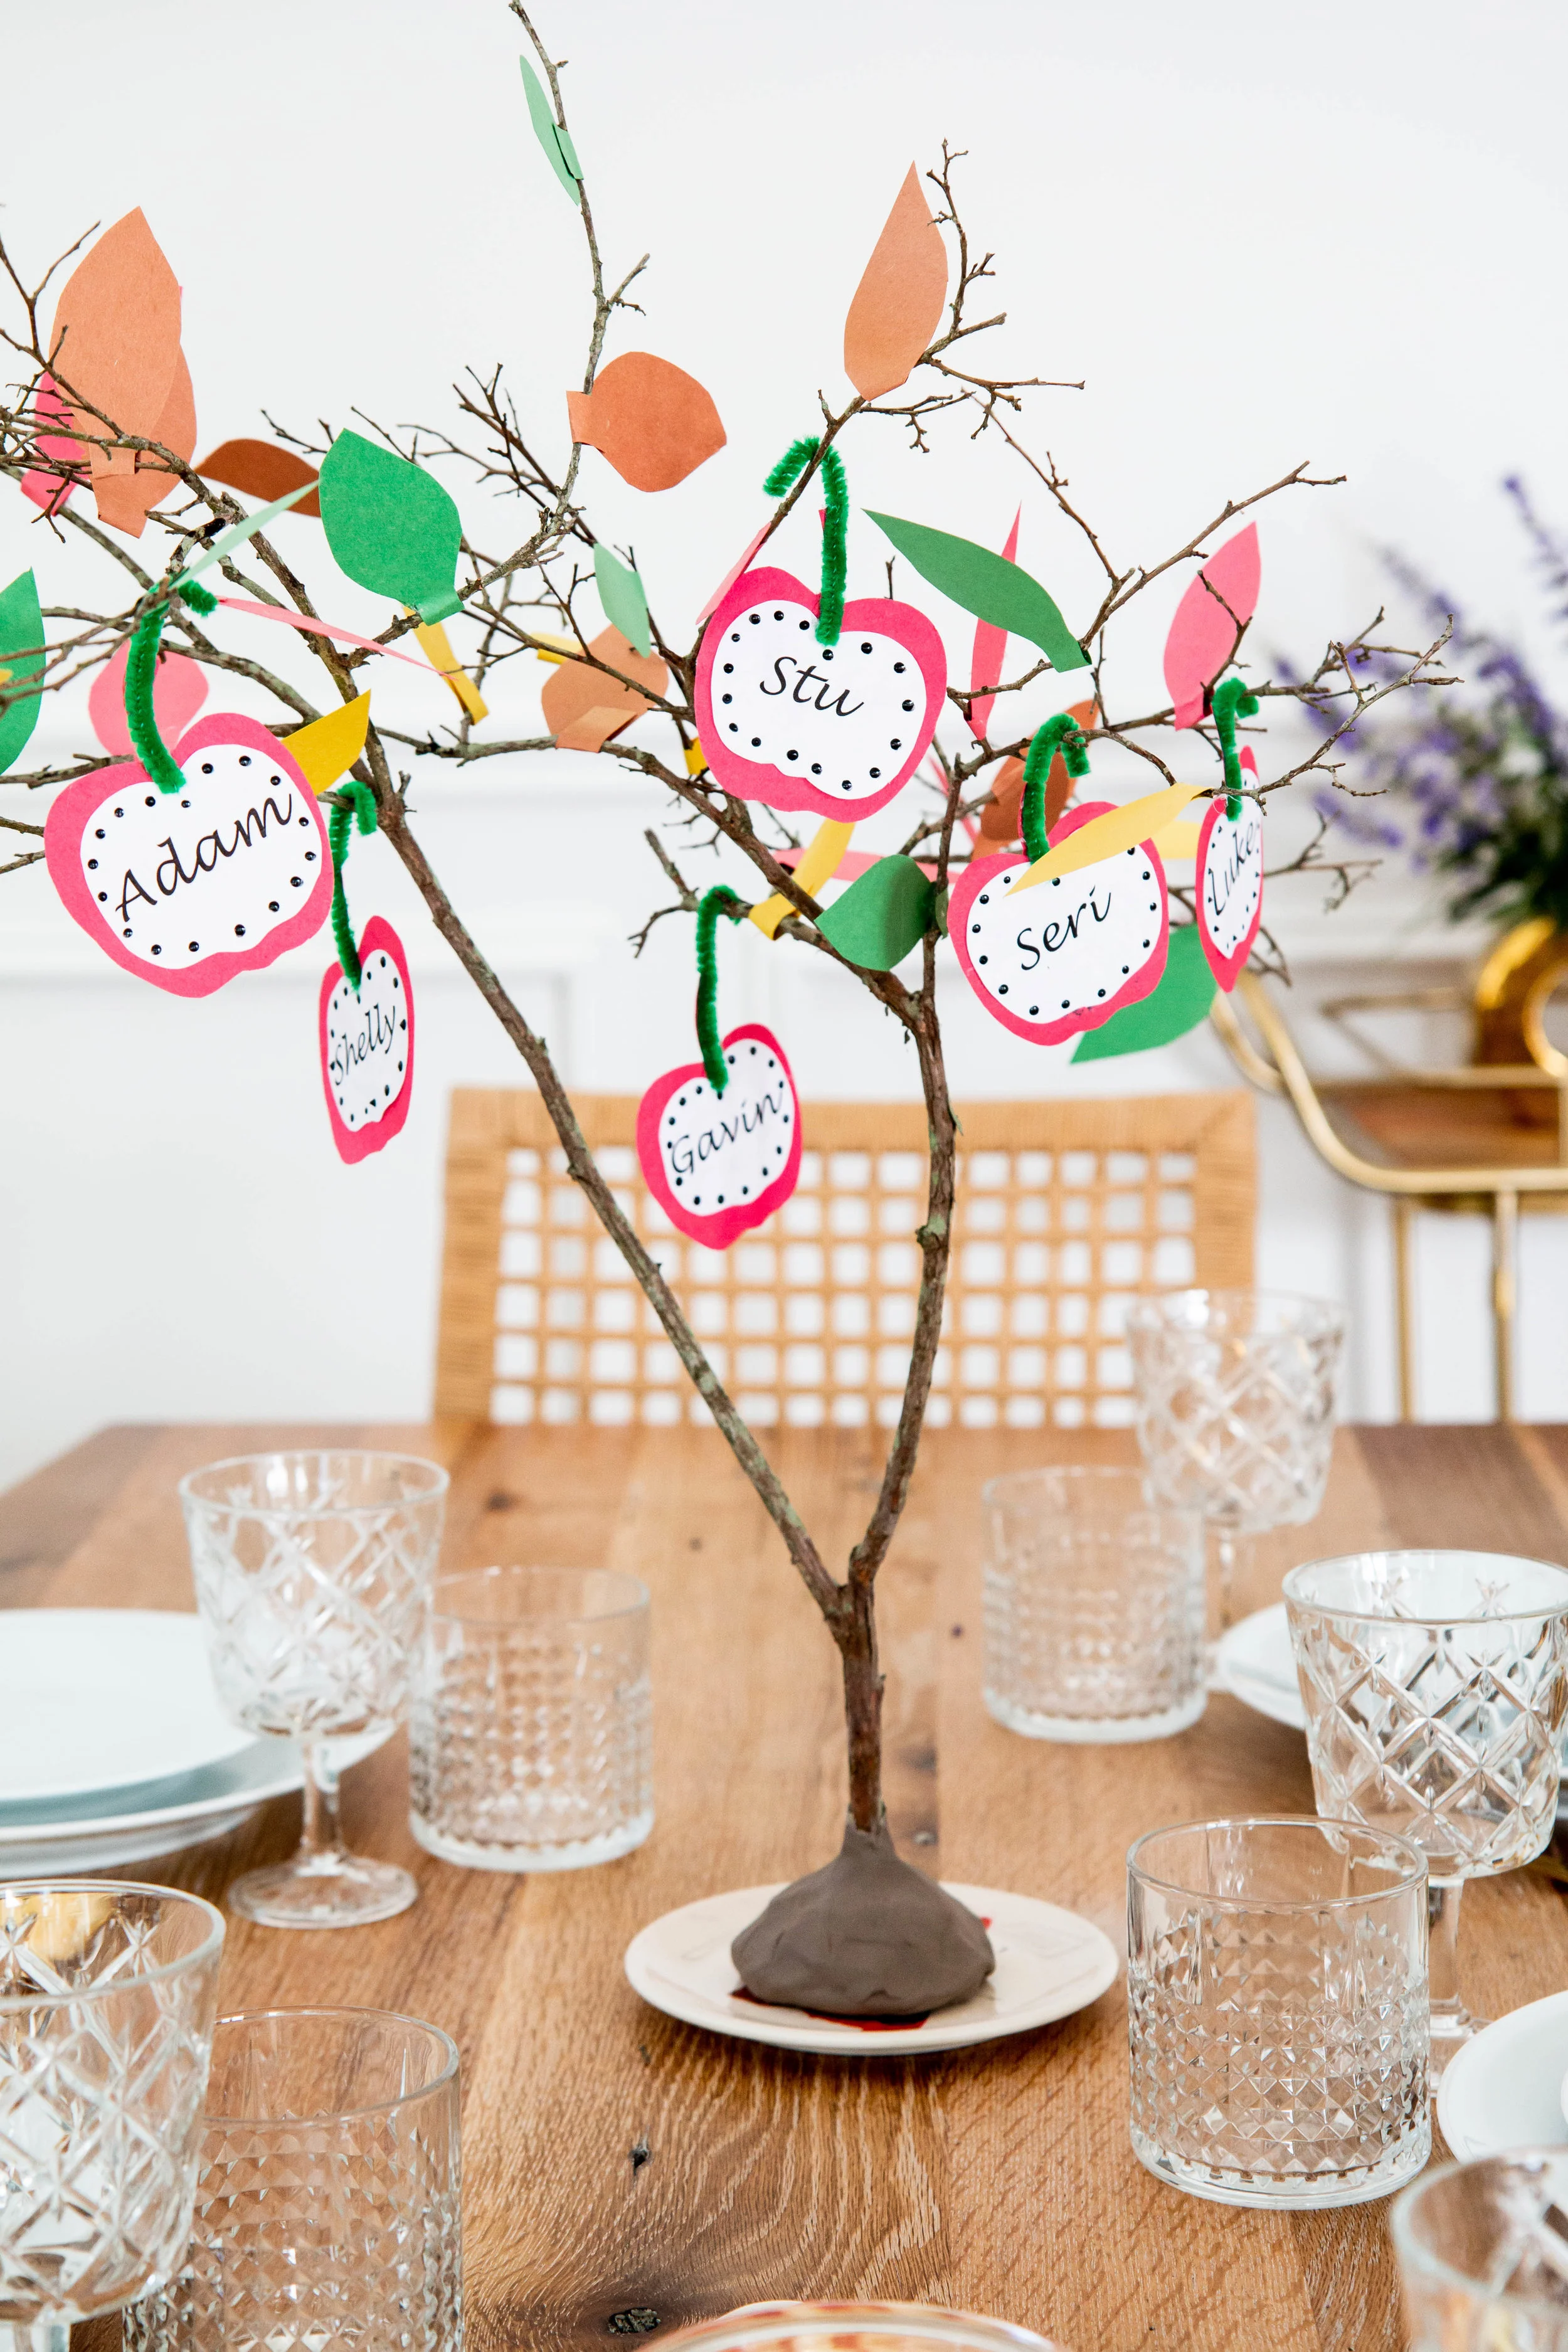
Rosh Hashana comes around every September to celebrate the Jewish New Year. We ring in the new year with apples and honey as a symbol for a sweet year to come. We also kick off the new year with two big dinners where we gather as a family and reflect on how we can make for a great year to come.
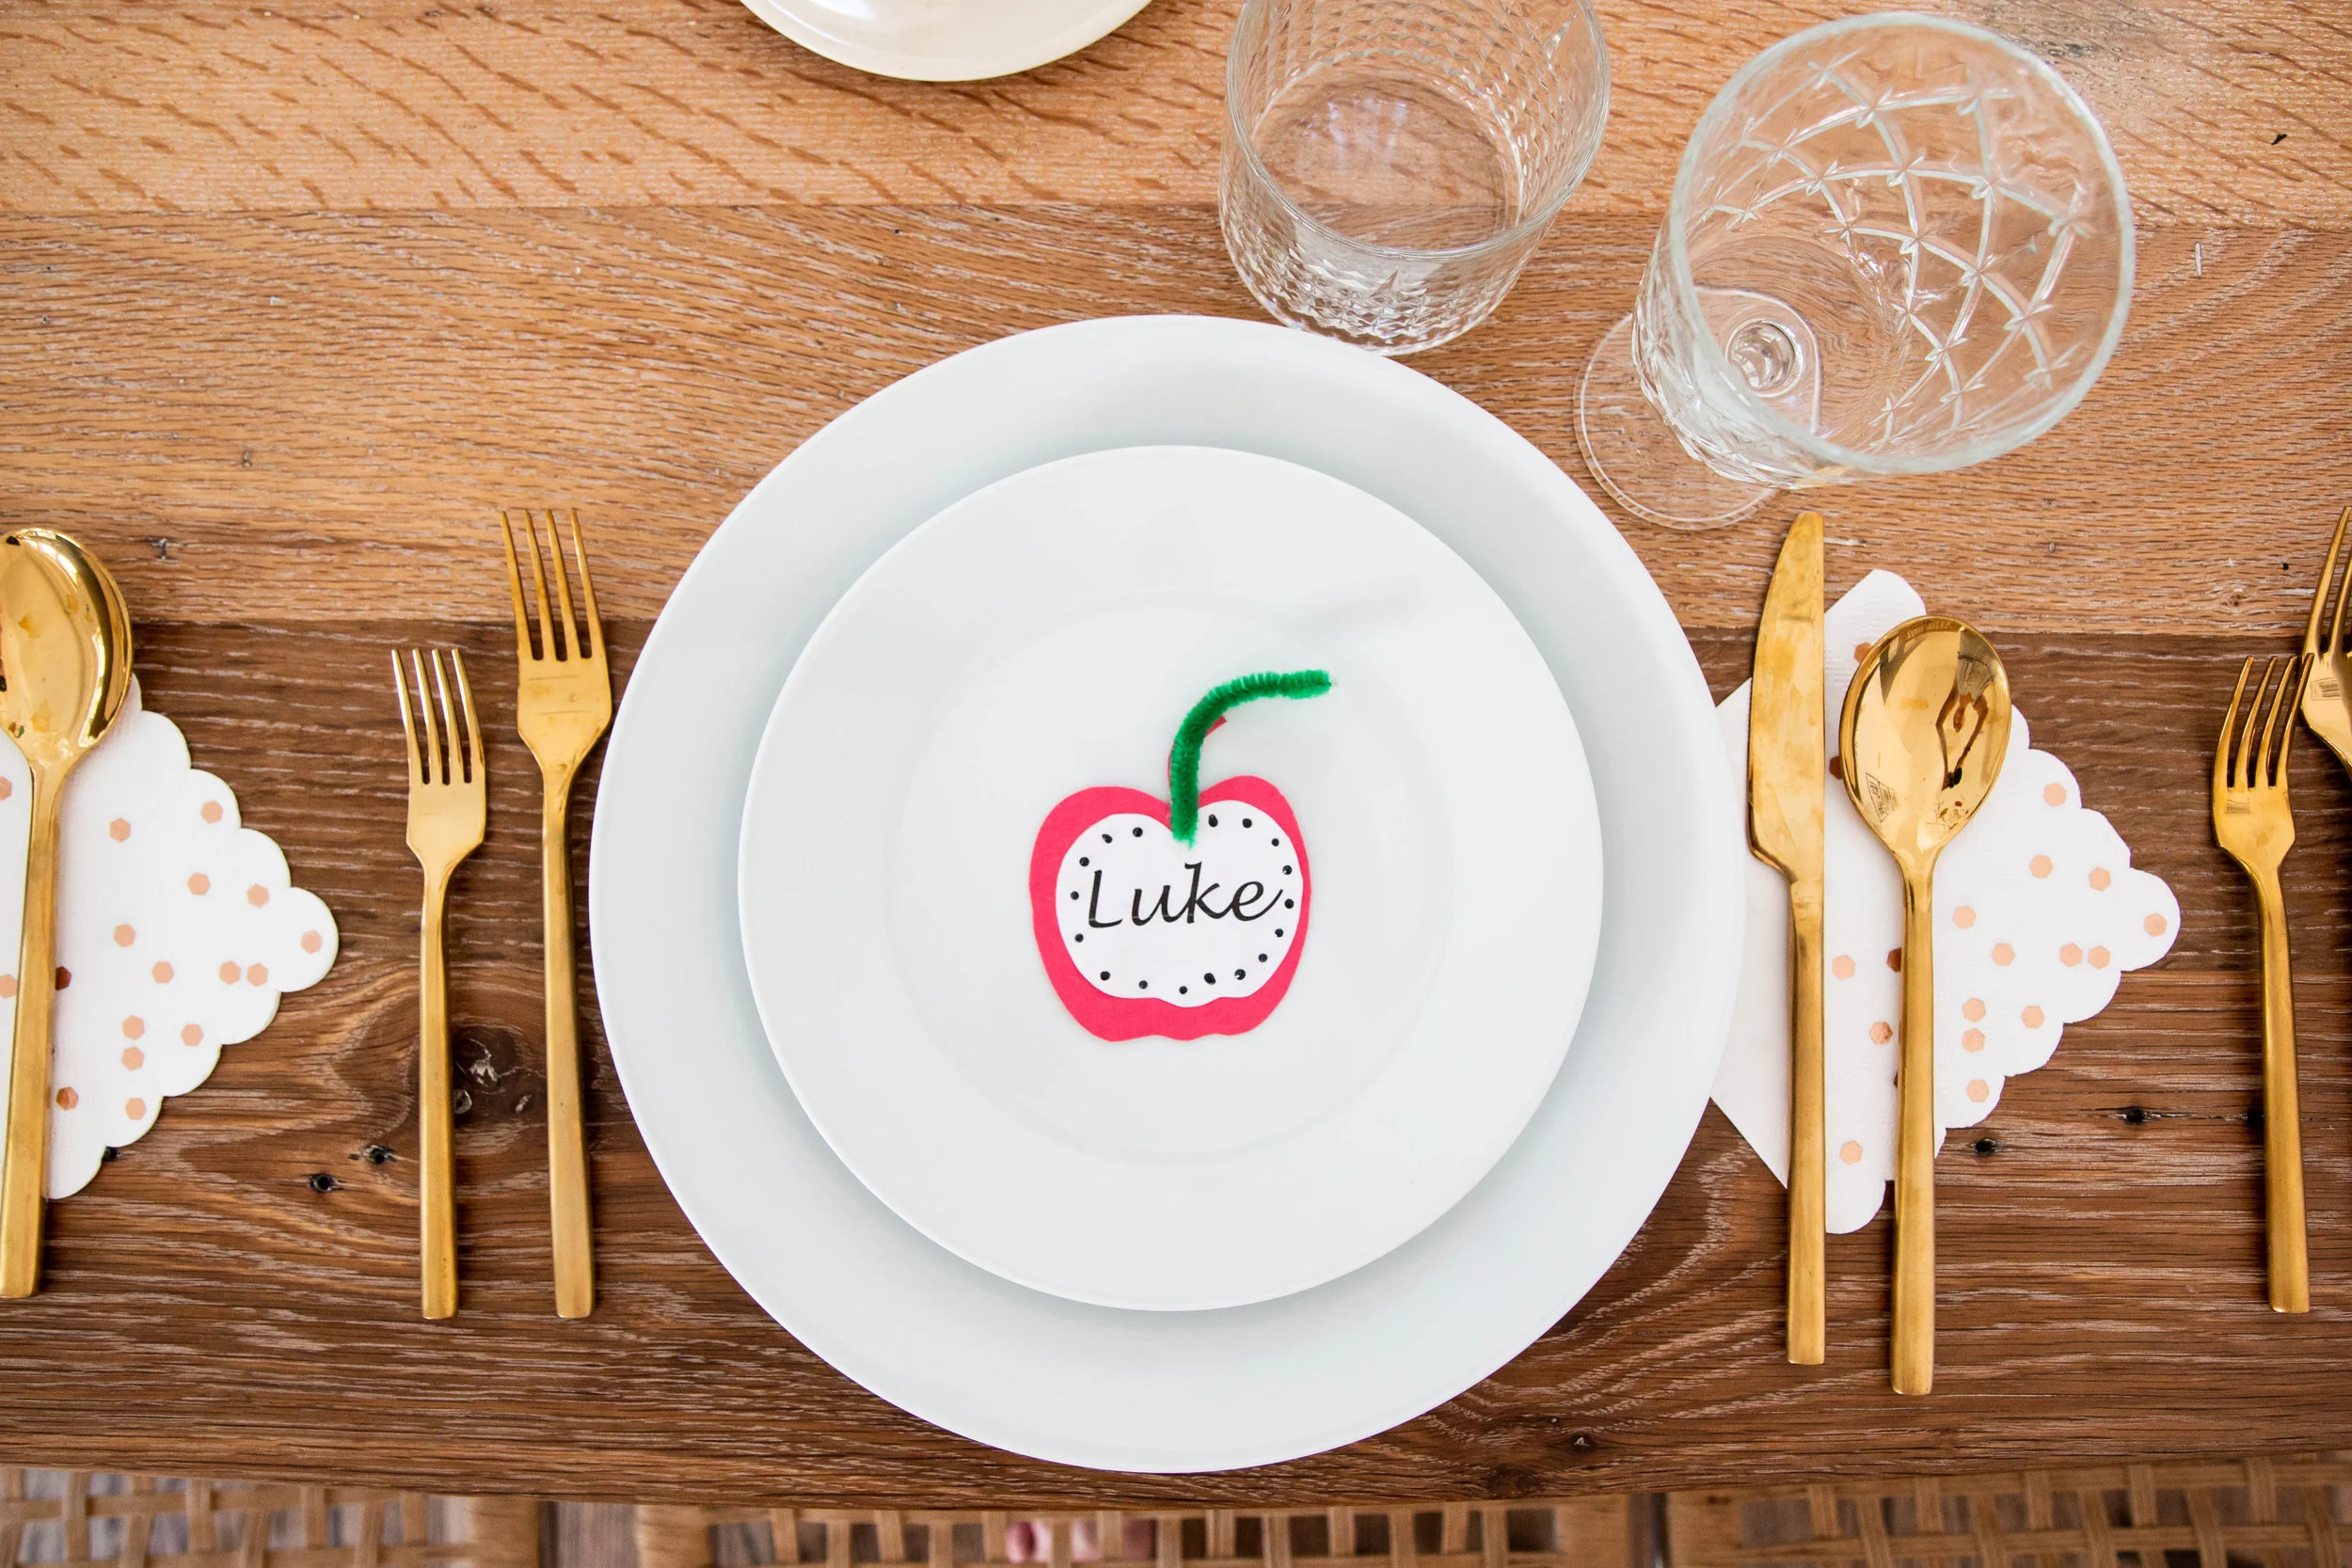
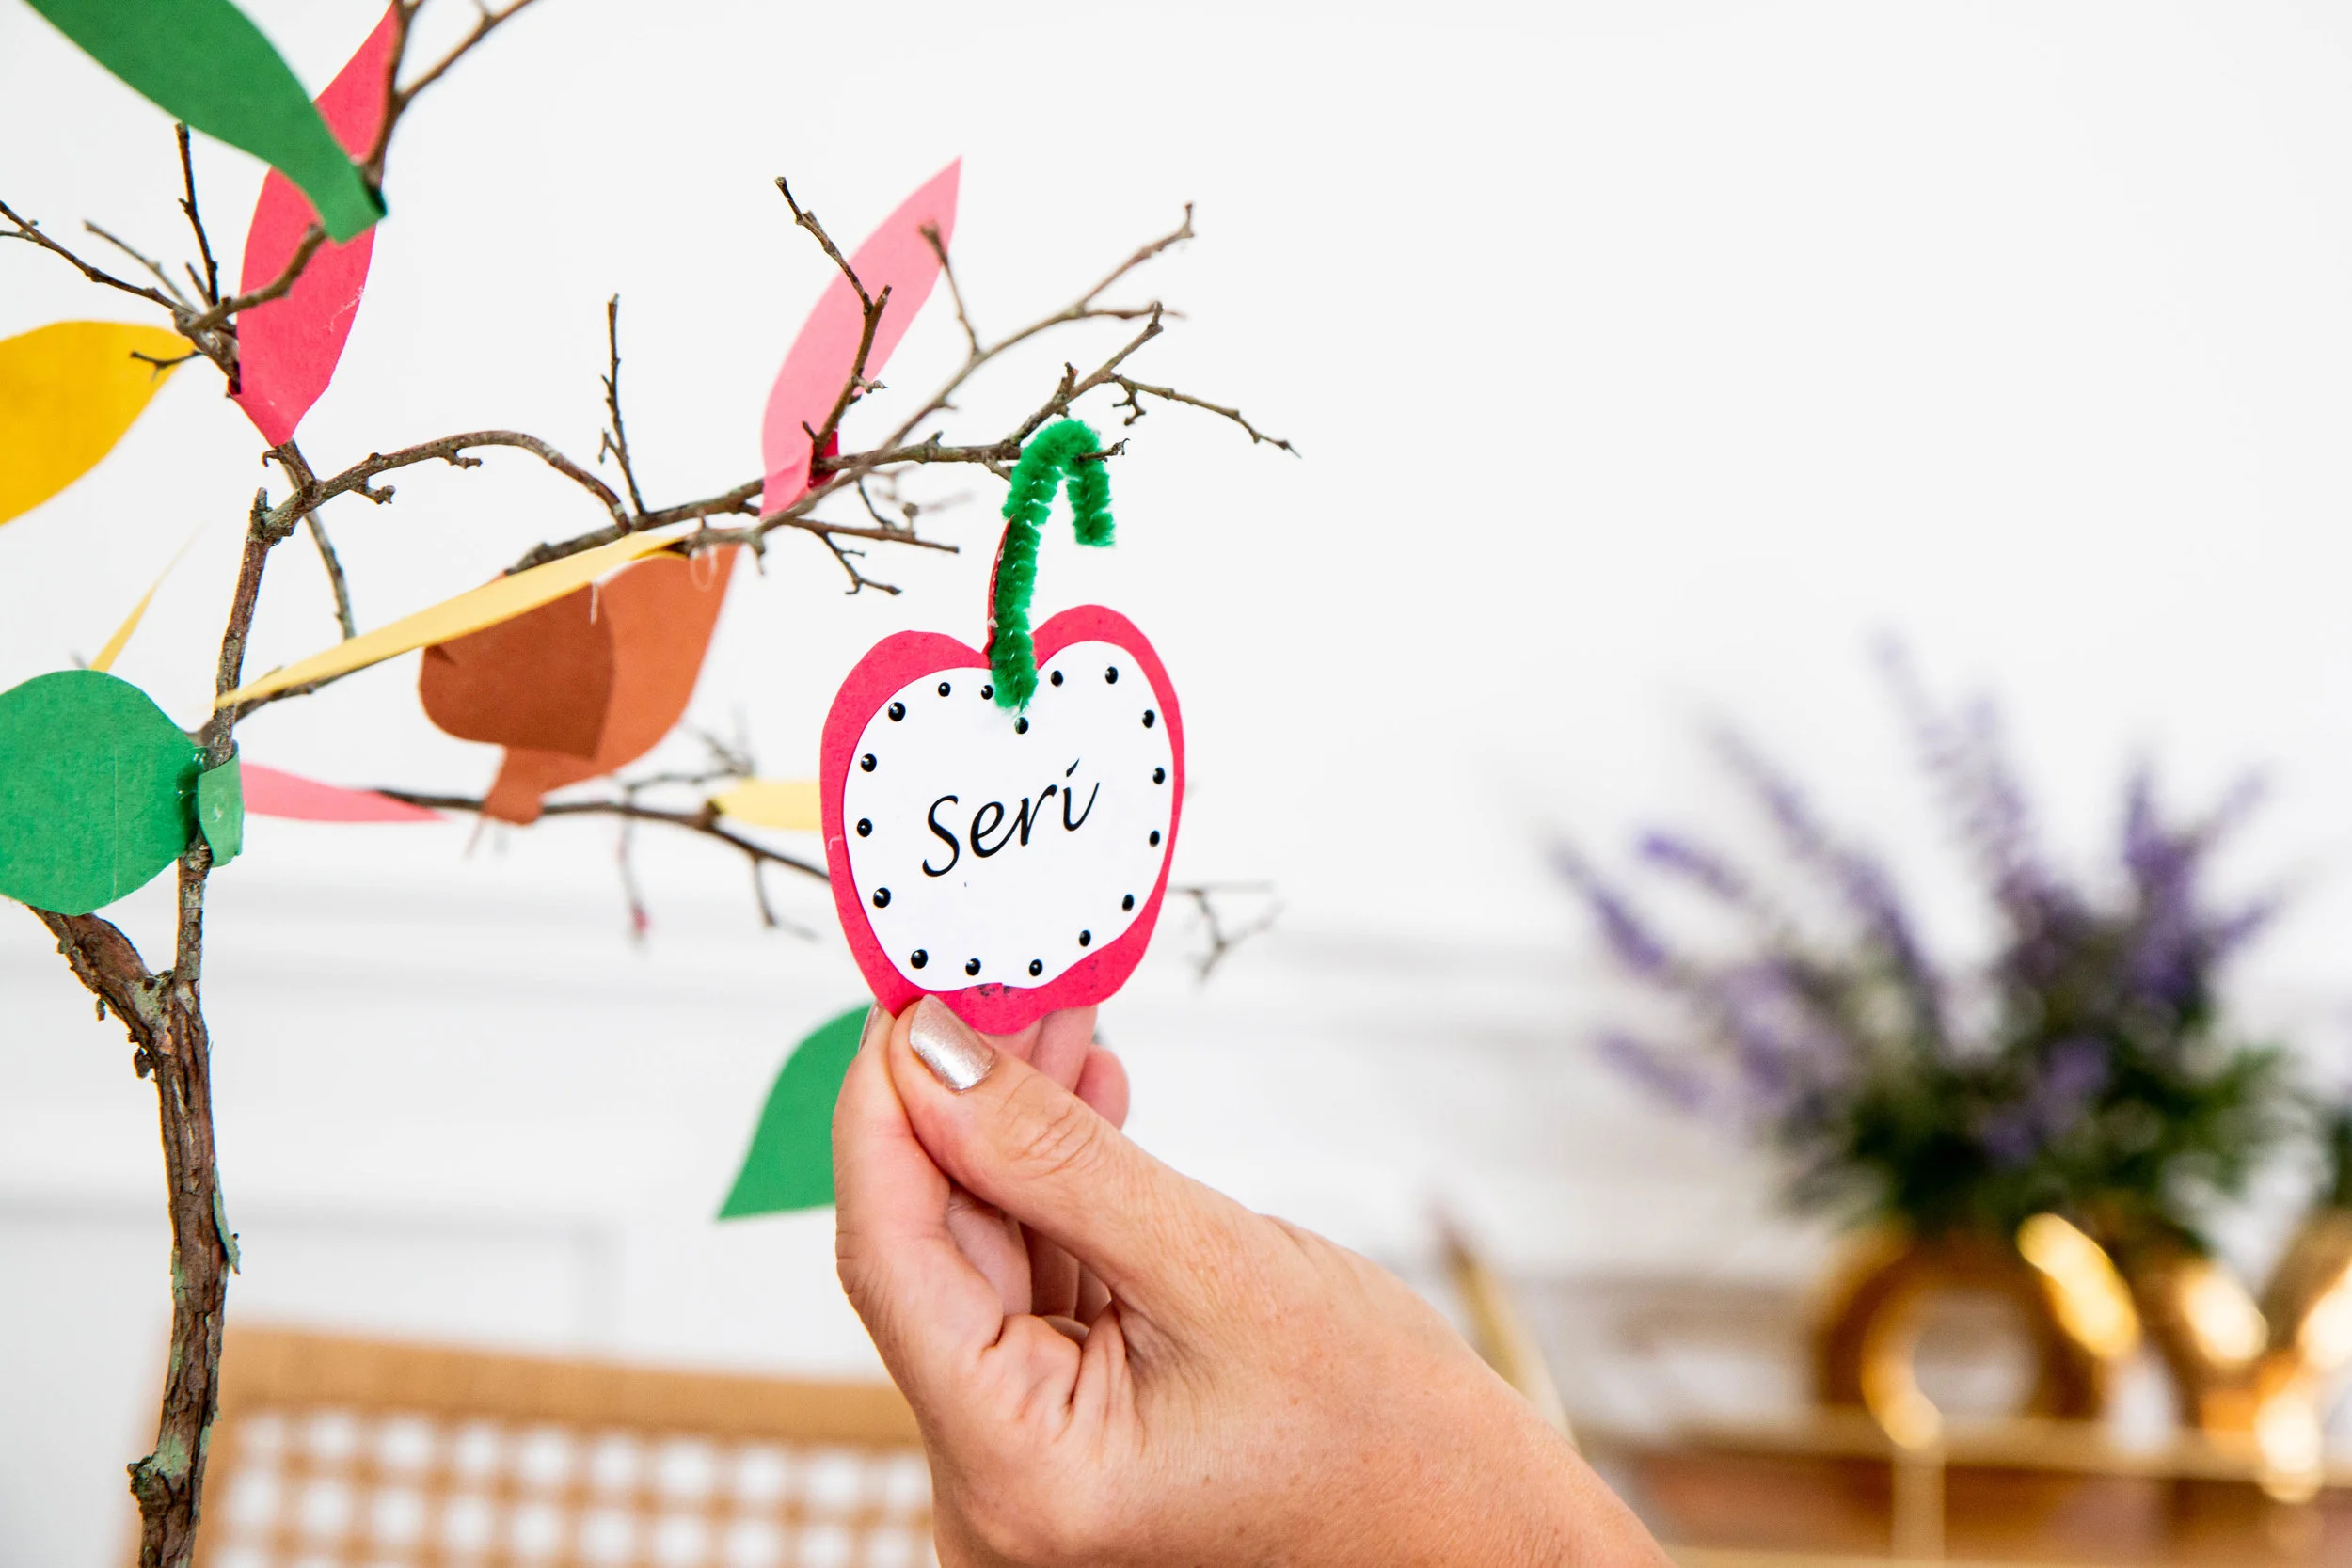
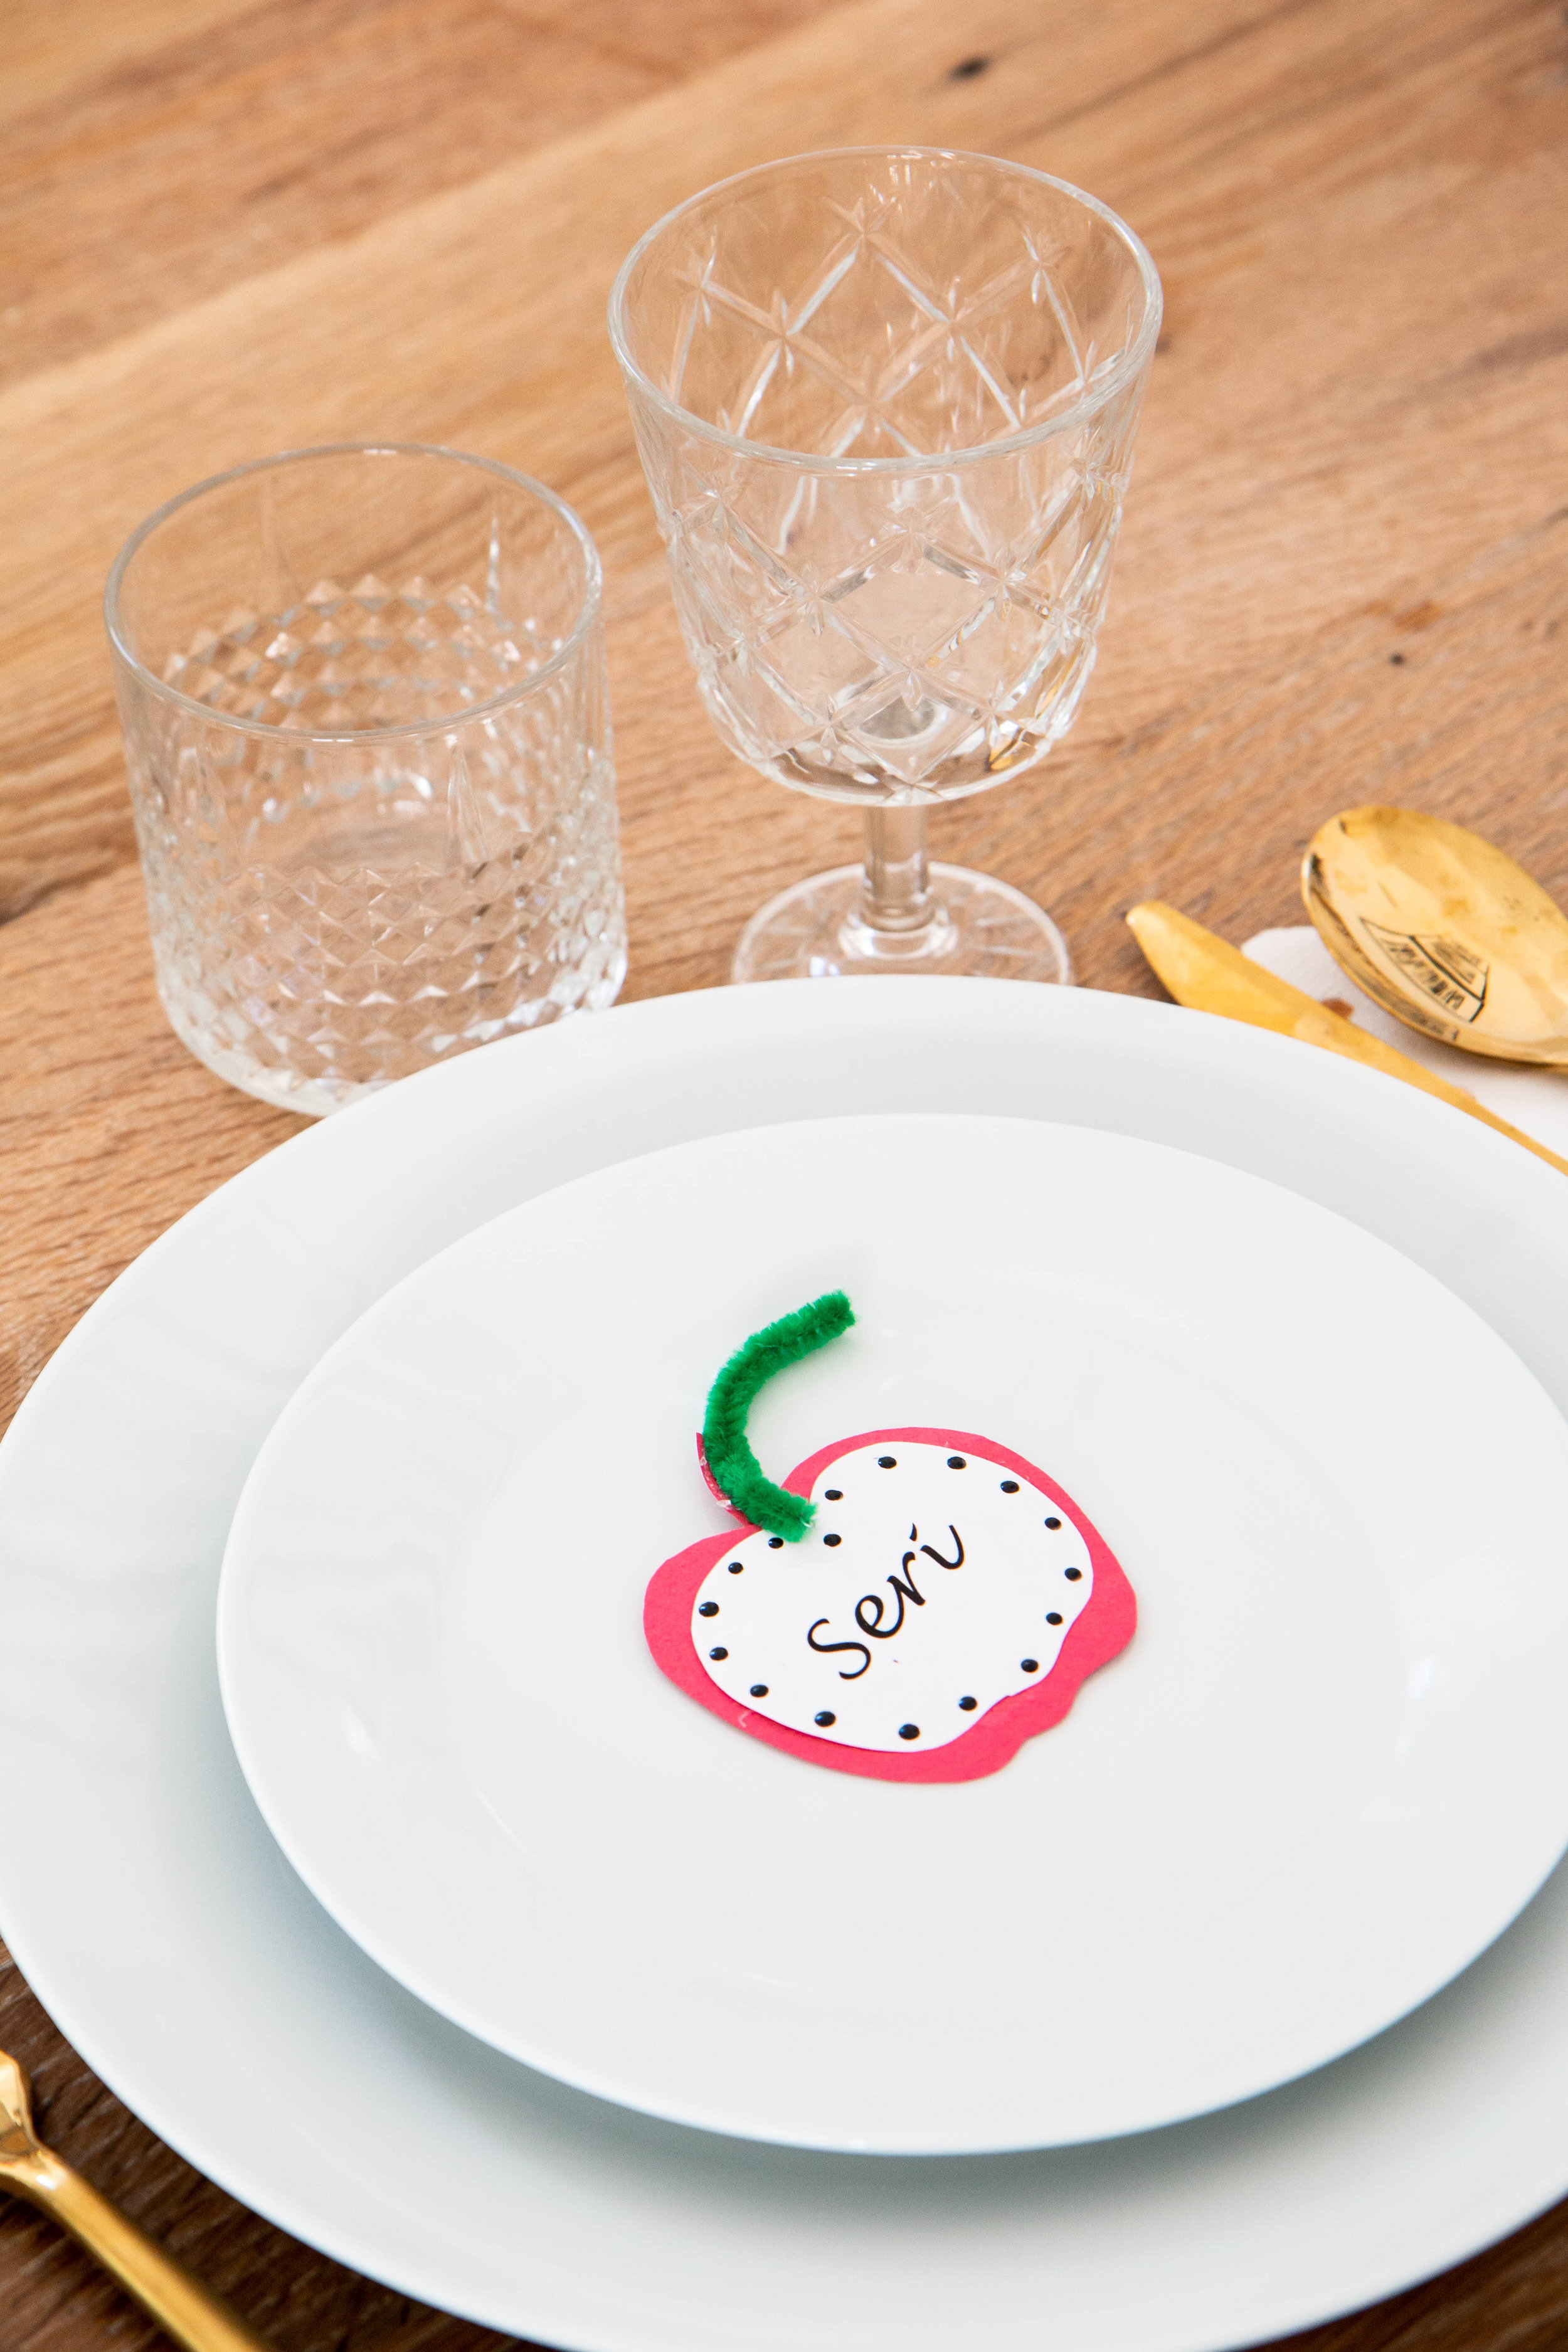
I love getting my children involved in our family dinners over the holidays. It's more meaningful that way and they learn more about the significance of the holiday when they are hands on. This year, Aunti Marissa showed us how to make a "Hope Tree". Our hope tree is two fold: first off, Marissa made apples out of red construction paper and added each guests name to the apple. We used the apples as our place cards on everyone's plate. Put a pencil at each place setting and have your guests fill out the back of the apple with what they are hopeful for in the year to come. Then, each guest can attach their apple to the hope tree in the center of your table.
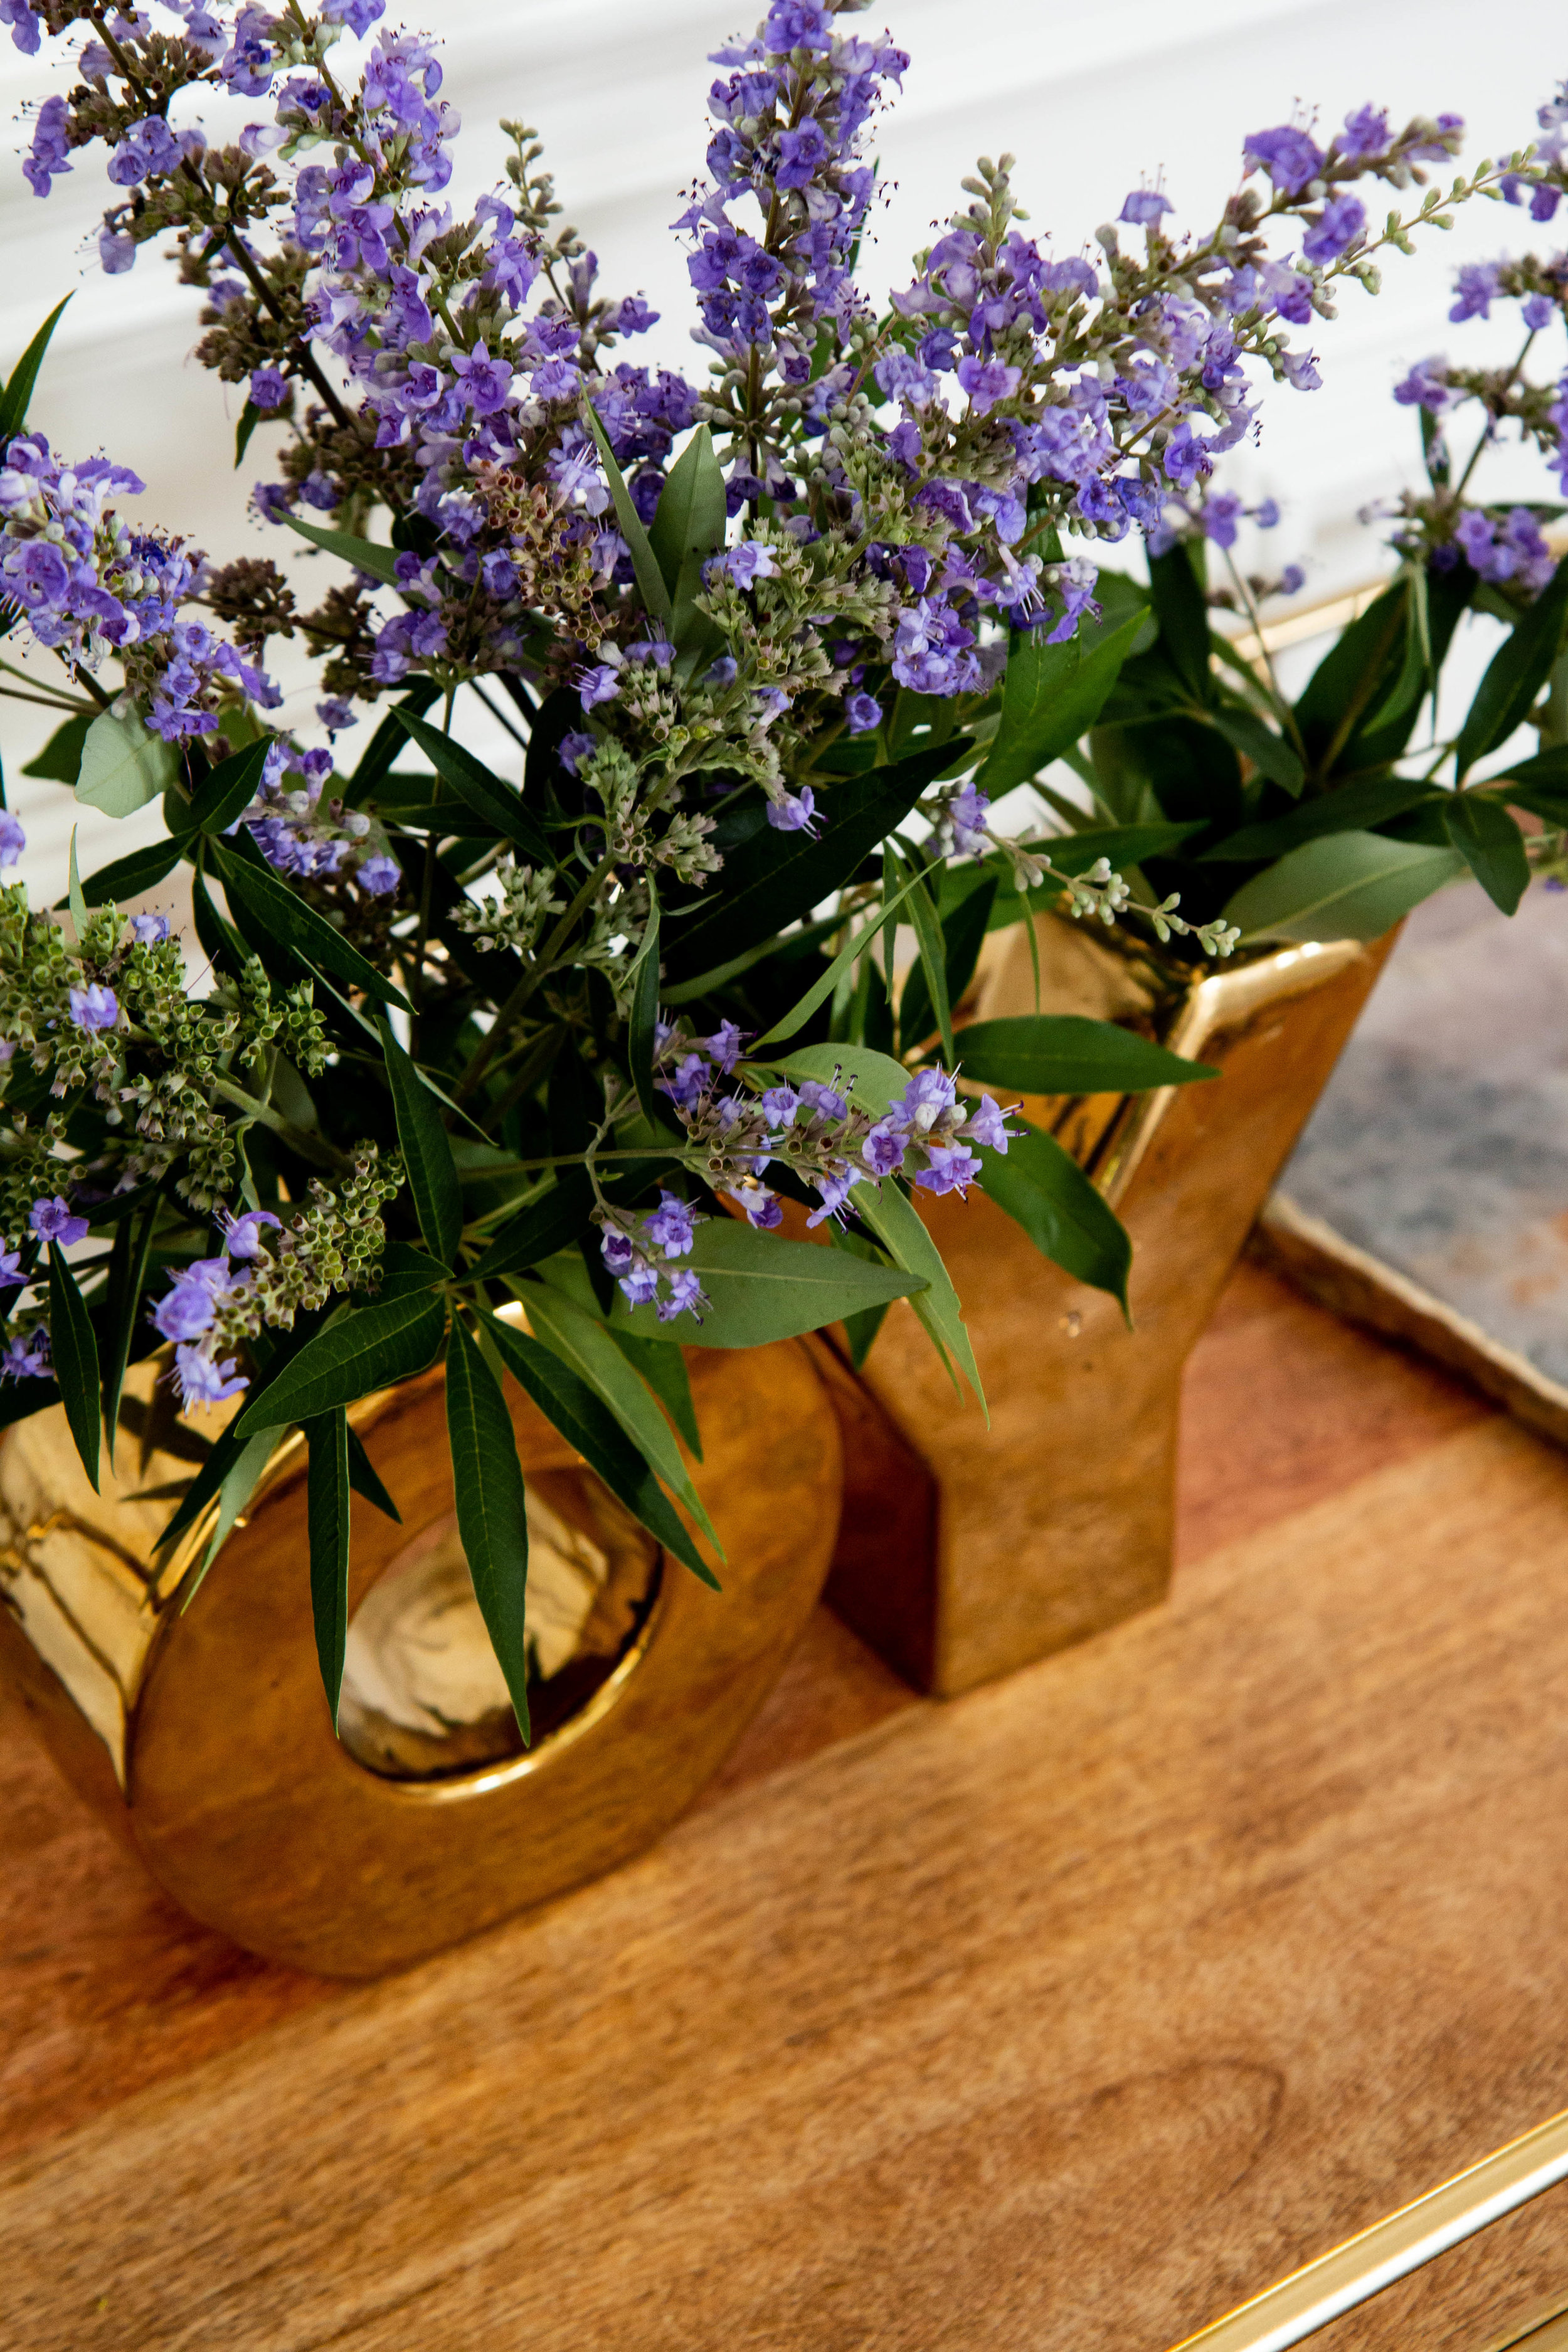

My tablescape is not complete without fresh flowers so I clipped some beauties from my garden and set my "OY" vase on the bar cart for a pretty look behind our dining room table.


You will need:
- modeling clay
- a small tree branch
- hot glue
- green pipe cleaners
- construction paper
- all purpose glue
- puff paint
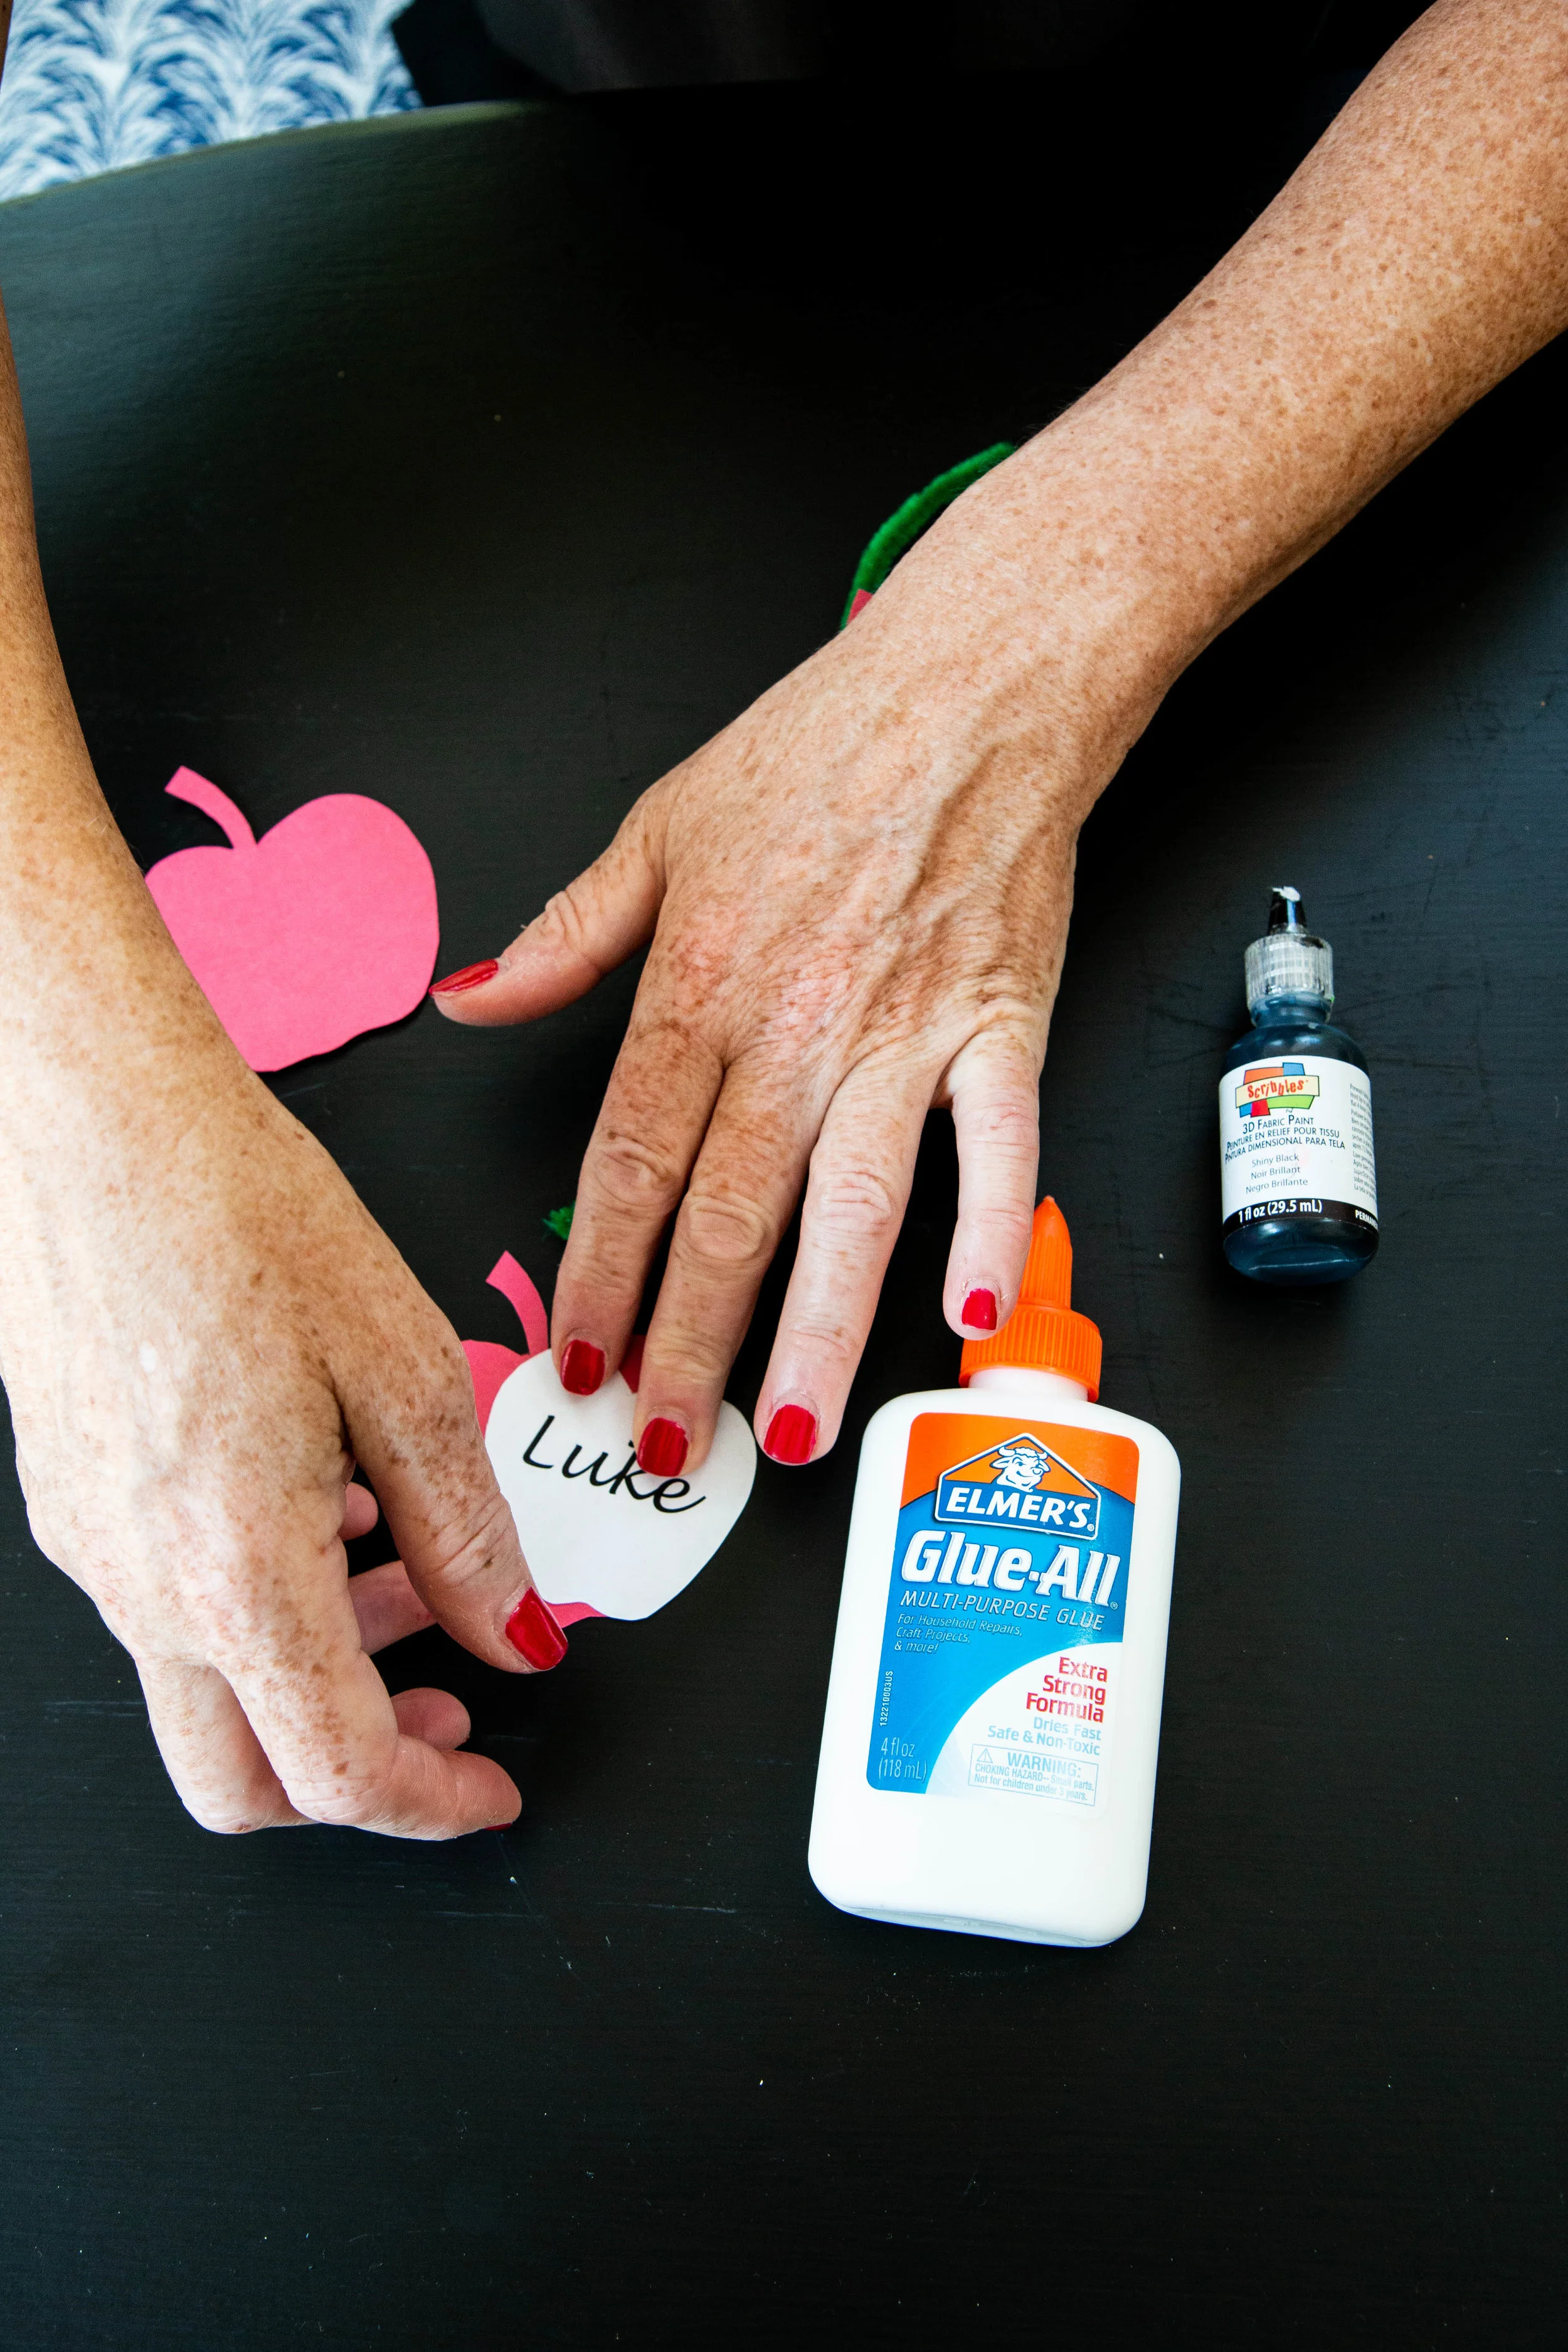
Step 1: Create your apple name cards for each person at your table by printing or writing out their names. Cut an apple shape out of red construction paper and cut the names out in smaller apple shape to go on top.
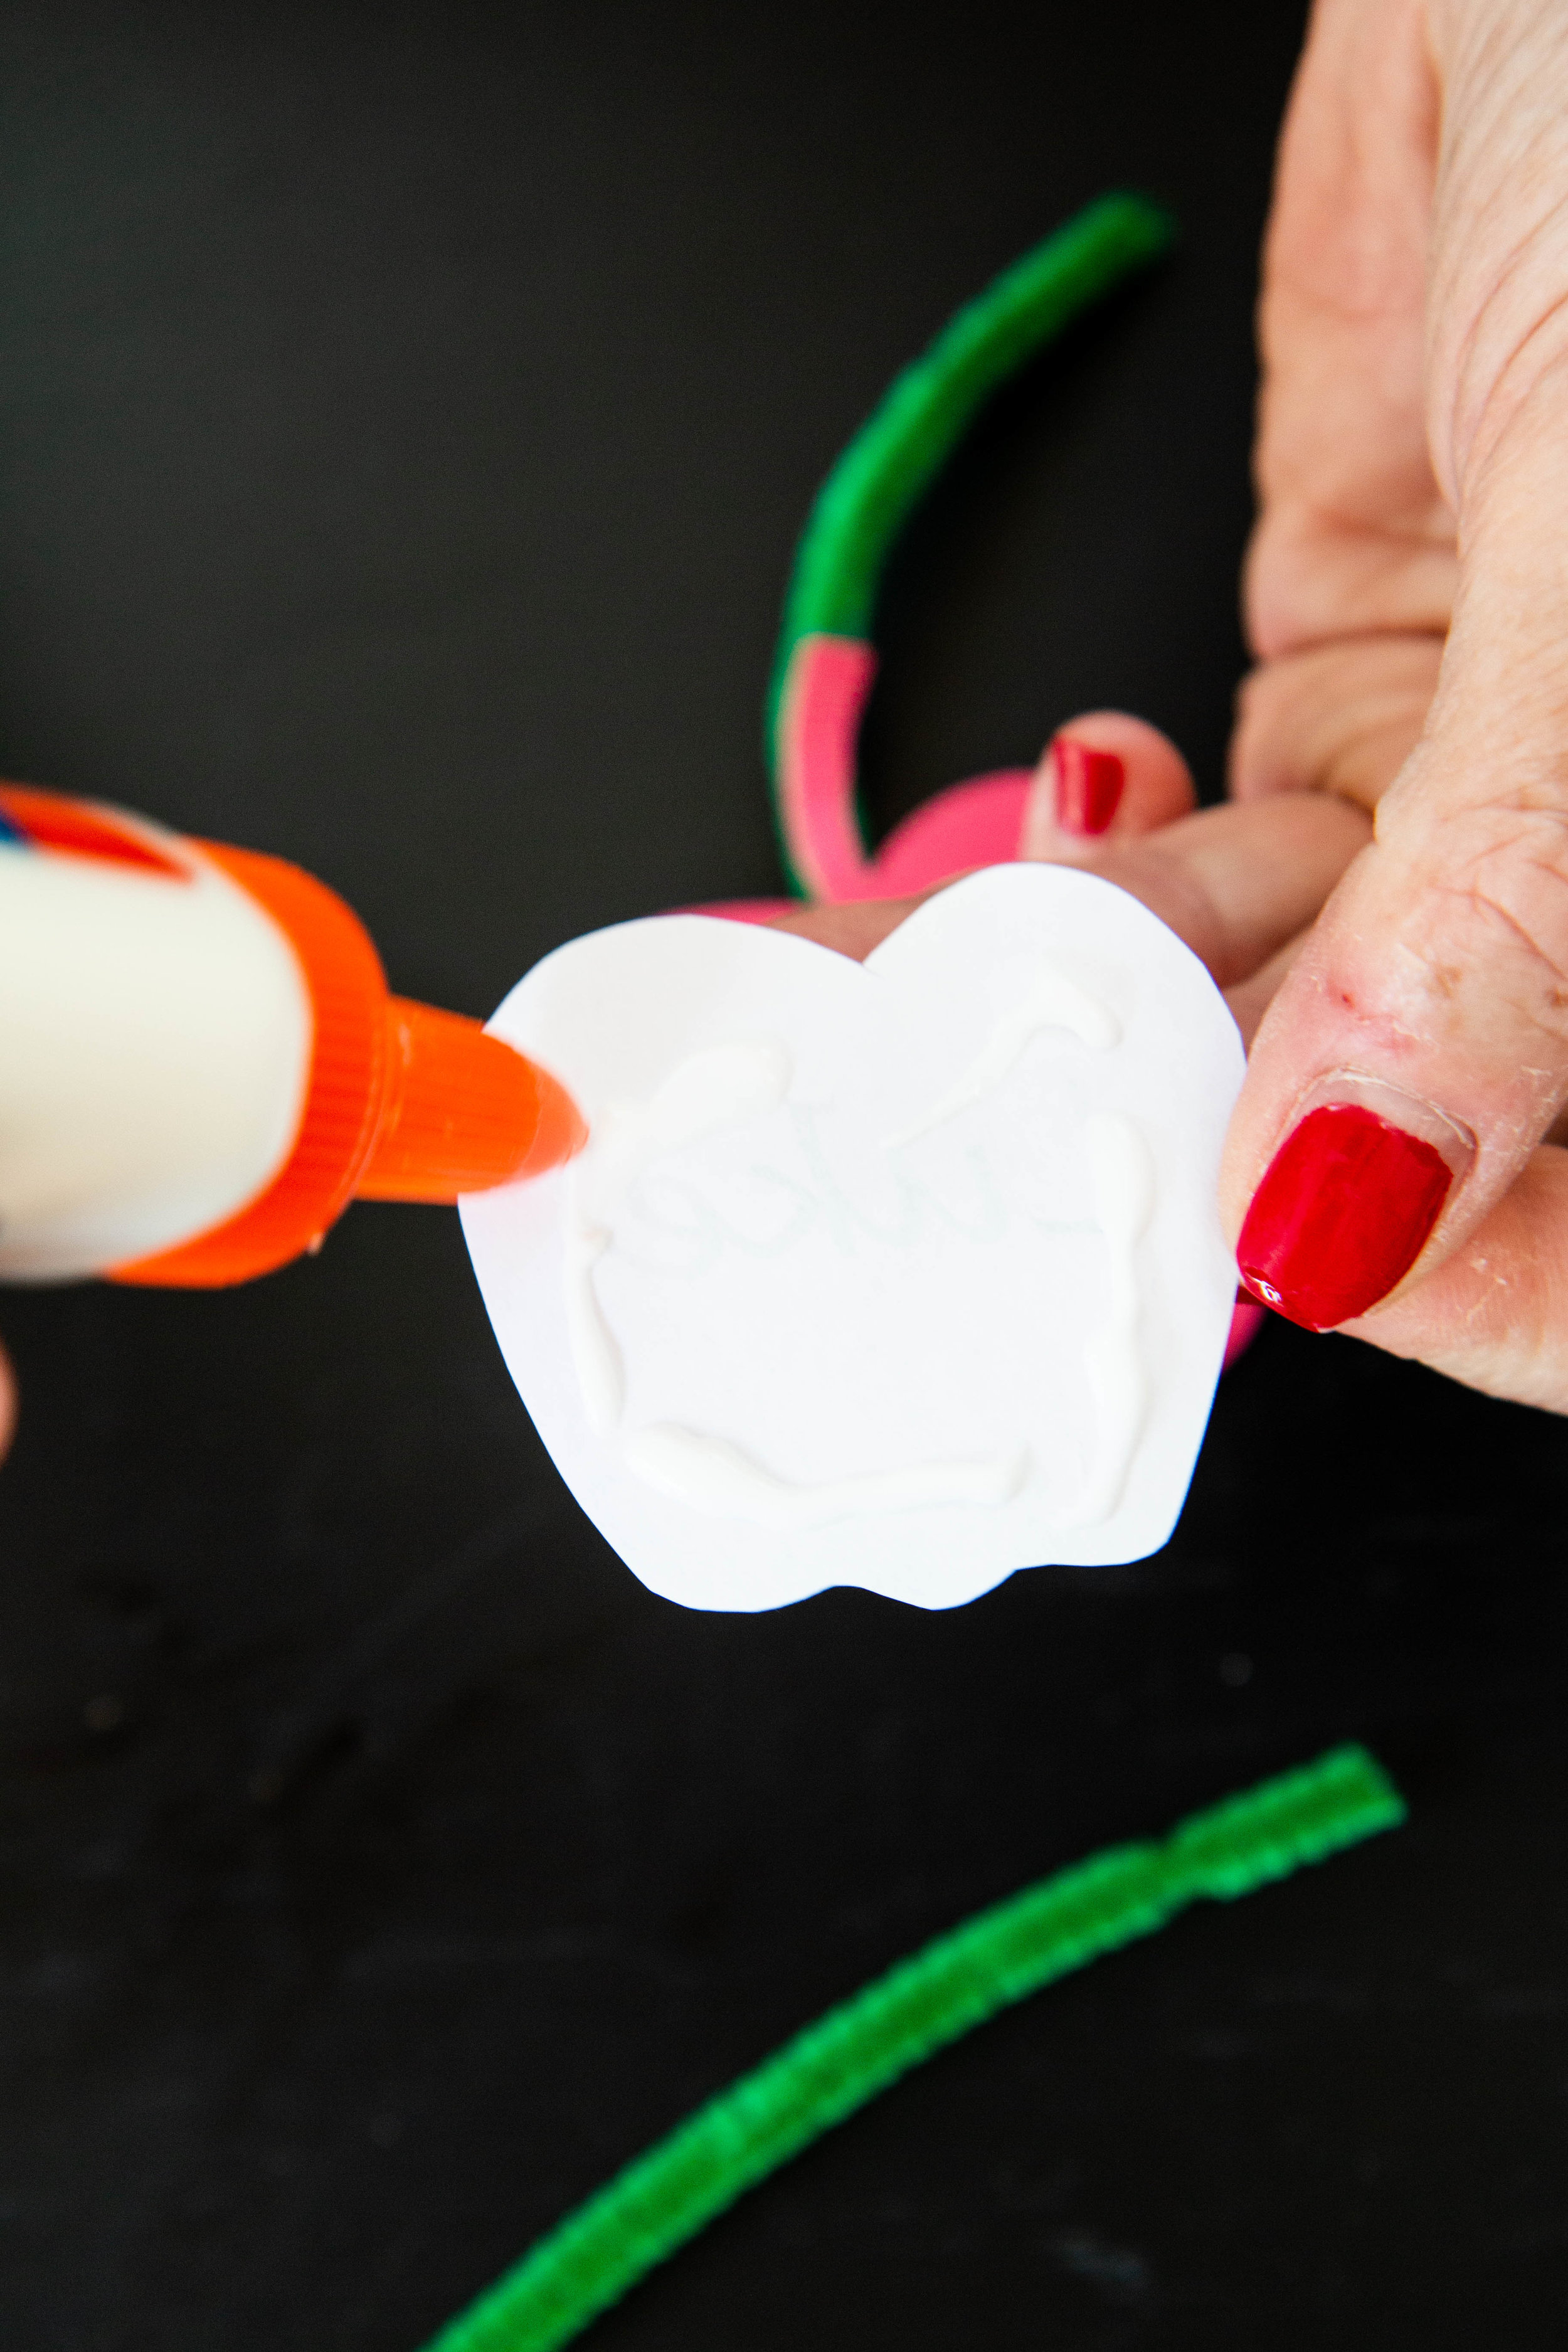
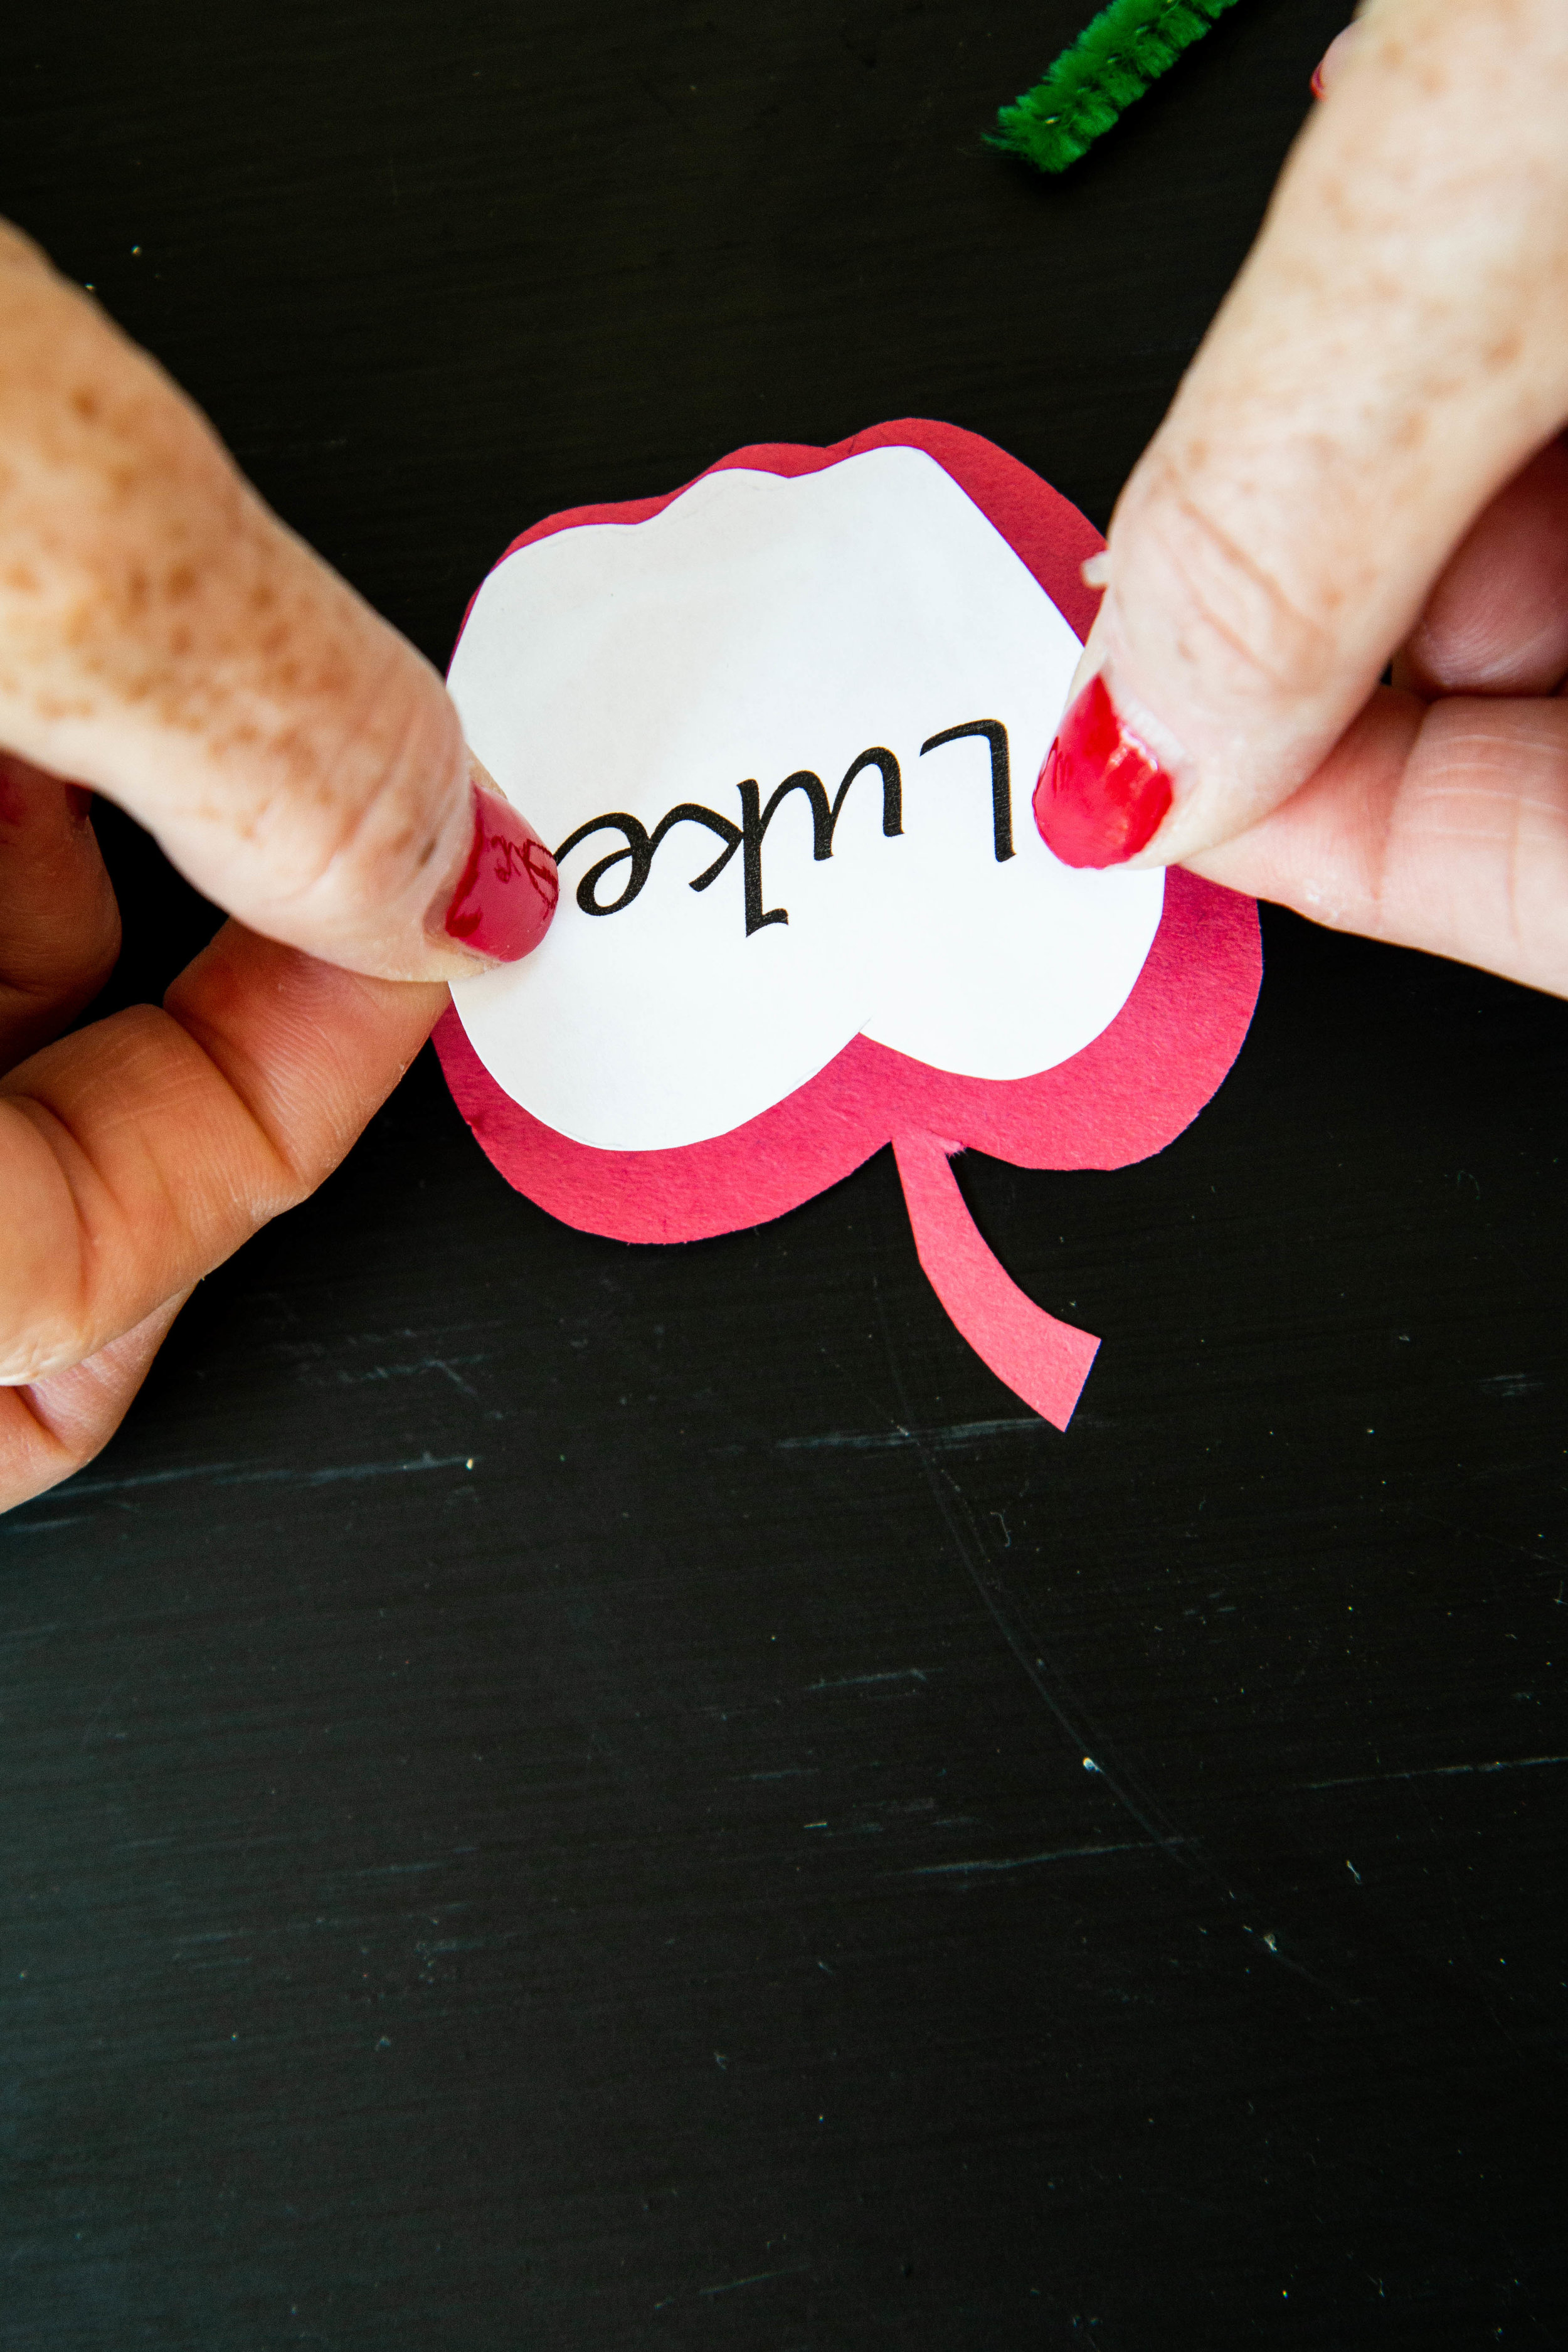
Step 2: Using your glue, paste the name onto the red construction paper.
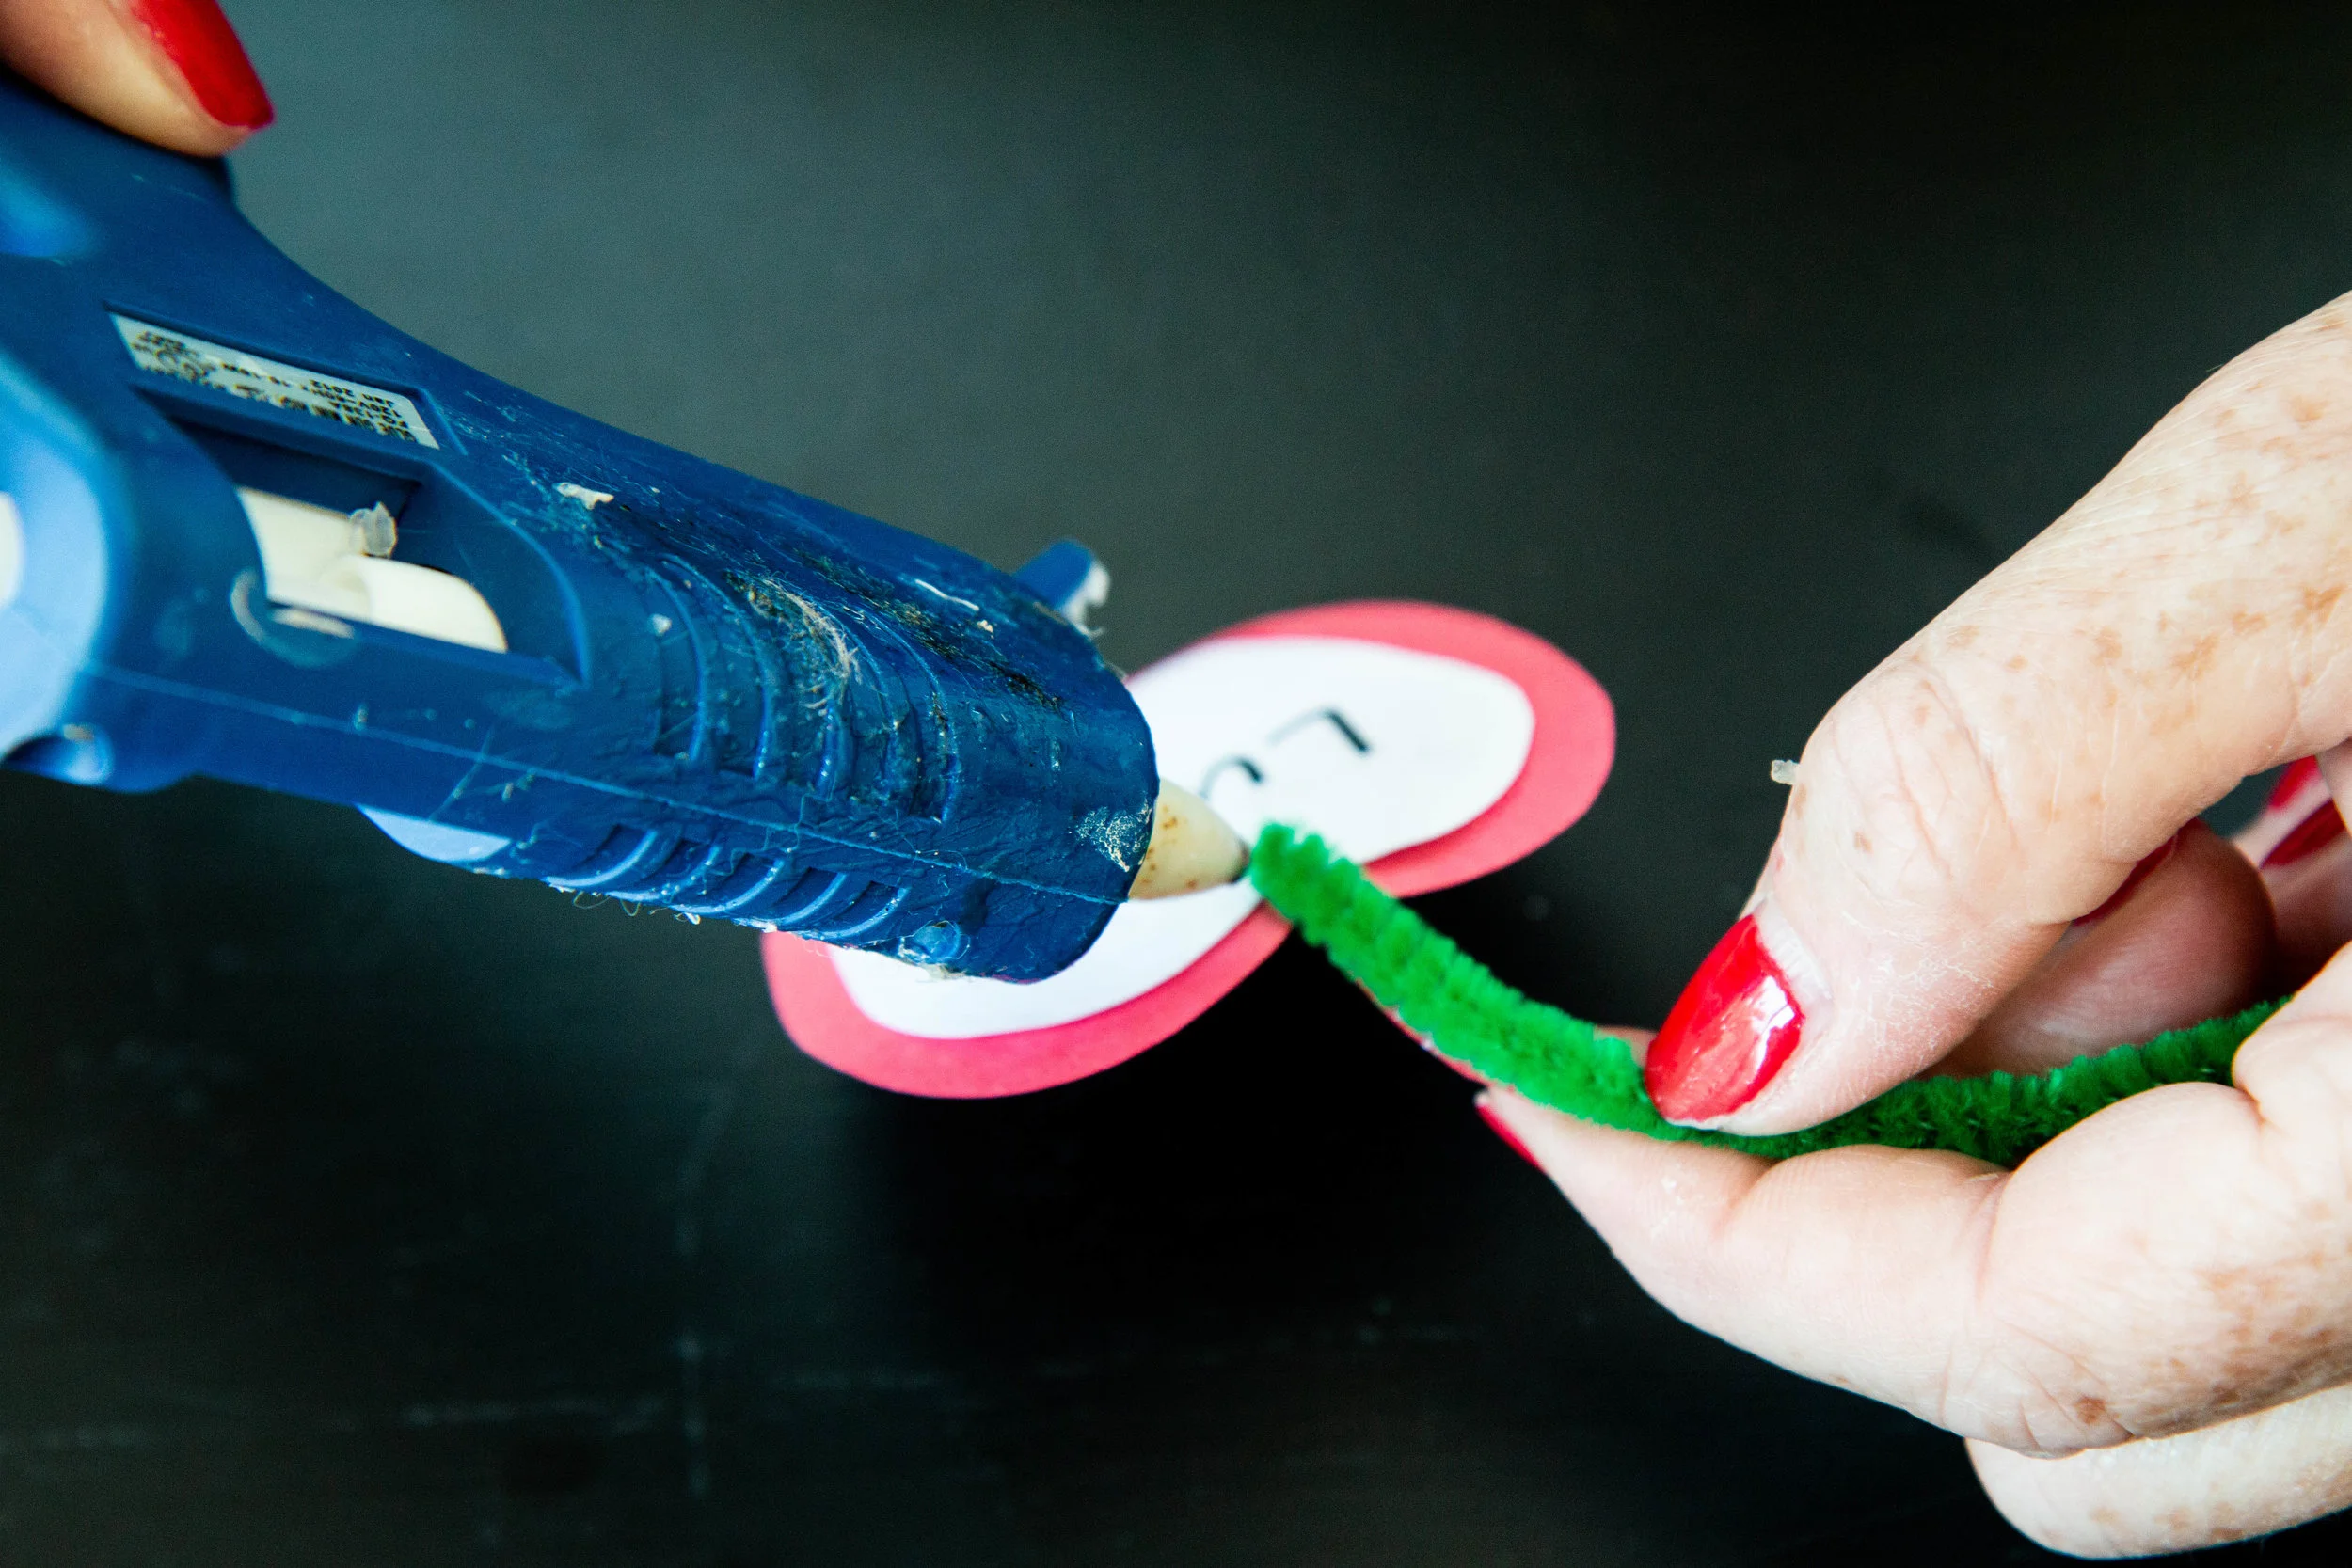
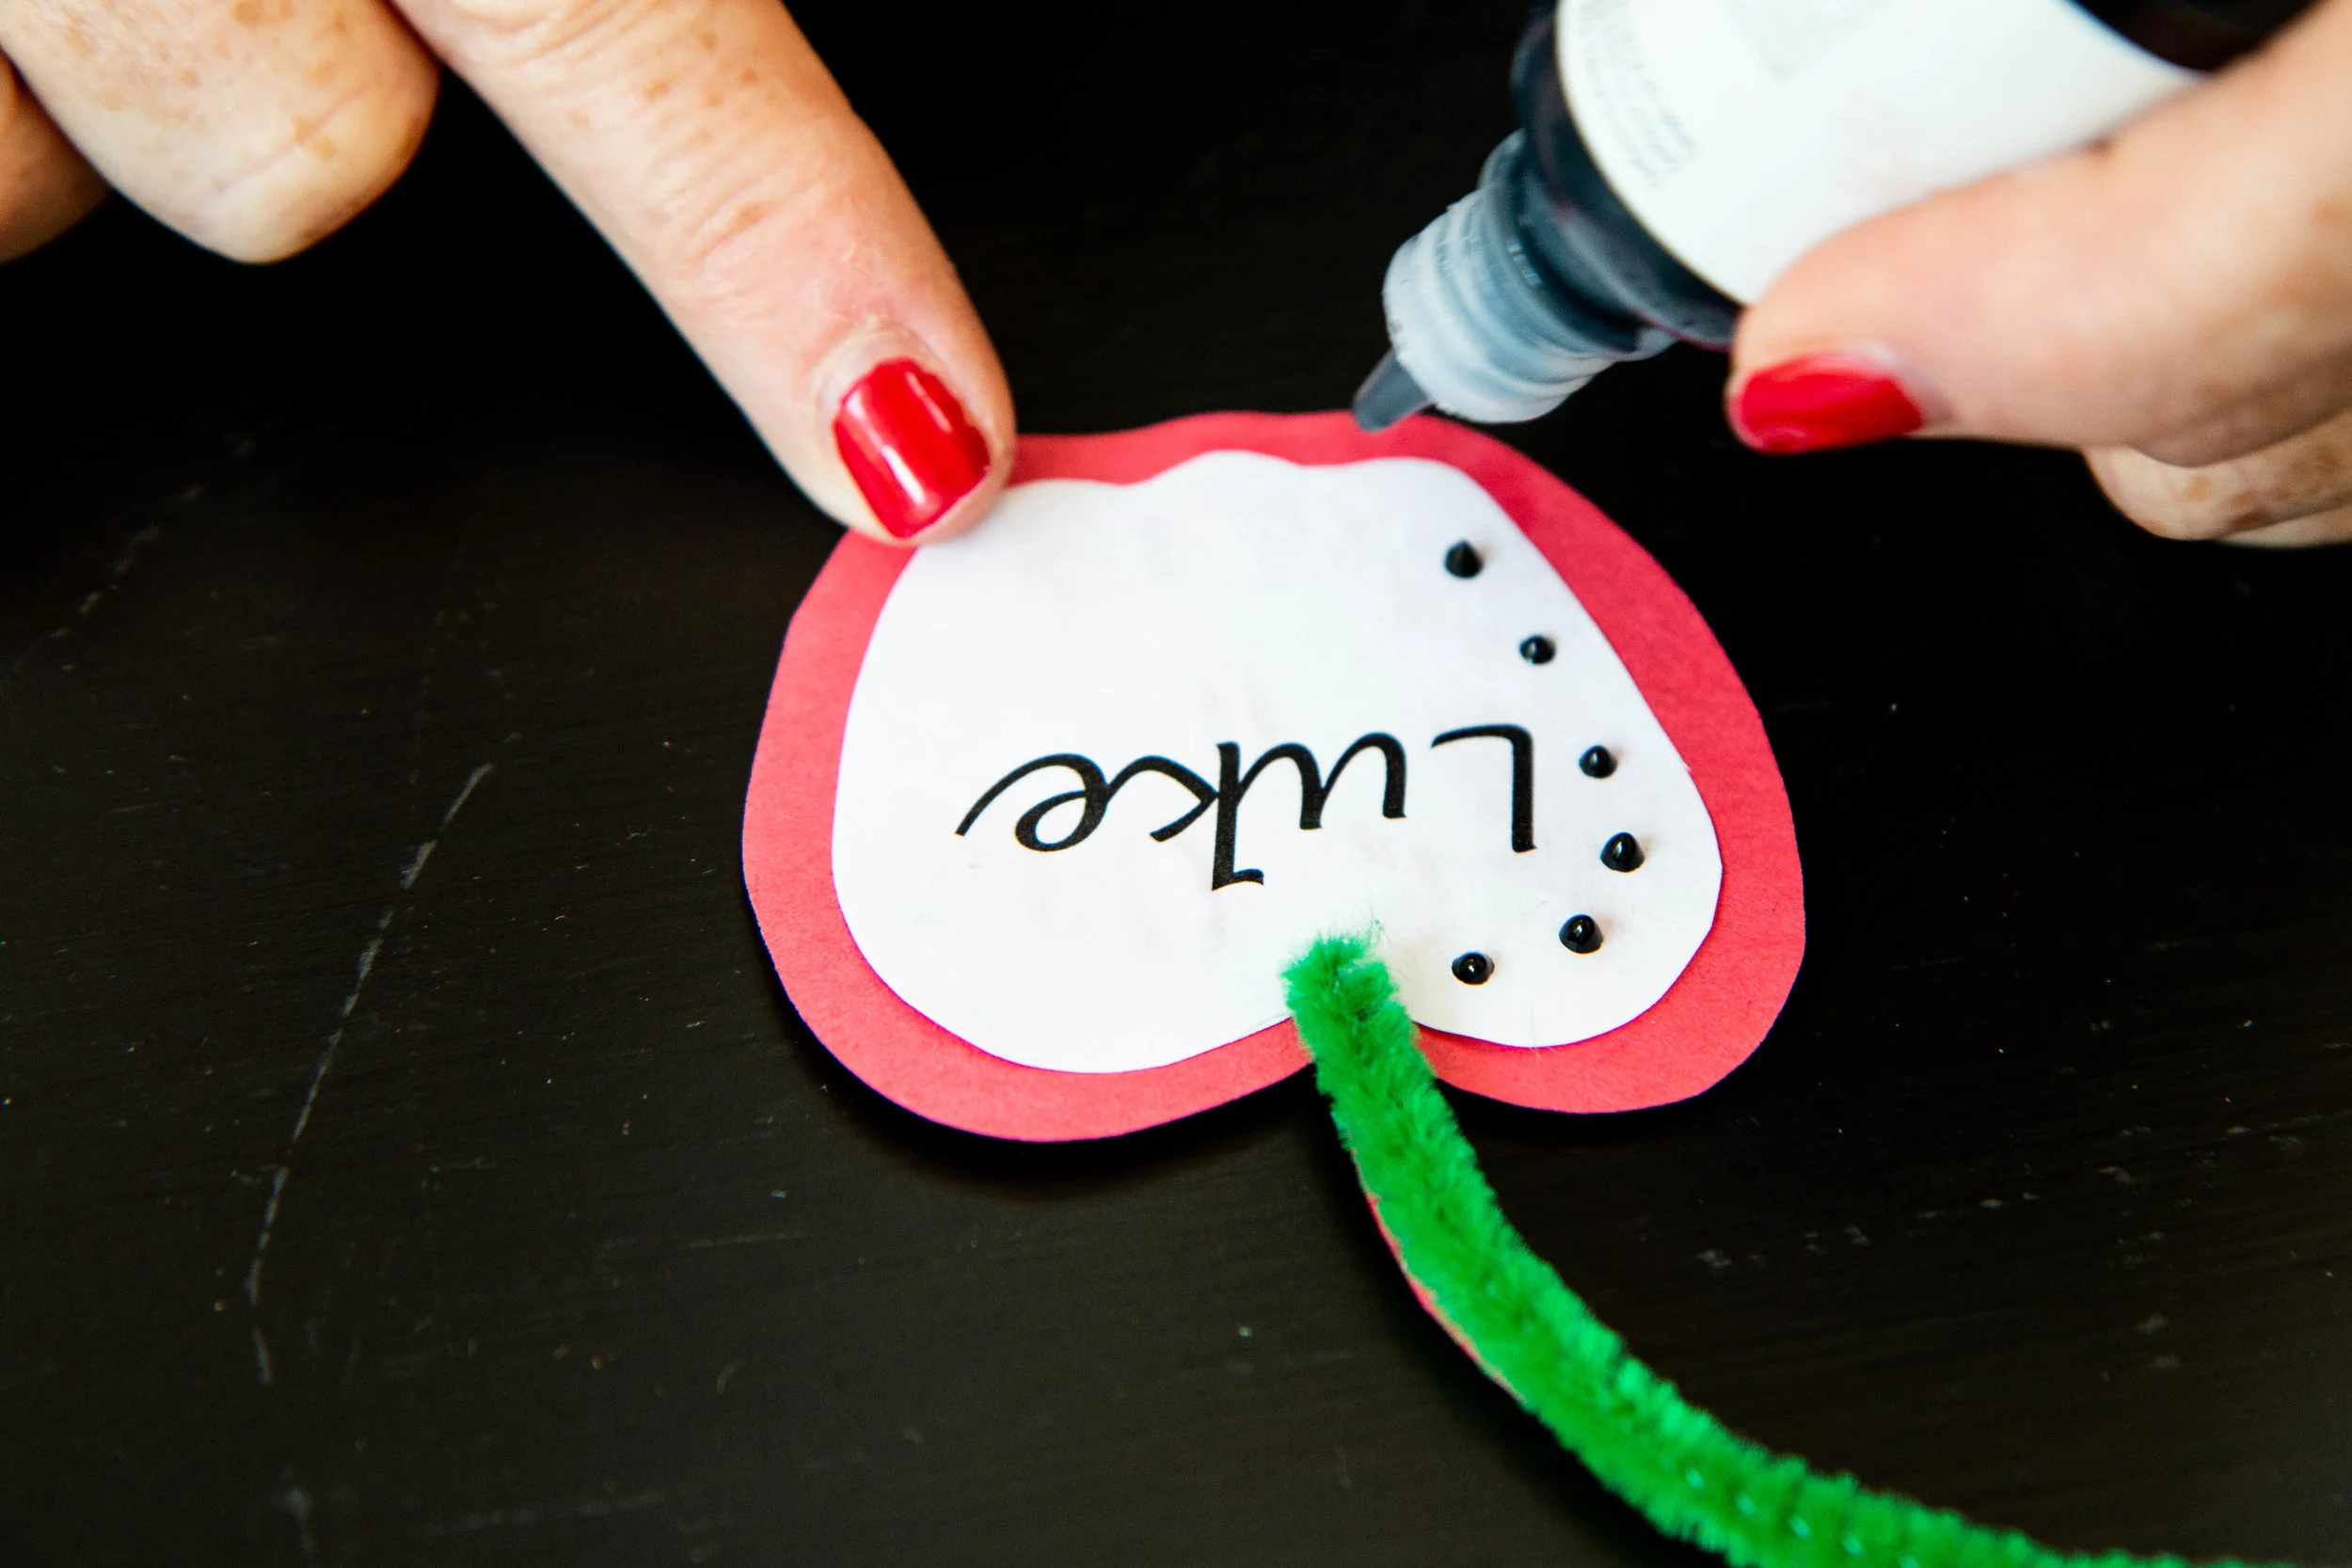
Step 3: Using the hot glue gun, add a piece of green pipe cleaner about 3 inches long as the stem. Then use your puff paint to add "seeds" for and added detail.
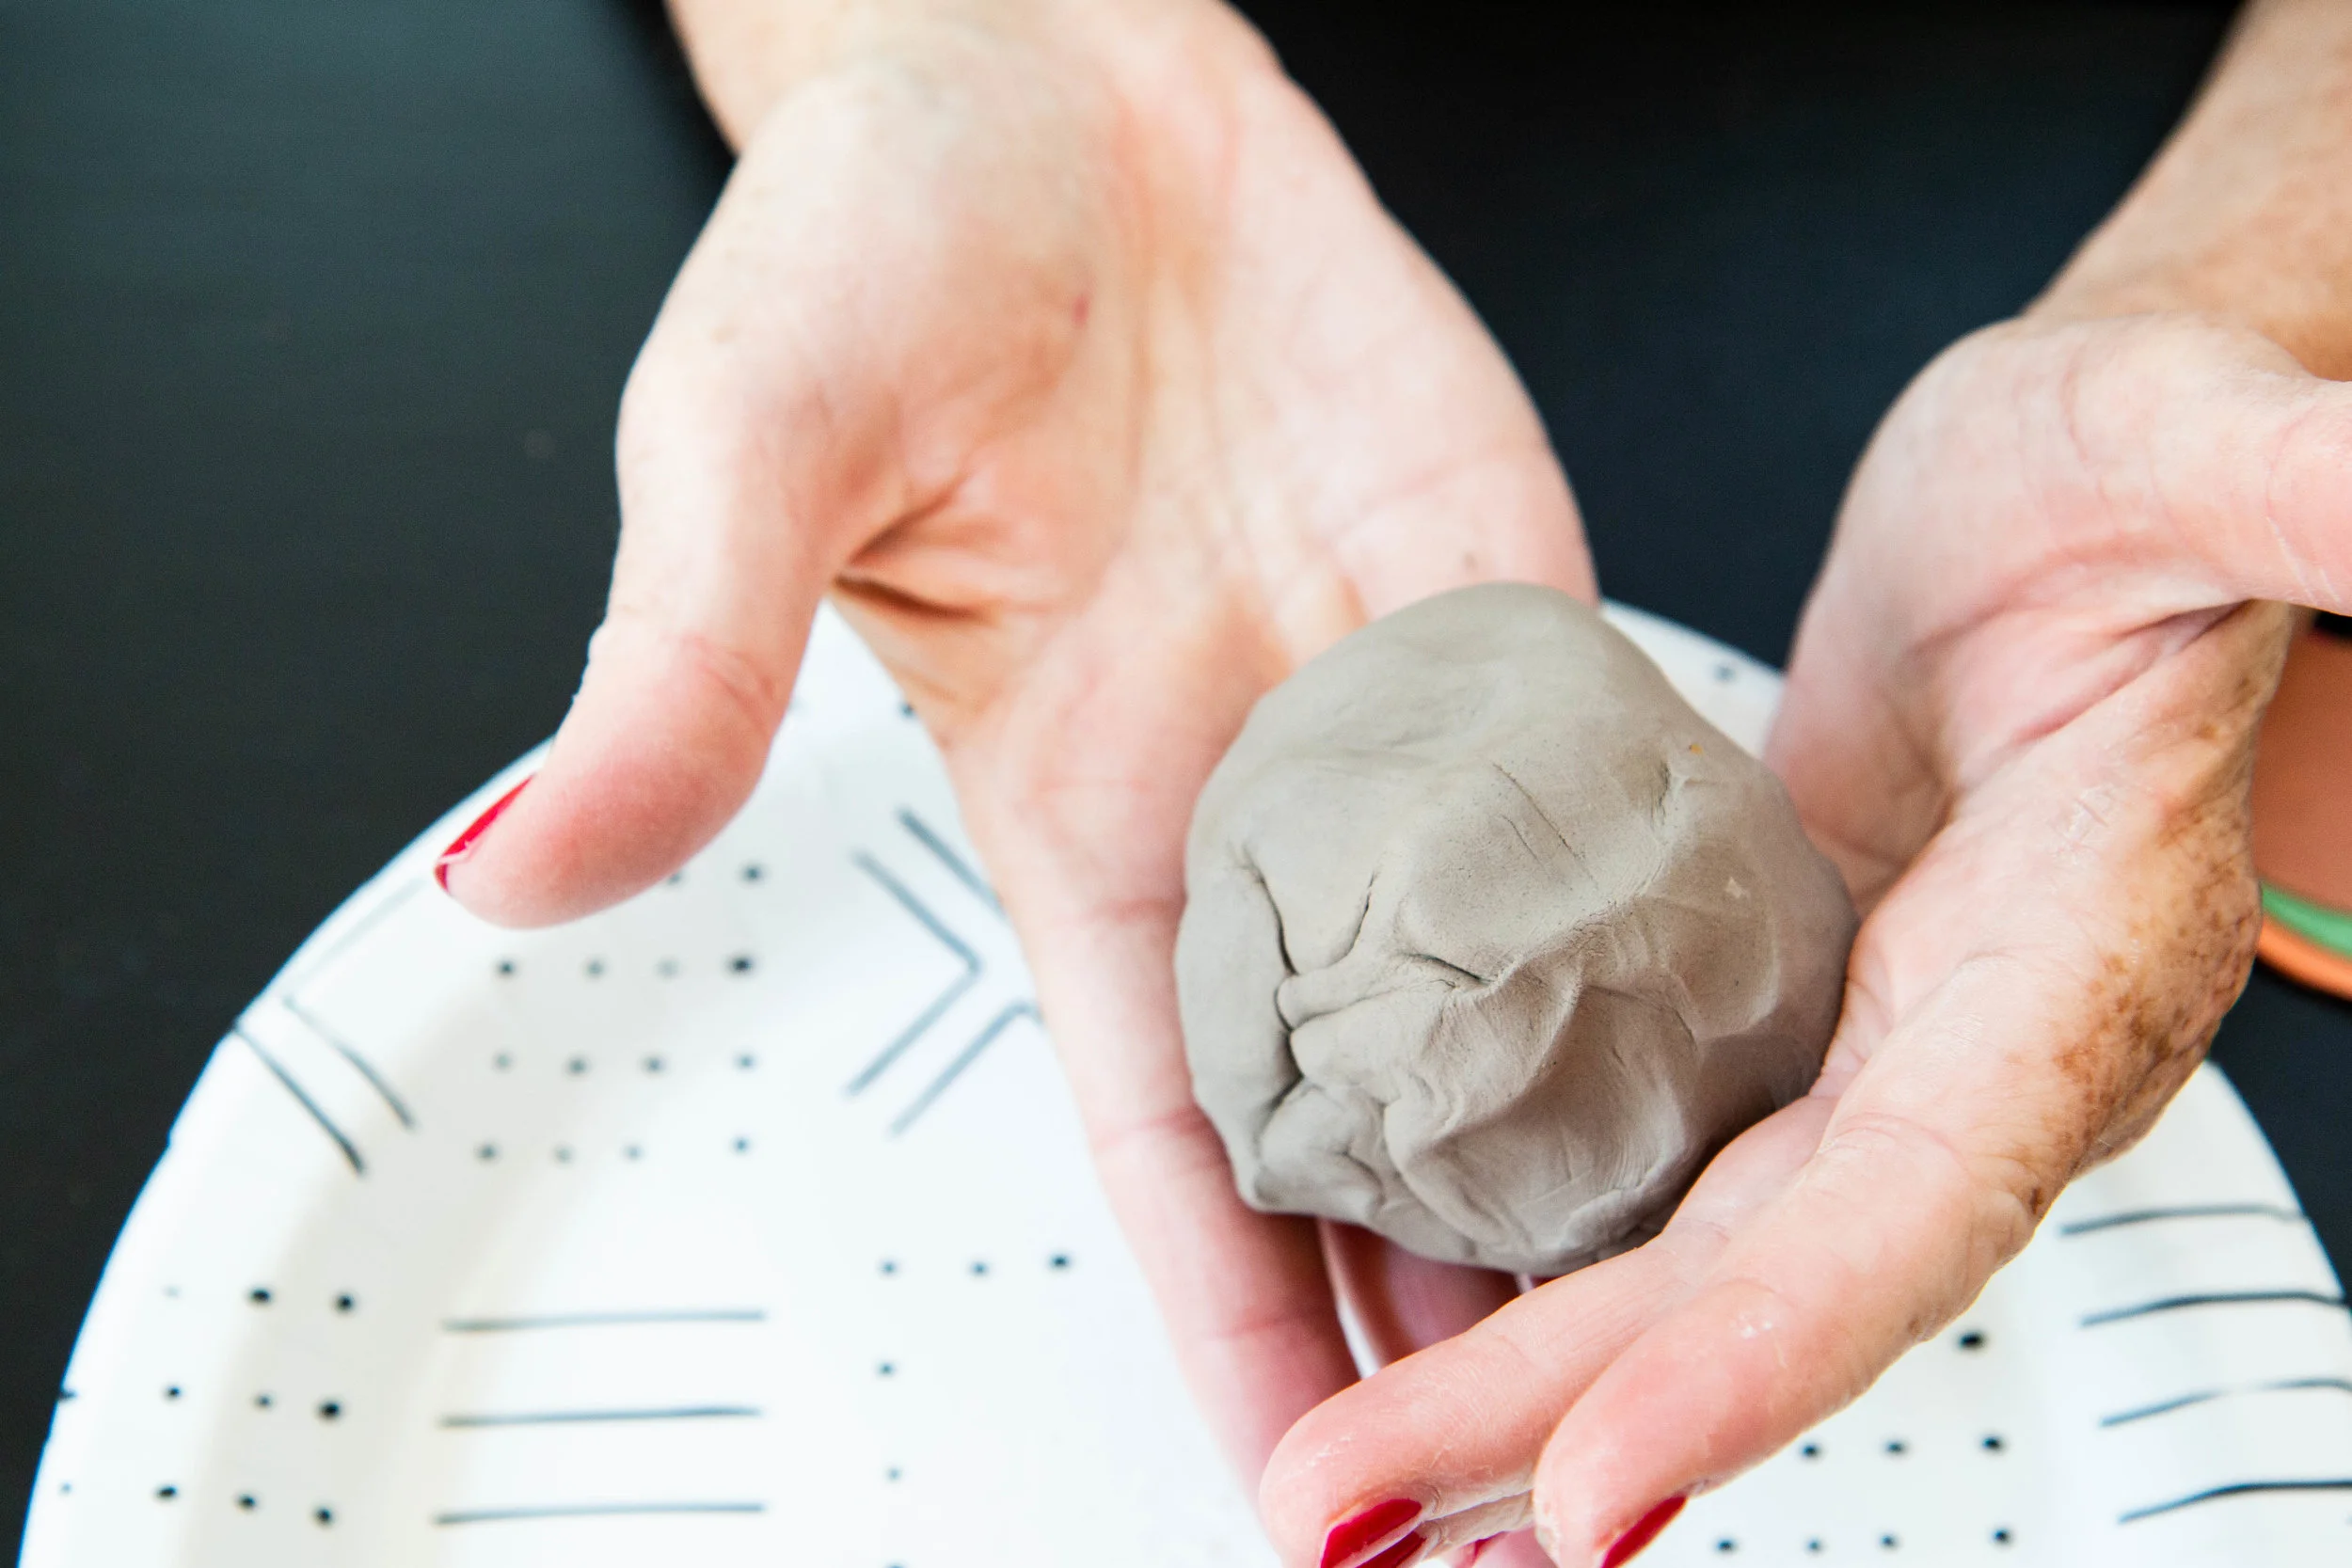
Step 4: Find a surface you would like to use for the base of the tree- we used a cute paper plate! Roll your modeling clay into a ball.
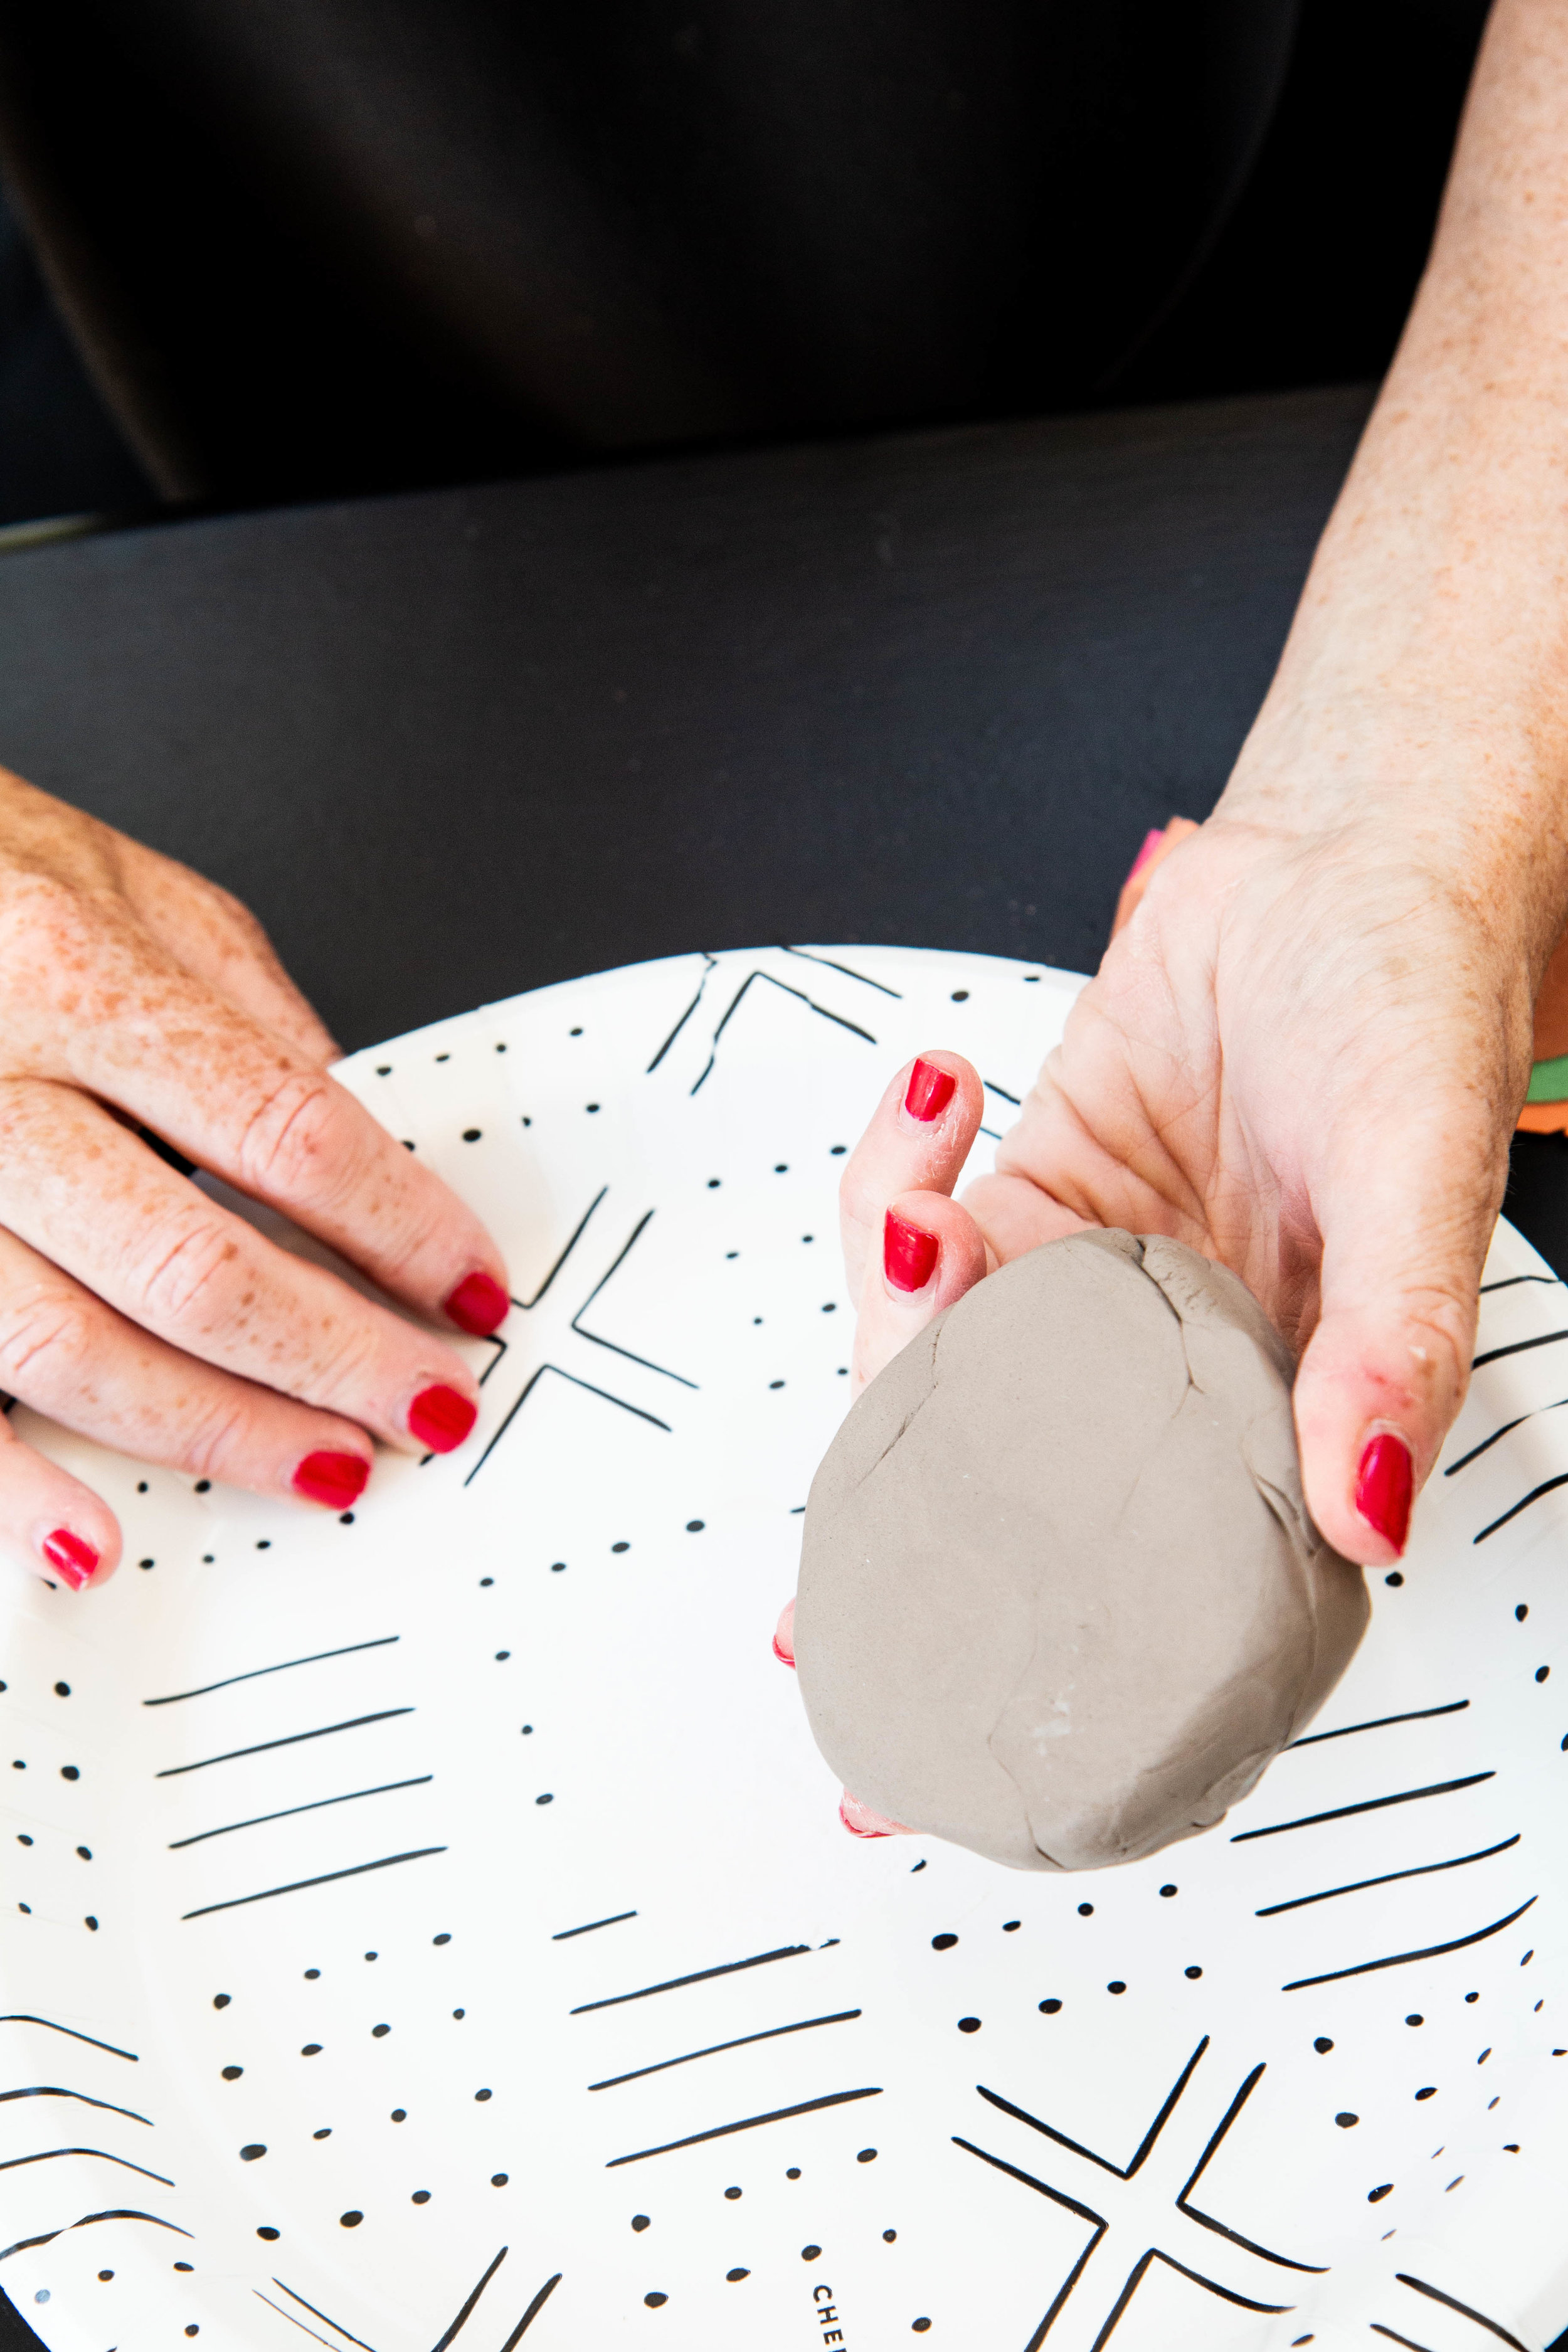
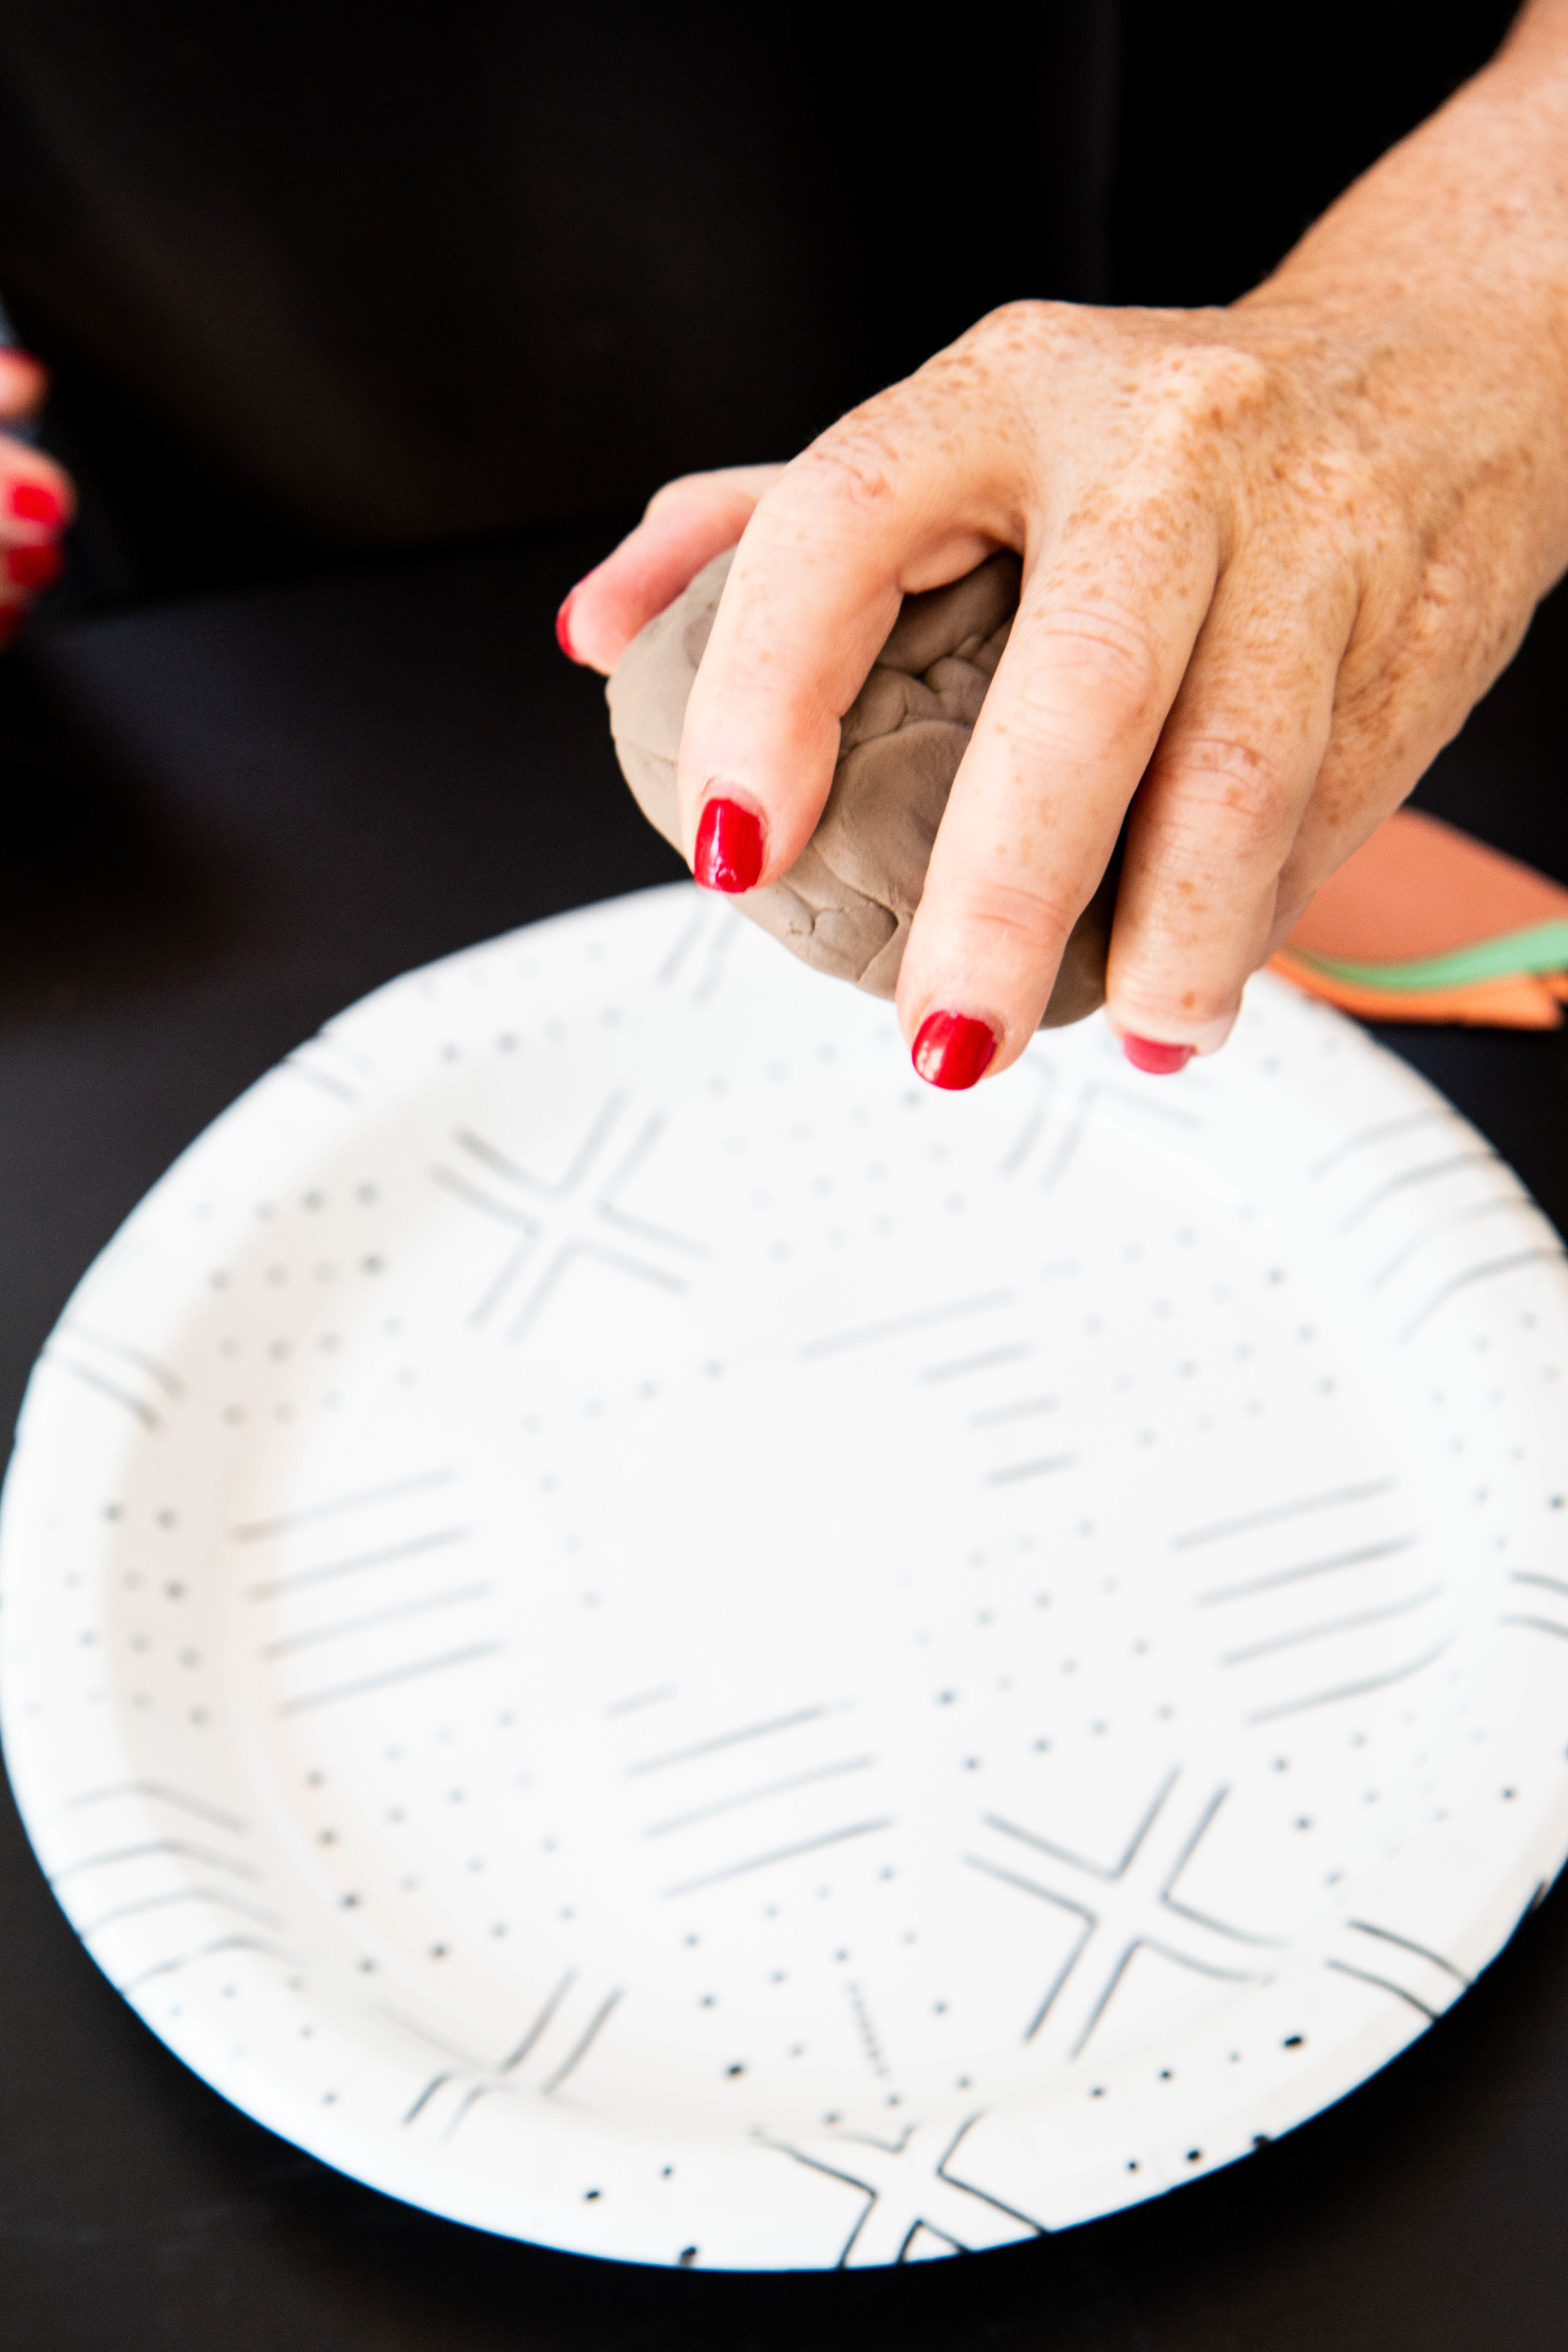
Step 5: Throw the ball against the table to create a flat base.

Step 6: Stick the base of your branch firmly into the clay and mold the clay around it so it does not move.
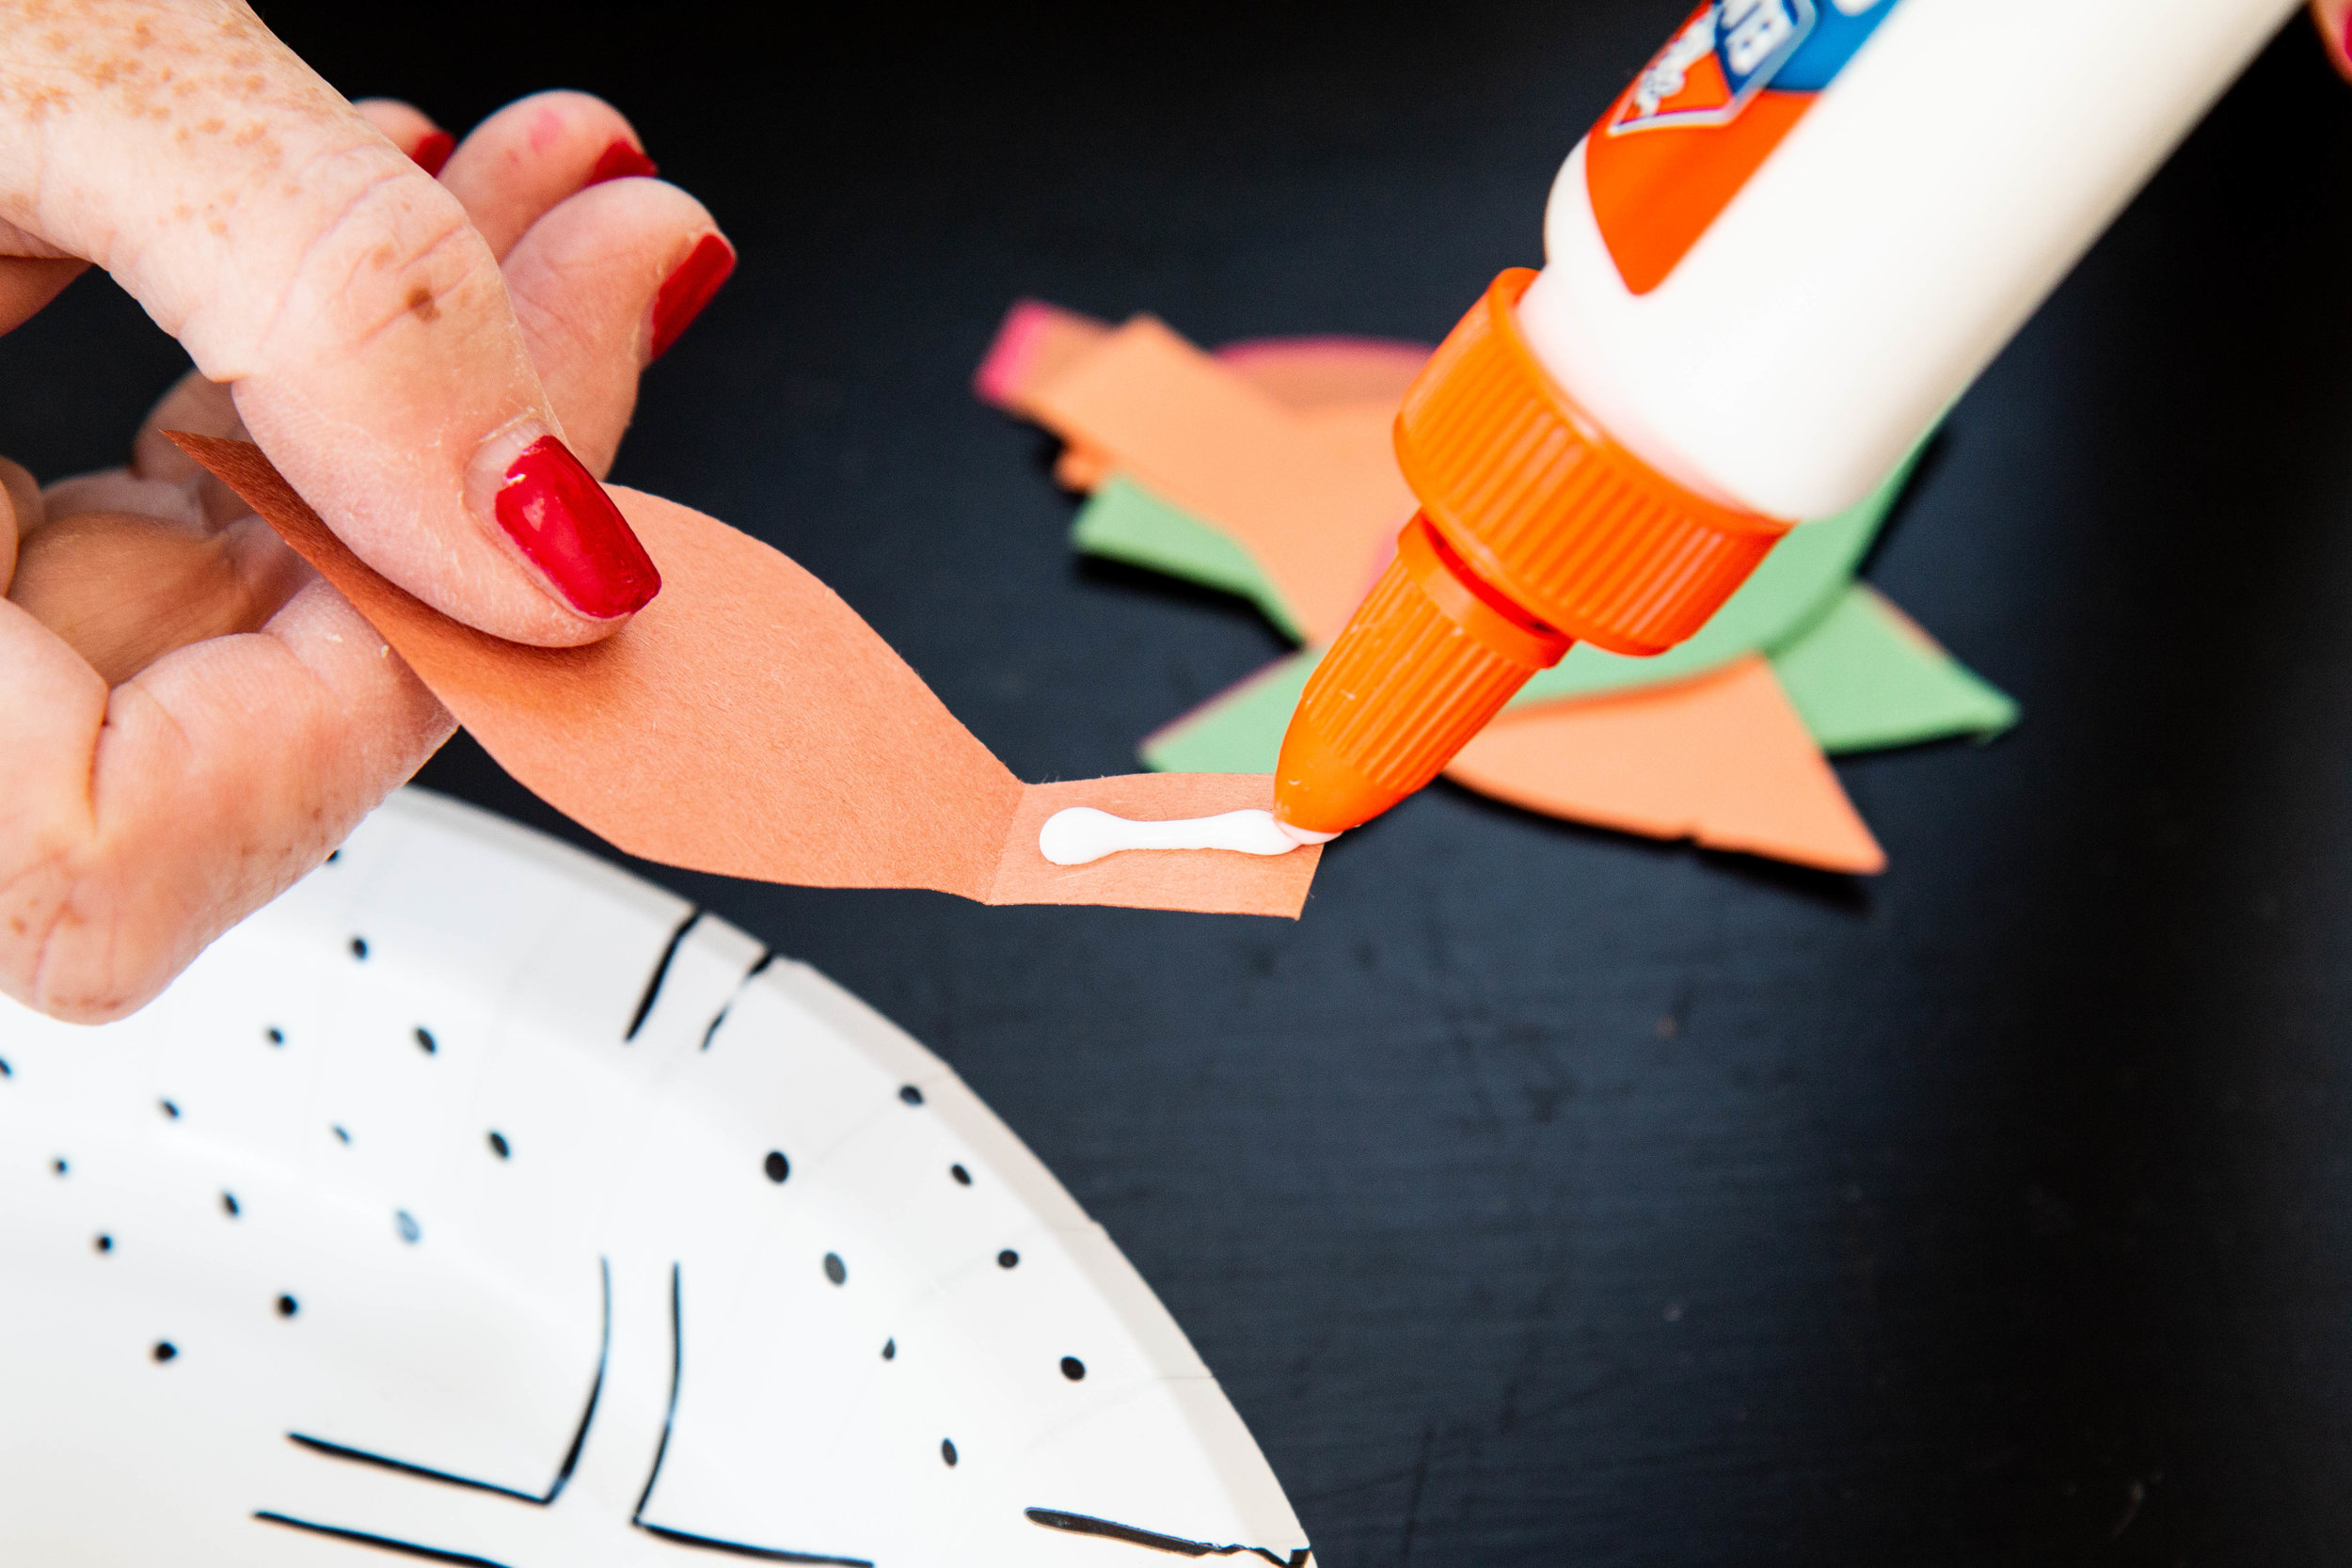
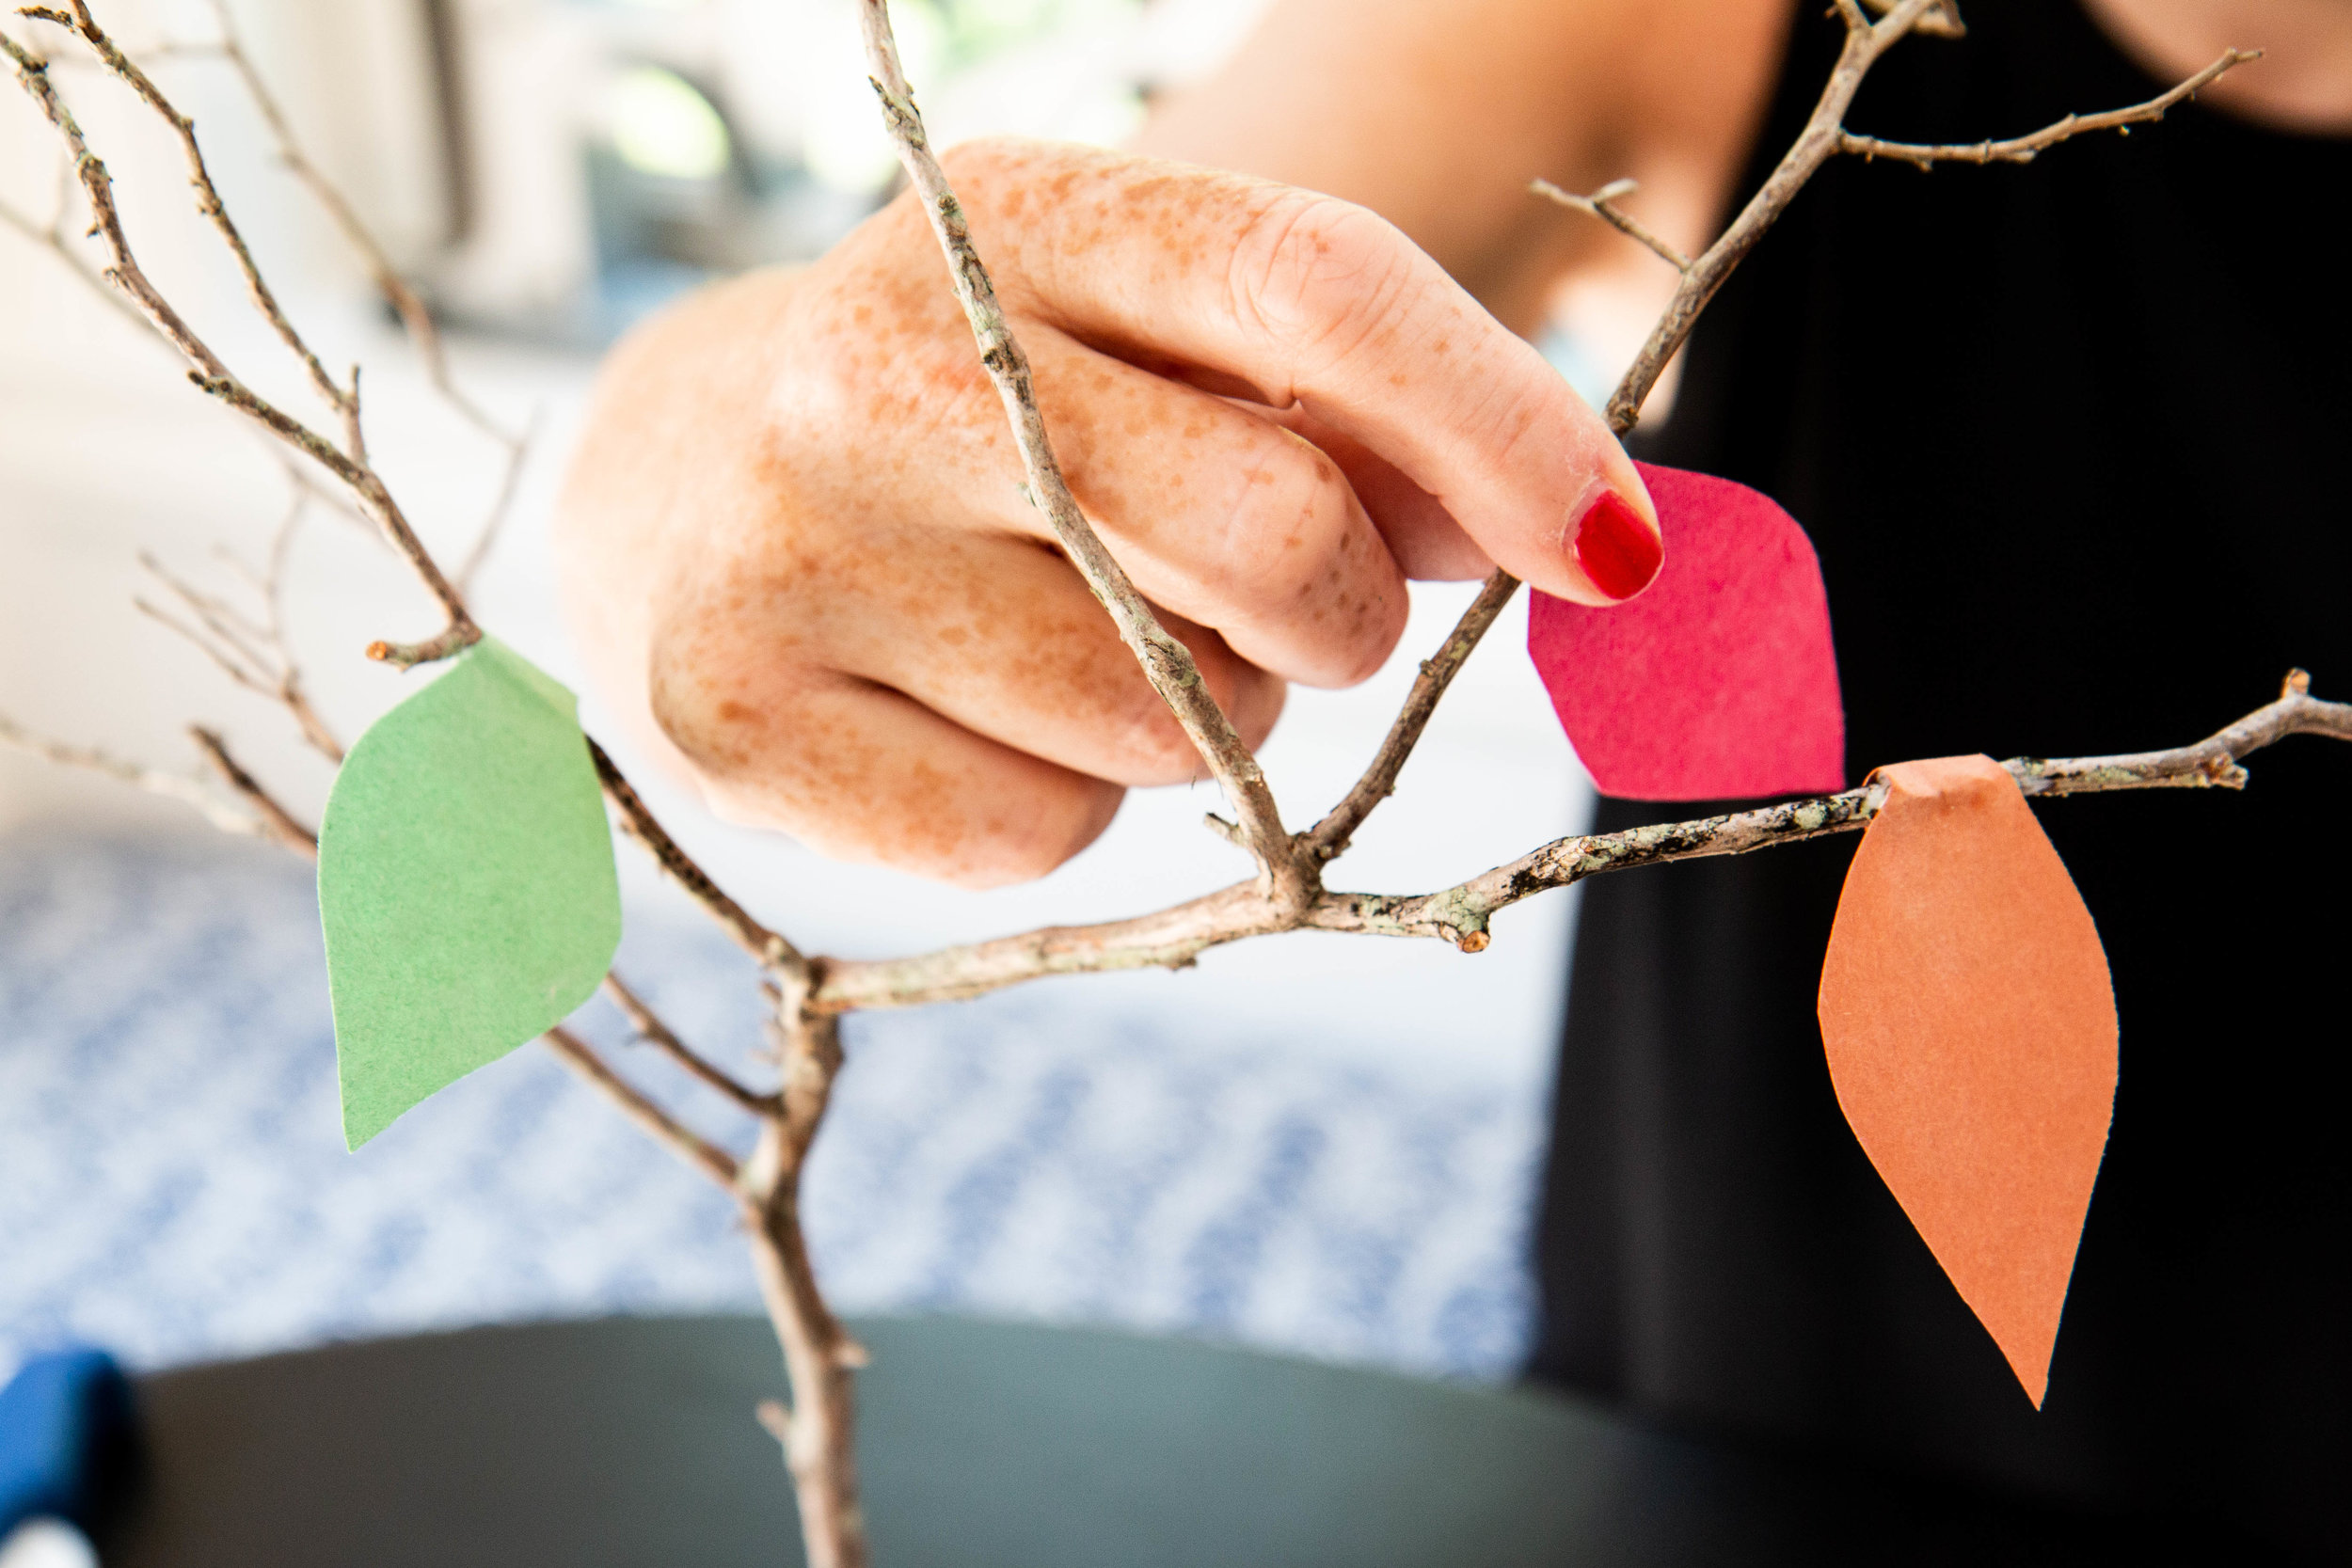
Step 7: Cut out your leaves using construction paper, leaving enough space at the end to fold and wrap around the branches. Use your glue to attach the leaves all over the tree, making sure to hold it long enough until it sticks.
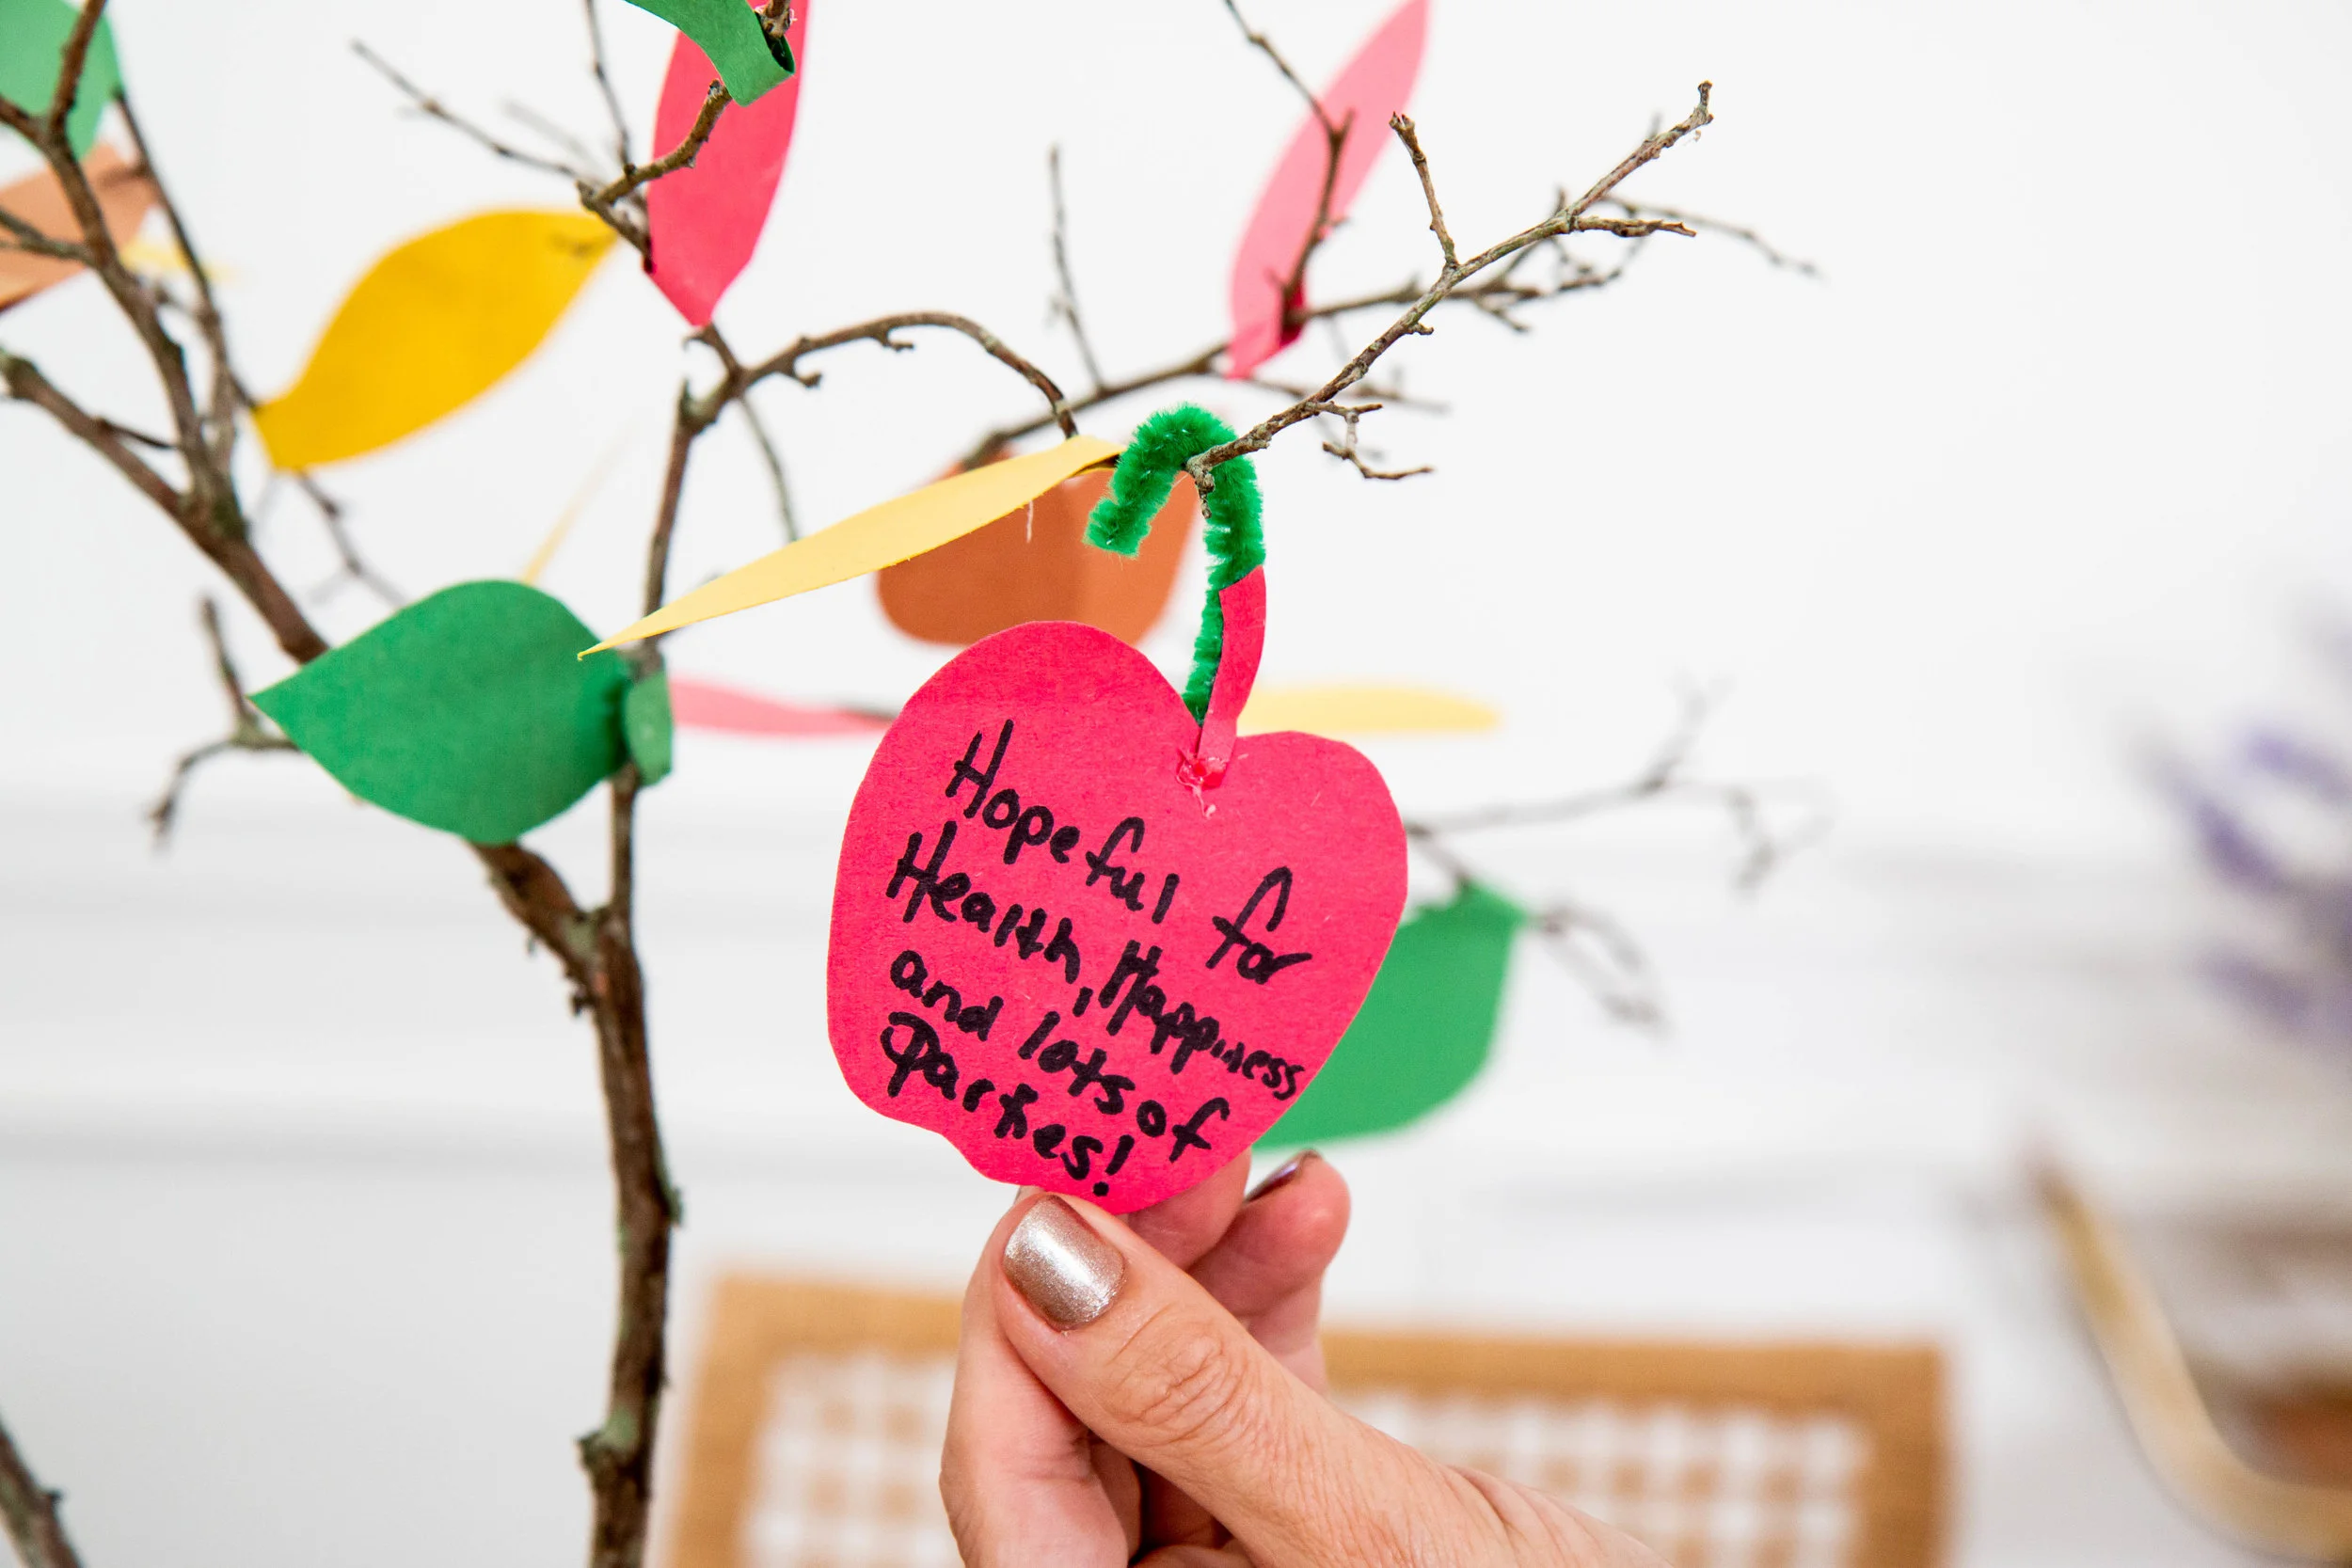
Step 8: Once everyone takes their place at the dinner table, have everyone write their hopes and dreams for the New Year on the back of their apple name card. Then, using the pipe cleaner stem, everyone can hook their apple onto the tree.
