DIY Chic Skull Vases

Every fall it seems like Halloween creeps up on us before we know it, so this year we really wanted to get ahead of the game with our decor. There's nothing worse than reaching the end of October and realizing you didn't even have a chance to put out your pumpkins!
For our most recent Halloween Party in a Box photoshoot, I wanted to add some details to the table. Seri had these old, ugly skulls laying around and I knew they just wouldn't fit into our decor selection. So instead, I transformed them into chic Halloween-y vases!
Here's what you will need:
Hallow plastic skulls, made of a softer plastic Exacto Knife Black, white, and metallic spray paint Krazy glue Sparkles Masking tape

Step 1: Carefully use your Exacto knife to cut into the top of the skull. Make sure the skull is standing upright and the hole is directly on top, where the flowers will stand straight.


Step 2: Bring your skulls outside and give them a base coat of spray paint. We started with black, but you can really use any color scheme you'd like!

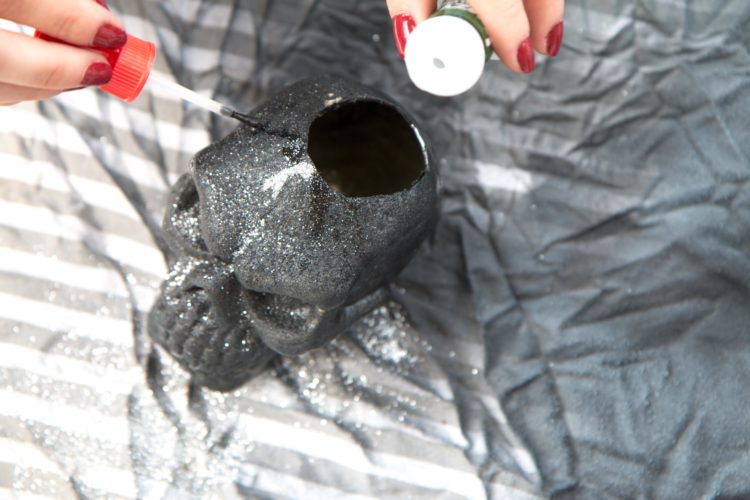
Step 3: After drying, decorate! We made one skull sparkly, using krazy glue and sparkles to create a "dripping" effect.
We created one ombre effect by lightly spraying white paint from directly above.

Finally, we used the masking tape to block off sections of black and cover the open spots with silver paint.


And, voila! A perfect addition to our Halloween table.
